[ad_1]
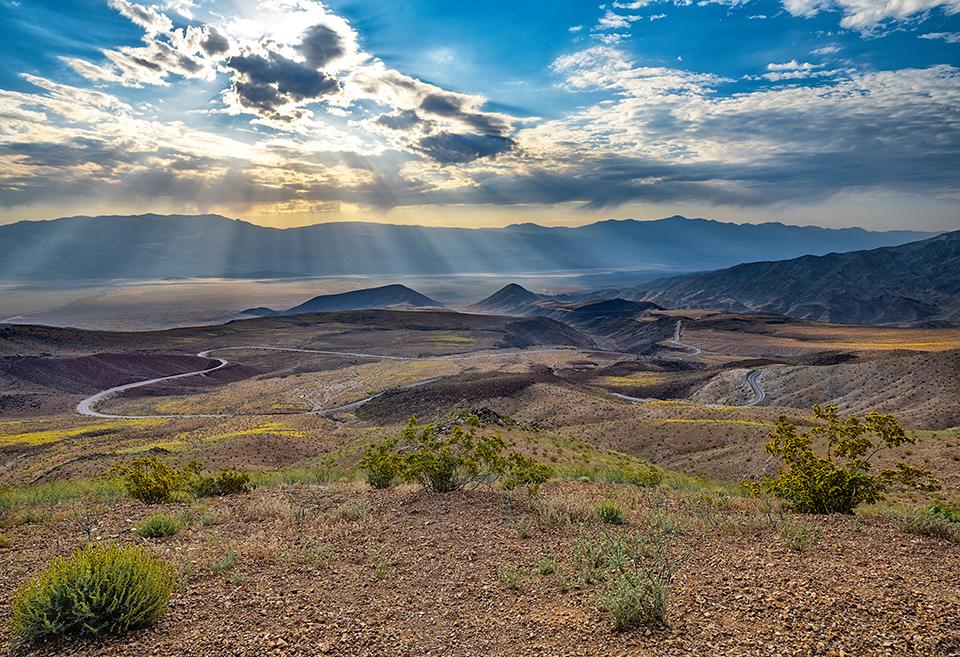
A morning view at Father Crowley Vista Point, Death Valley National Park / Rebecca Latson
“I had absolutely no idea Death Valley National Park was so beautiful,” my amazed sister told me after looking at a few photos I’d emailed her from my May trip to this national park. Truth be told, I had no idea, either, of the beauty, color, and depth of the landscapes I would photograph. Even after poring through Flickr photos of Death Valley, I still envisioned a washed out, hazy, dusty panorama (including a cow skull or two) over which a blindingly bright sun produced furnace-hot air shimmers while sucking the moisture from everything it touched. Yes, it is dry, hot, and dusty out there, especially if you visit May through September. But everything I experienced and photographed, from the geology to the terra cotta colors of the corrugated hillsides, to the crazy slapdash look of the mountain rocks, to the sunrises, sunsets, and brilliant stars, to the quirky history of the park, people and land, won me over completely.
A visit to Death Valley with your cameras will reward you with awesome shots and teach you something about handling cameras and capturing photos in 114-degree F heat. Yes, I know, winter is the best time to visit for cooler temps and less haze, but sometimes, the only time you are free to travel to Death Valley is during the summer season. You go when you can go. A visit in the summer will also teach you about handling yourself under constant heat. It’s all about water, water, and more water … plus sunglasses, light clothing, a little sunscreen, and common sense.
Park staff, signs, and other printed materials cautioning the Death Valley visitor to restrict or even curtail their activities after 10 a.m. during the summer season are spot on – especially for photography. Morning and late afternoon / evening times are best for saturated light, shadows, and depth anyway, so you might as well heed those cautions. Besides, from 10 a.m. until 5 p.m., the sun is, indeed, bright, sharp, and harsh. It’s also quite hazy (actually, it’s hazy by 8 a.m.). And it’s hot, hot, hot. The hotter it gets, the hotter your camera will feel to the touch. The late afternoon heat remained so intense one day that my medium format camera registered a yellow thermometer warning icon on the LCD screen. First time I’d ever seen that! I put that baby back into the backpack pronto, returning to the air-conditioned comfort of my rental truck quickly thereafter.
In addition to the heat, you should remember to affix the lens you wish to whatever camera you have and leave it on. It’s sandy and dusty (especially near the dunes), often quite windy, and if you are at Badwater Basin, there’s salt in the air. Dust and salt can finagle their way onto your camera’s sensor and into your camera’s system a bit or a bunch whenever you switch lenses out in the field. Even when the camera is “weather resistant.” Sometimes, the lens switching can’t be avoided, but try not to do this too much, if possible, and keep your back to the wind.
Ok, so what kind of images can you get, aside from the iconic shots? Well, I strongly advise getting those iconic shots. Why, when a gazillion images exist out there of those places already? Because your image is going to be different from those gazillion others. The change in seasons, the size and shape of the clouds, the quality of the light, the time of day – all these together create a unique image specifically yours captured at that one moment in time. Yes, even if you are standing next to a person aiming their camera in the same general direction. So go ahead and click that shutter button at Zabriskie Point, Dantes View, Badwater Basin, Mesquite Flat Sand Dunes, Father Crowley Vista Point, and all those other famous spots.
Oh, speaking of iconic spots and sunrises, sunsets, and star shots: the views at Zabriskie Point and Dantes View look west, so sunrise will bathe the Panamint Mountains across the valley, eventually moving over the valley and ultimately immersing the nearby hills with golden light. If you wish to photograph the actual sun rising above the mountains, you’ll need to turn your camera and face the landscape behind you.
Sunrise over Manly Beacon at Zabriskie Point, Death Valley National Park / Rebecca Latson
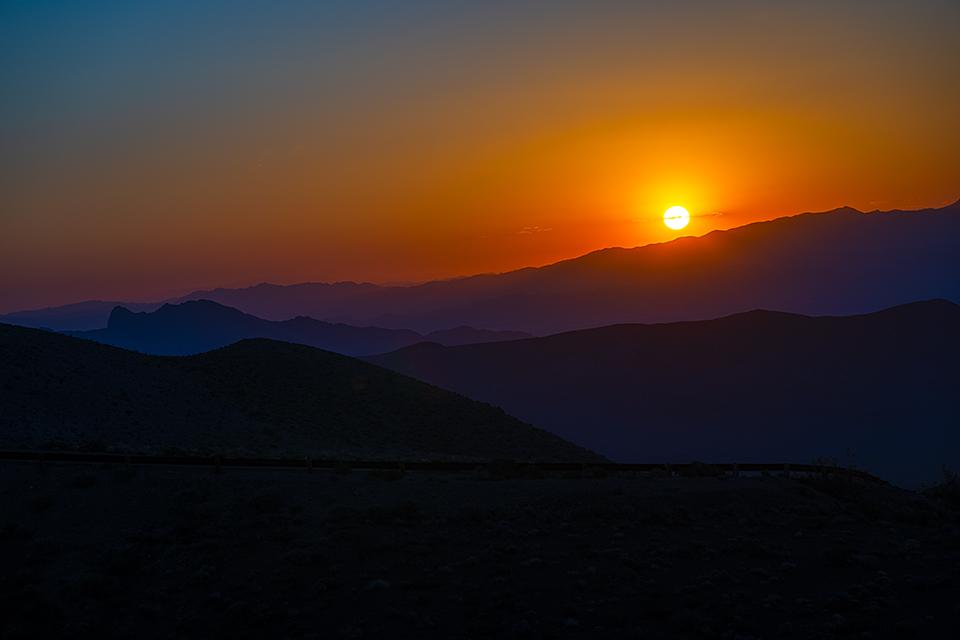
Watching the sun rise behind me at Dantes View, Death Valley National Park / Rebecca Latson
In my opinion, you’ll get more sunrise bang for your buck at Zabriskie Point. Ditto for “blue hour,” which is that time of morning and evening when the landscape and sky are colored with shades of purple, blue and pink prior to sunrise and just after sunset.
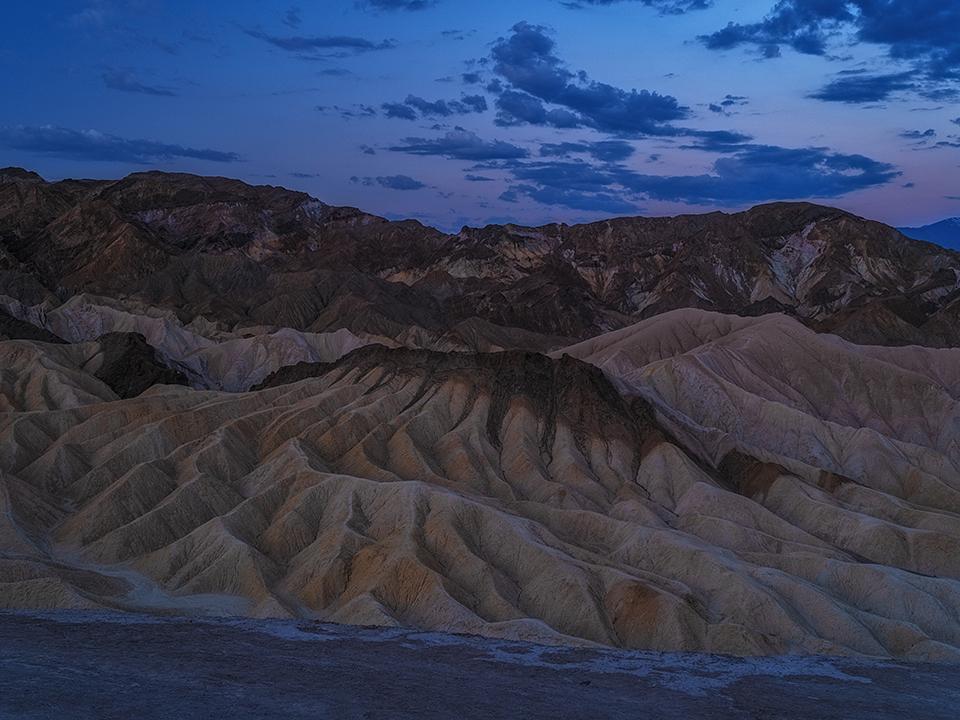
Blue hour at Zabriskie Point, Death Valley National Park / Rebecca Latson
Dantes View and Zabriskie Point are both great for sunsets and star shots. I’m a sunrise kind of gal, but I photographed more sunsets than sunrises in this national park.
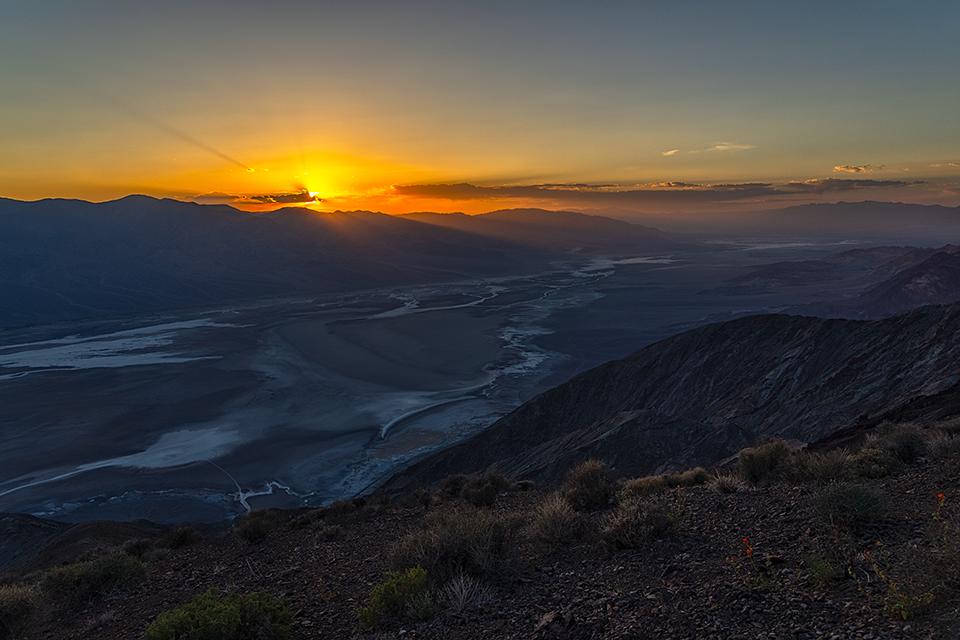
Sunset at Dantes View, Death Valley National Park / Rebecca Latson
I did also manage to stay up late enough to capture a starry night at Dantes View. The next time I visit Death Valley, I’m going to try and photograph sunset and stars at Badwater Basin.
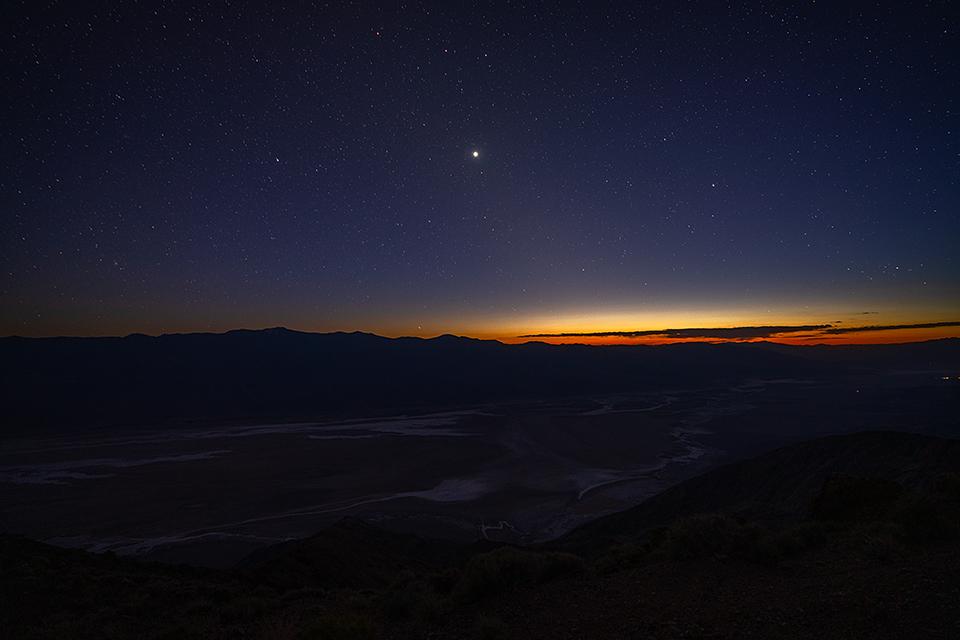
Sunset’s afterglow and the beginning of night at Dantes View, Death Valley National Park / Rebecca Latson
Look for interesting shapes, patterns, and textures. The polygonal salt patterns reflecting the mud cracks beneath at Badwater Basin make amazing compositions.

Salt flat and storm clouds at Badwater Basin, Death Valley National Park / Rebecca Latson
Heck, even the geometry of a view area is great for a photo.

The curvy pavement to and from Zabriskie Point, Death Valley National Park / Rebecca Latson
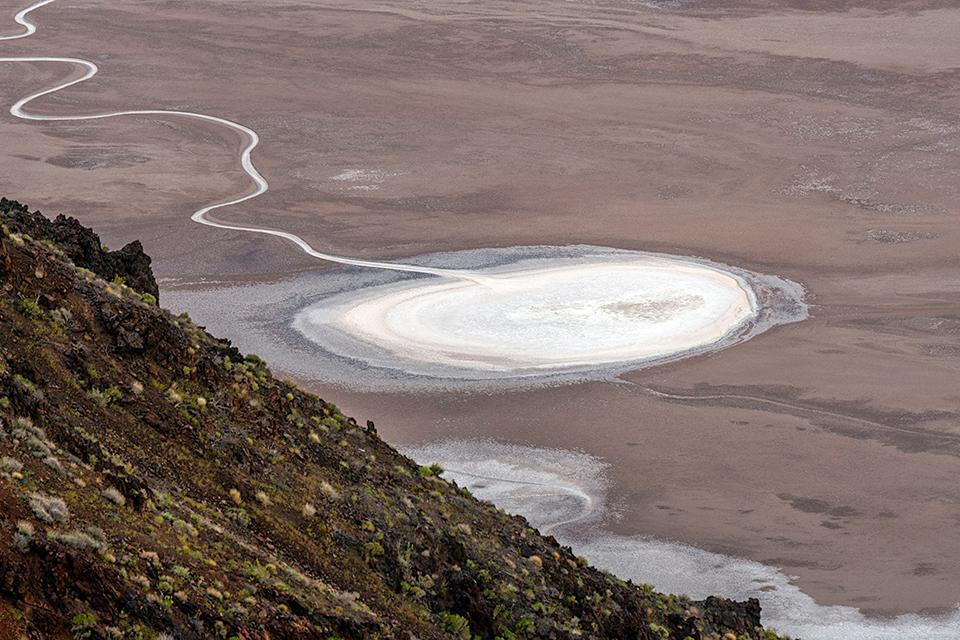
A salt flat seen from the height of Dantes View, Death Valley National Park / Rebecca Latson
Why on earth would you want to photograph a view area or a building or something manmade? Well, aside from the fact that most of the infrastructure in the park has some sort of history associated with it, those objects flesh out the story of your Death Valley experience. If you can see the beauty in something like the curving pavement from parking lot to Zabriskie Point view area, and even compare it to a salt flat out on the valley that looks eerily similar in shape, then you’ve got great powers of photographic observation. Remember, capture shots of what interests you, be it a view area, a close-up of salt on a salt flat, or the mud cracks of an ancient lakebed. All these images tell your personal park adventure story.

A delicate crust of salt, Death Valley National Park / Rebecca Latson
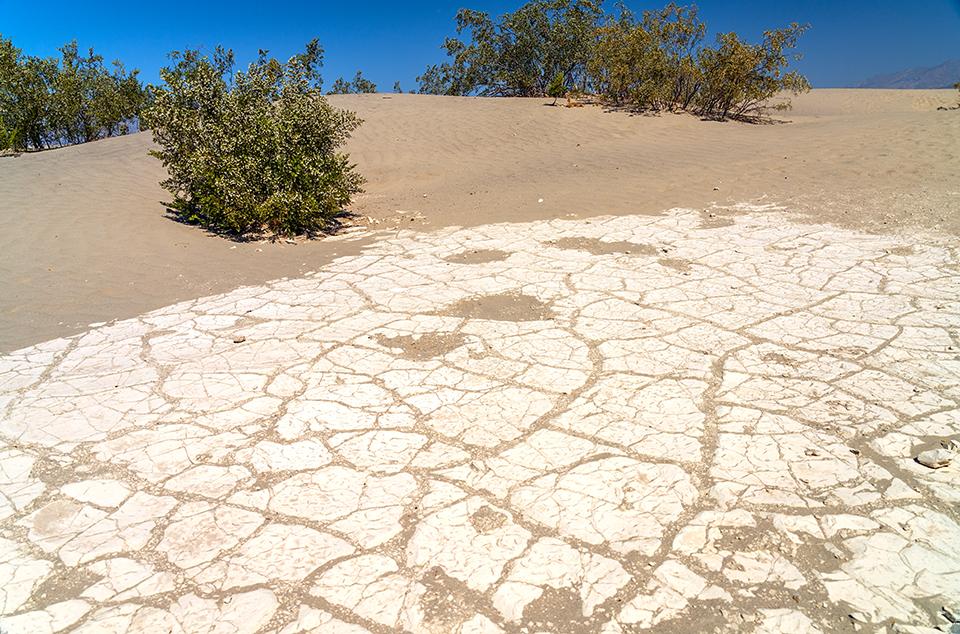
Creosote bushes, sand, and an ancient lakebed at Mesquite Flat, Death Valley National Park / Rebecca Latson
Death Valley is a great national park in which to include shots of people. Really? Yes, really. The people you see in the images below are great scale and reference.
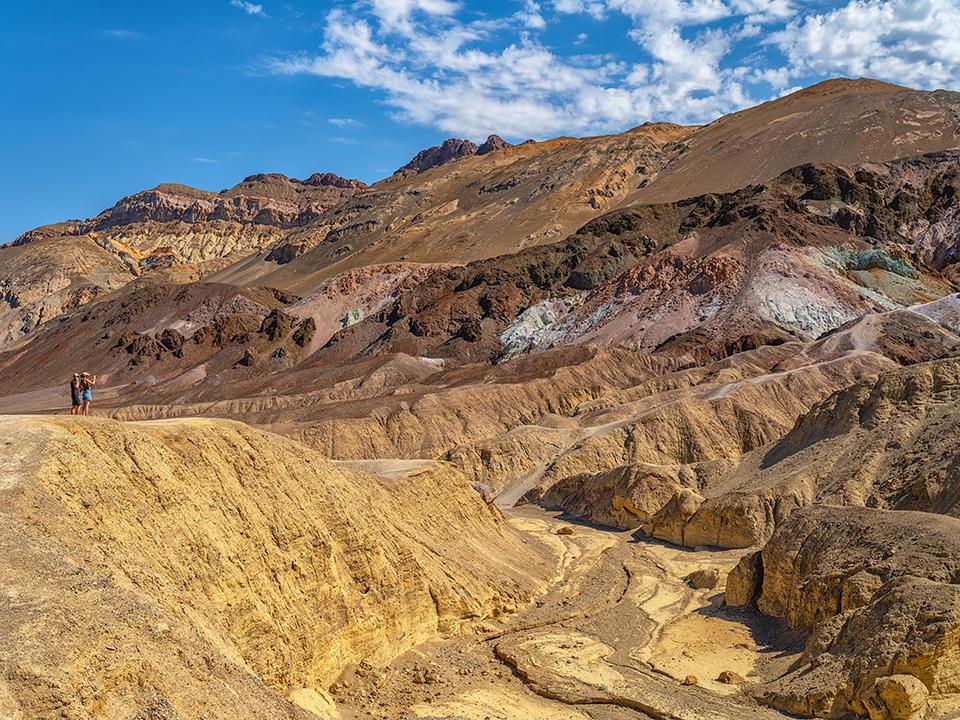
Viewing Artists Palette, Death Valley National Park / Rebecca Latson

Walking back to the parking lot at Badwater Basin, Death Valley National Park / Rebecca Latson
These landscapes are much larger / broader / taller than you’d think, and without some frame of reference your viewers can apply to the landscape, they won’t know the width and breadth of a feature. Humans, vehicles, buildings, anything else man-made helps your viewer get a sense of the size and provides that frame of reference for comparison.
Plus, people can add a bit of human interest.
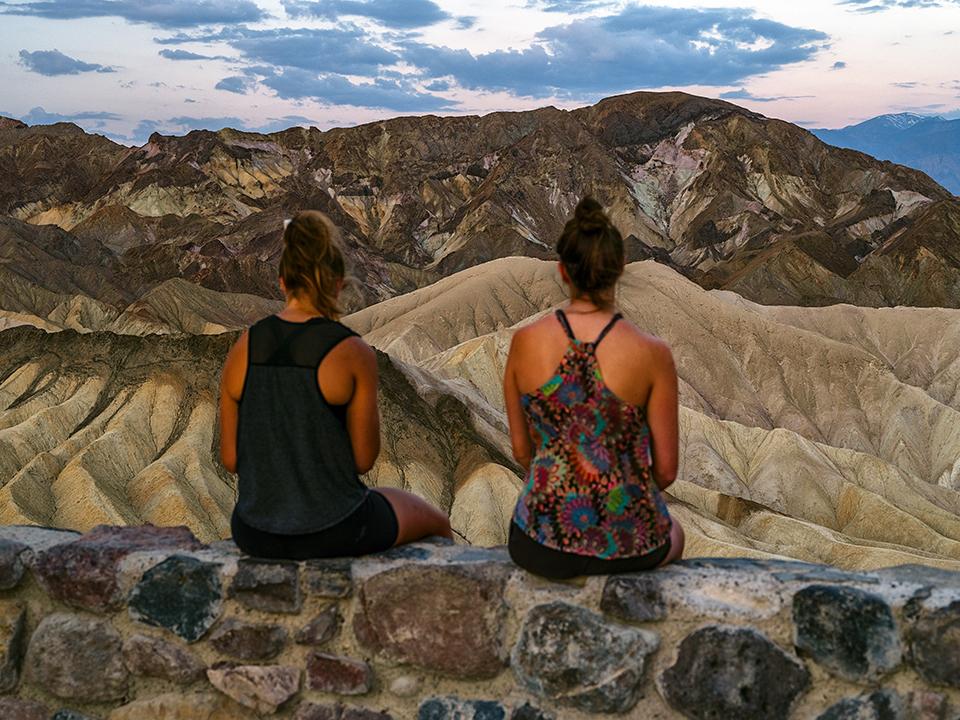
Waiting for sunrise at Zabriskie Point, Death Valley National Park / Rebecca Latson
Speaking of people, don’t forget to include yourself in some shots. You provide as much scale and reference as the next person, you know.
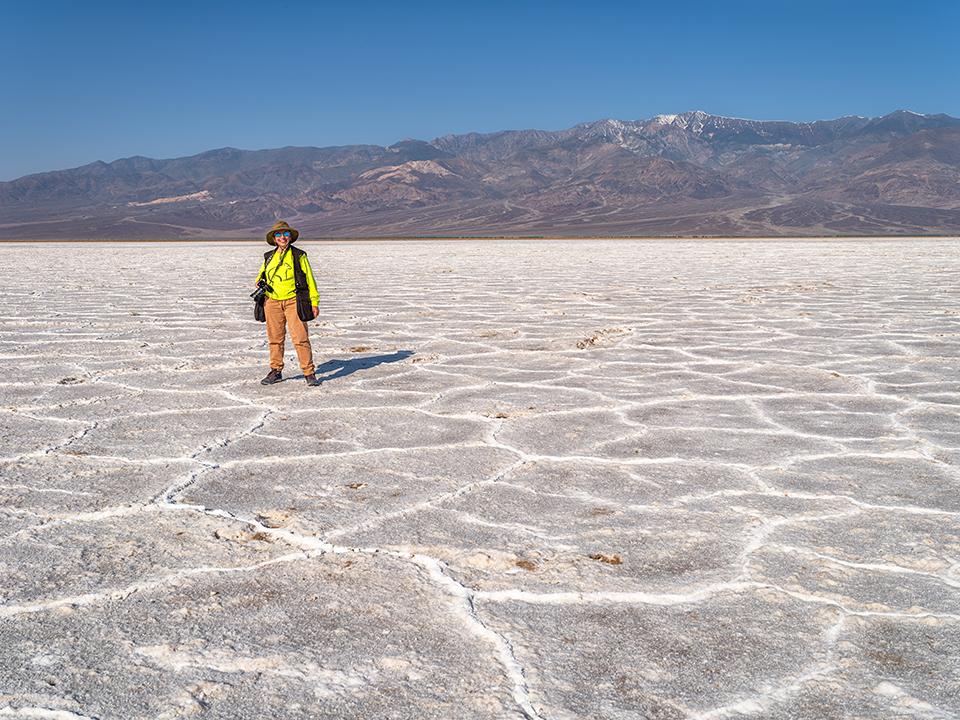
Becky at Badwater Basin, Death Valley National Park / Rebecca Latson
If you’ve read any of my other photo columns, you’ll know I’m a huge proponent of the leading line technique. It’s my favorite theme, and Death Valley provides plenty of leading line photo ops guiding the viewer’s eye from one part of your image to the other while allowing them to take in every detail of your composition. The road across the Panamint Valley is a fantastic leading line subject, as is Badwater Road and Artists Drive leading to Artists Palette.
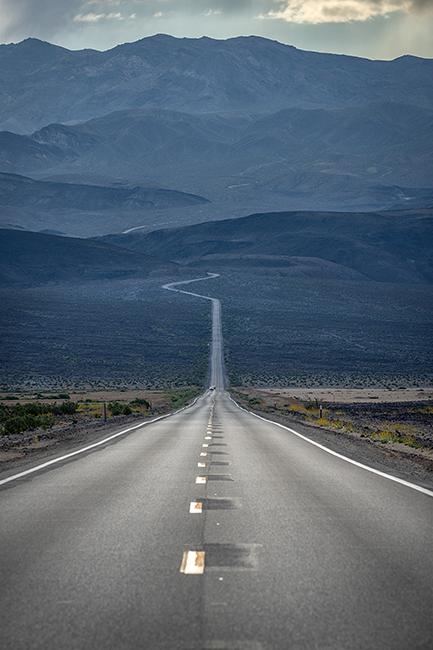
The road across Panamint Valley heading east, Death Valley National Park / Rebecca Latson
Don’t forget to experiment with your shots. For instance, I never created many panoramic shots consisting of multiple images stitched together using a photo editor like Adobe Photoshop. Dantes View provided the perfect opportunity for me to try my hand at this technique. The image below is a panorama of seven combined images.

Dantes View morning panorama, Death Valley National Park / Rebecca Latson
Any broad landscape provides great panoramic material. You can take as many or as few shots as you wish. Just remember all the images should be at the same level (no moving the tripod up and down for different shots for your panorama). Handholding your camera is not really a good idea for this technique, although you can do it. Even your smartphone creates panoramas. Bear in mind a panorama created from multiple images will take up quite a bit of space on your computer.
Converting a color image to monochrome is a fantastic experiment producing dramatic compositions emphasizing texture, pattern, light, and shadows. Death Valley, in addition to being a land of extremes, is also a land of contrasts: sharp, textured clarity versus soft, shadowy curves. Black-and-white imagery highlights these contrasts without the distraction (if you can call it that) of added color, allowing your viewer to concentrate on those textural and light differences.
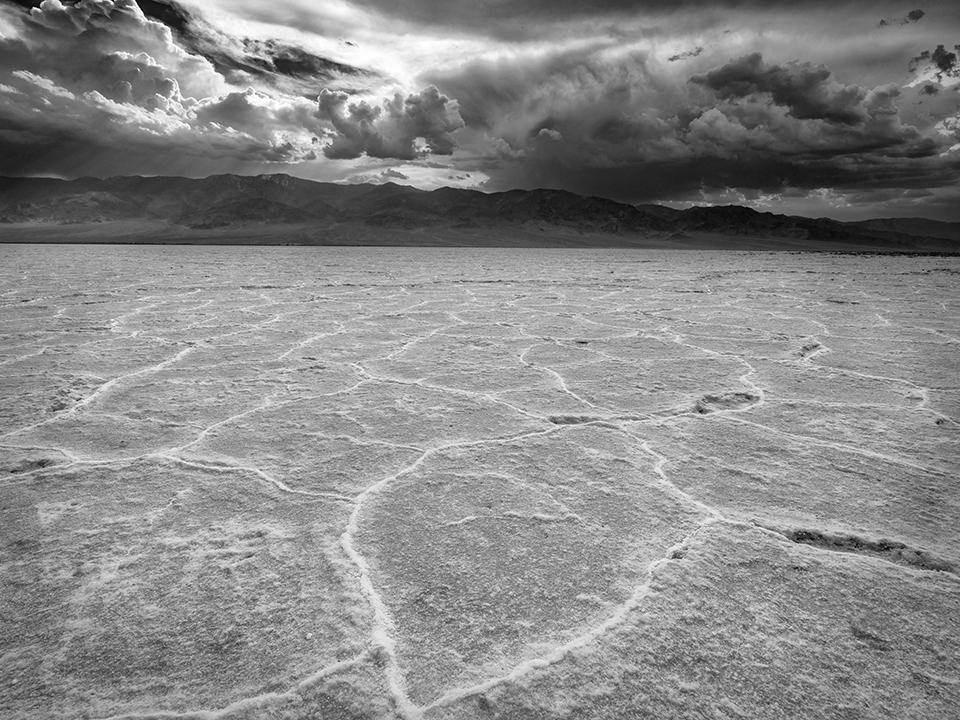

A monochrome morning view toward the Badwater Basin parking lot waaay in the distance, Death Valley National Park / Rebecca Latson
I know I’ve already stressed how hot it can get during the summer months (which includes late spring and autumn). What I have not yet mentioned but what you will see for yourself – usually after uploading the file to your computer – is product of the heat out there – a wavey, almost unfocused appearance to your images when using a telephoto lens. This issue is known as “heat shimmer” or “heat haze” and I noticed this with photos I’d taken of Mesquite Flat Sand Dunes using my 100 – 400mm lens. Heat shimmer occurs when you look at objects (or photograph them) through a layer of heated air. Quora.com writes that heat changes the air density and thus its index of refraction (i.e., how much the light bends between your eye and the object). A further search on Google indicates this issue may be mitigated to a certain extent by using a lens hood and polarizing filter. I used both, but my sand dune images still show heat shimmer. Maybe the effect would have been greater had I not used a hood and polarizer filter – I don’t know. Even if your image displays a little heat haze, doesn’t it shout out to you “it’s HOT here”?
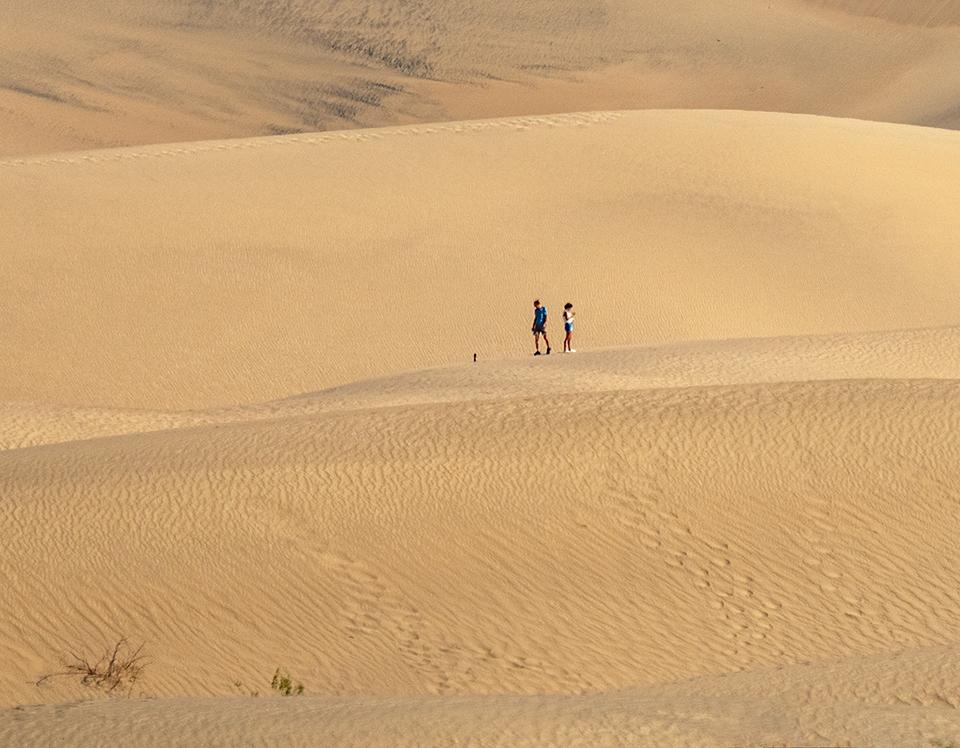
An example of heat shimmer effect on an image, Mesquite Flat Sand Dunes, Death Valley National Park / Rebecca Latson
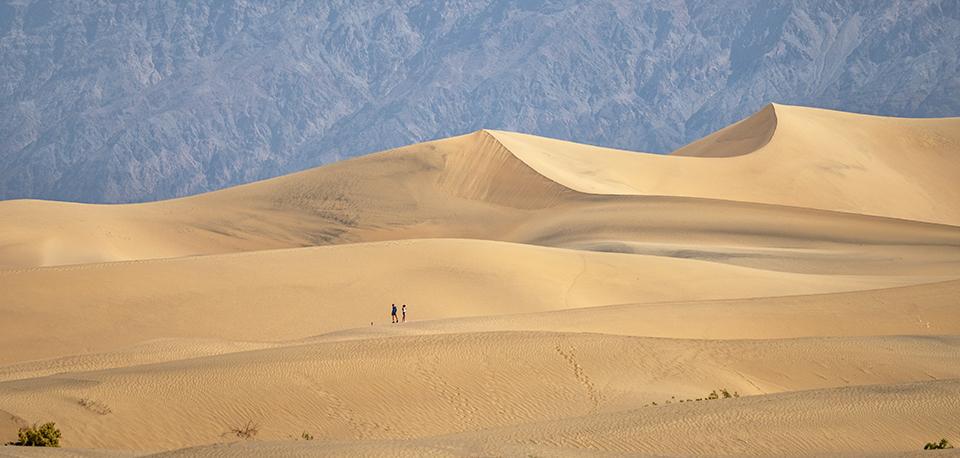
Exploring the Mesquite Flat Sand Dunes – the full view, Death Valley National Park / Rebecca Latson
A caveat of visiting Death Valley during the summer season (aside from the heat) is that your backgrounds will be hazy. According to the NPS, pollutants blow into the park “from metropolitan areas, industrial areas, and transportation corridors from the west.” Nature also adds its own two-cents’-worth of haze by “blowing dust into the air. But humans increase the amount of dust available to be blown by the wind when they drive on unpaved roads or break up the salt crust by walking on it.”
Can you mitigate haze in your images? Sometimes, a circular polarizing filter diminishes some of that haze, as does a grad ND filter. There is also a fix you can apply while processing your hazy images, depending upon what your photo editor offers. It’s called “dehazing.” I use Adobe Lightroom for a first pass at editing and there’s a dehaze slider on that program. Judicious use of that slider helps reduce or eliminate atmospheric haze. On the other hand, sometimes haze makes for a nice effect to tell your photographic story. To see less haze in your landscapes, Death Valley during the winter is the ideal time because of improved air quality since the winds and air mass originate “in a less developed area,” as opposed to LA, San Francisco, Sacramento, and all those other West Coast big cities.
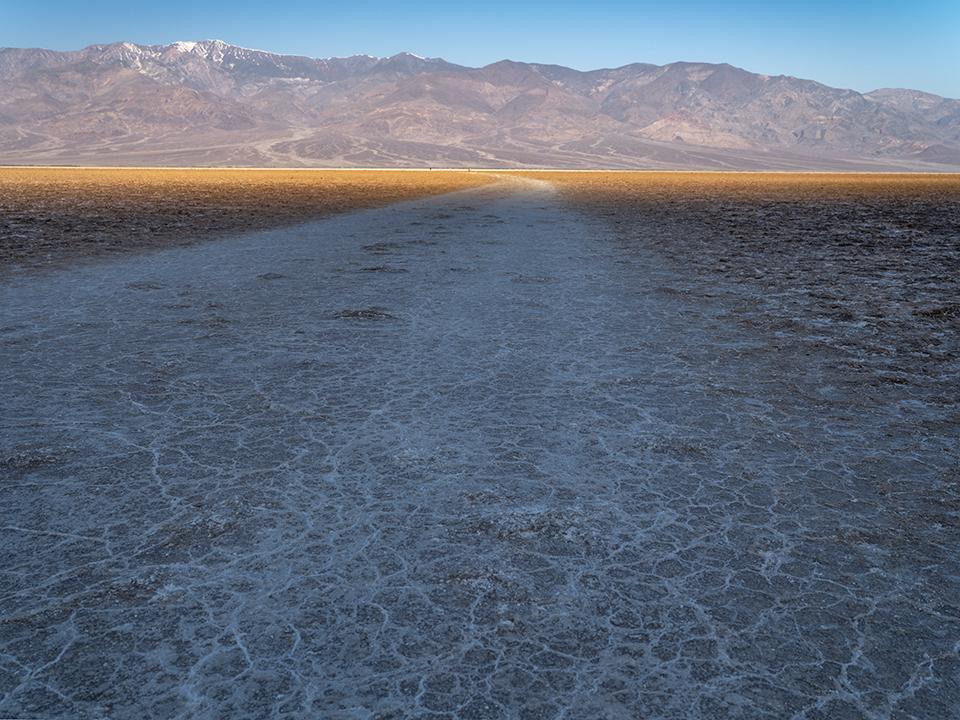
The salt trail to a salt flat at Badwater Basin – original view, Death Valley National Park / Rebecca Latson
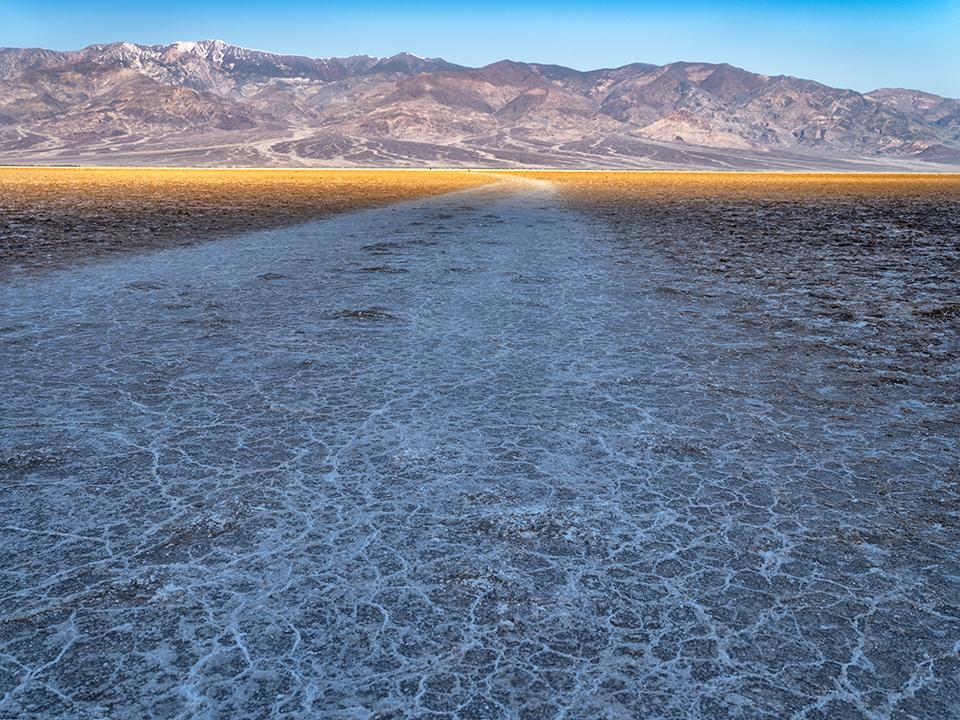
The salt trail to a salt flat at Badwater Basin – dehazed mountains, Death Valley National Park / Rebecca Latson
Despite the haze created by mid-May heat, this hottest, driest, lowest national park provides photographic surprises around every corner. A visit to Death Valley National Park, no matter what time of year, will win you over as completely as it’s done me. And like me, you might even wish to return for a second visit.
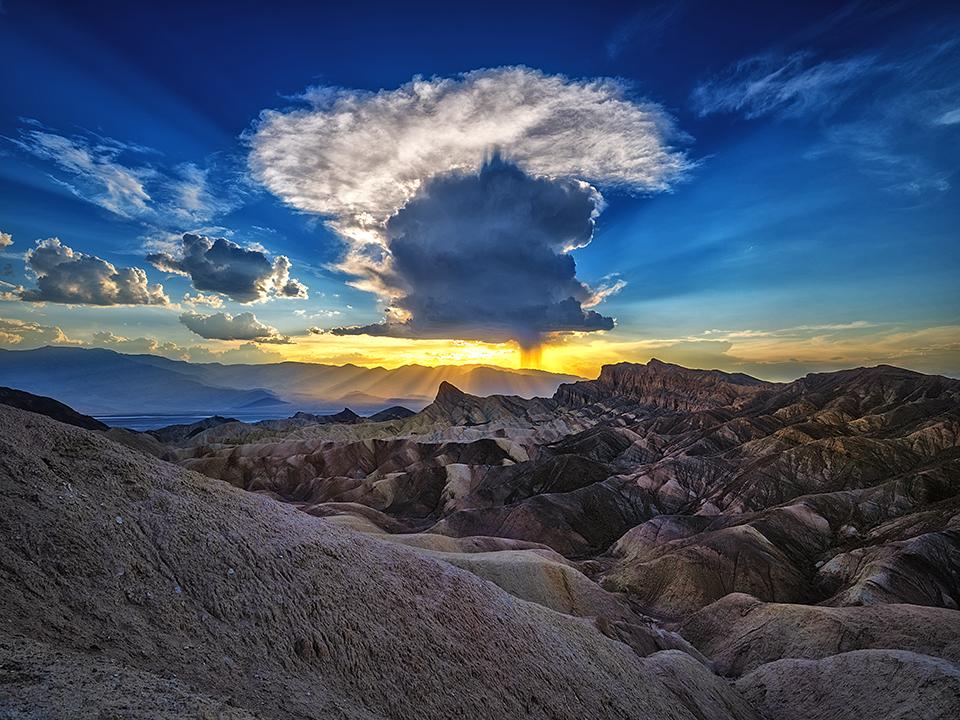
That one moment in time at Zabriskie Point, Death Valley National Park / Rebecca Latson
[ad_2]