[ad_1]
© Tom’s Guide
null
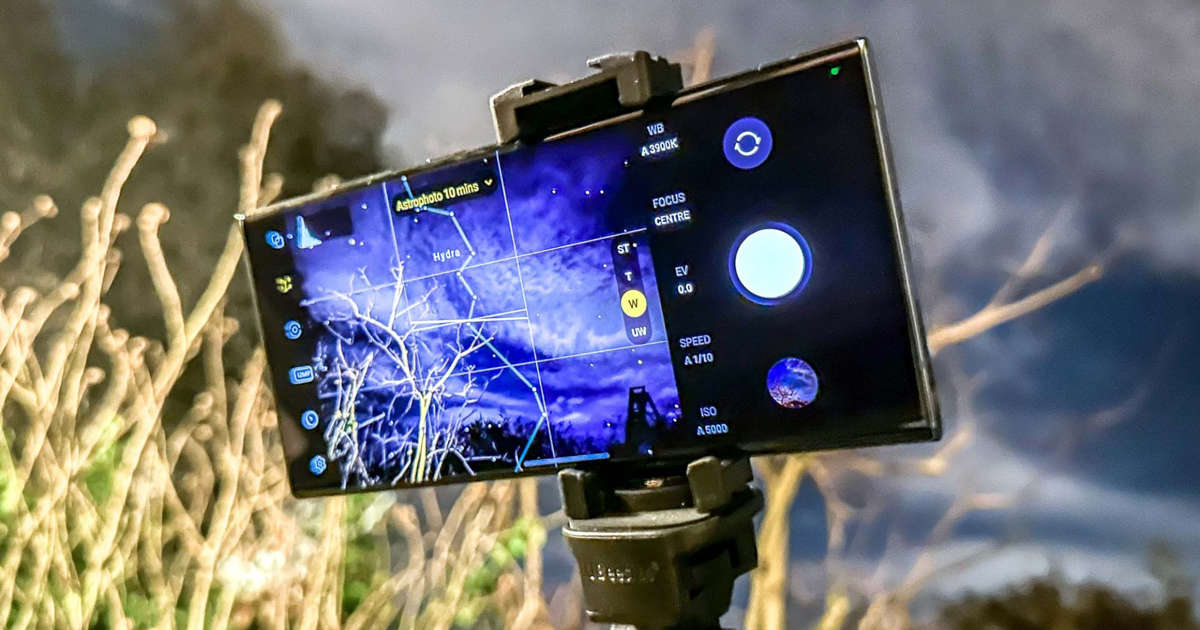
You’ll definitely want to use Galaxy S23 astrophotography mode once you get your phone, as it’s surprisingly impressive for a smartphone. Thanks to the power of AI and combining multiple images, you can get beautiful images of the night sky.
The fact you need to download a separate app full of settings to adjust is a bit intimidating but just stick with our guide below. We’ll show you step-by-step how to enable the correct settings and prepare your Galaxy S23 and your shot, and by the end, you will hopefully have your first astrophoto.
Assuming it’s already dark outside where you are, and you’ve got your phone to hand, here’s what you need to do to use the Galaxy S23’s astrophotography mode.
How to use Galaxy S23 astrophotography mode
This astrophotography mode works on any Galaxy S23 handset, and also the Galaxy S22 series, since it’s tied to an app rather than the phone’s hardware. These steps should be the same, no matter which phone or model you are using.
1. If you haven’t already, download the ExpertRAW app, which is free from the Galaxy Store app.
2. Open up ExpertRAW and then the Settings menu (the cog in the top/bottom left corner)
3. In here, make sure the Special photo options slider is turned on, otherwise the astrophotography mode won’t be available to you. Also, enable RAW photos so you can capture the most possible detail. See our how to take RAW photos on Galaxy S23 guide if you need more details on this.
4. Return to the main app window, and tap the astrophotography button (the constellation icon) in the top right.
5. Before taking a photo, select whether to hide or show the AR sky guide, which will help you target specific things in the sky, and the duration, which can be set from four, seven or ten minutes (ten minutes providing the best shots). If you’re happy with the settings, just tap the cross in the corner to minimize it.
6. Lastly, pick your lens of choice and tap the shutter button. Wait for the magic to happen, and then check the Gallery app to see how your photo came out.
I tried this feature out on a cloudy night, so I wasn’t able to see much beyond a couple of particularly bright stars. I hope you fare better than I did.
A couple of other tips for you: A tripod is basically a necessity for these shots considering how long it takes for the exposure to come out.
And since it’ll be dark out, particularly if you go to an area with minimal light pollution, you may also want to bring a flashlight so you can see what you’re doing.
Take a look at some more Samsung Galaxy tips before you go. We have guides on how to use the hidden magic eraser tool on Samsung phones to quickly edit your photos, how to use finger sensor gestures on Samsung phones to add extra shortcuts to your most-used features, and how to set up Easy Mode on Samsung smartphones if you or the person you’re setting the phone up for would prefer a much simpler interface.
If you’d prefer more general Android how-to tips, we’ve got plenty of those too. Take a look at how to check screen time on Android to see how long you’re spending using different apps, how to split screen on Android to open up app multi-tasking on your phone, or how to show battery percentage on Android phones so you know just how much power you’ve got left.
[ad_2]

