Around here we love technology for its own sake. But we have to admit, most people are interested in applications–what can the technology do? Those people often have the best projects. After all, there’s only so many blinking LED projects you can look at before you want something more.
[Landingfield] is interested in astrophotography. He was dismayed at the cost of commercial camera sensors suitable for work like this, so he decided he would create his own. Although he started thinking about it a few years ago, he started earnestly in early 2016.
The project uses a Nikon sensor and a Xilinx Zynq CPU/FPGA. The idea is the set up and control the CMOS sensor with the CPU side of the Zynq chip, then receive and process the data from the sensor using the FPGA side before dumping it into memory and letting the CPU take over again. The project stalled for a bit due to a bug in the vendor’s tools. The posts describe the problem which might be handy if you are doing something similar. There’s still work to go, but the device has taken images that should appear on the same blog soon.
Along the way, the project shows you a lot about the interfaces between both the sensor and the FPGA, and the FPGA and the onboard ARM CPU. The writeups are way beyond a blink the light tutorial, but that’s a good thing if you have the will to dig through them. One interesting hack is that the build uses a 754 CPU socket to hold the image sensor.
We’ve looked at hacking film cameras to digital lately. If you prefer your telescopes in the cloud, there’s always the unfortunately named Skynet.
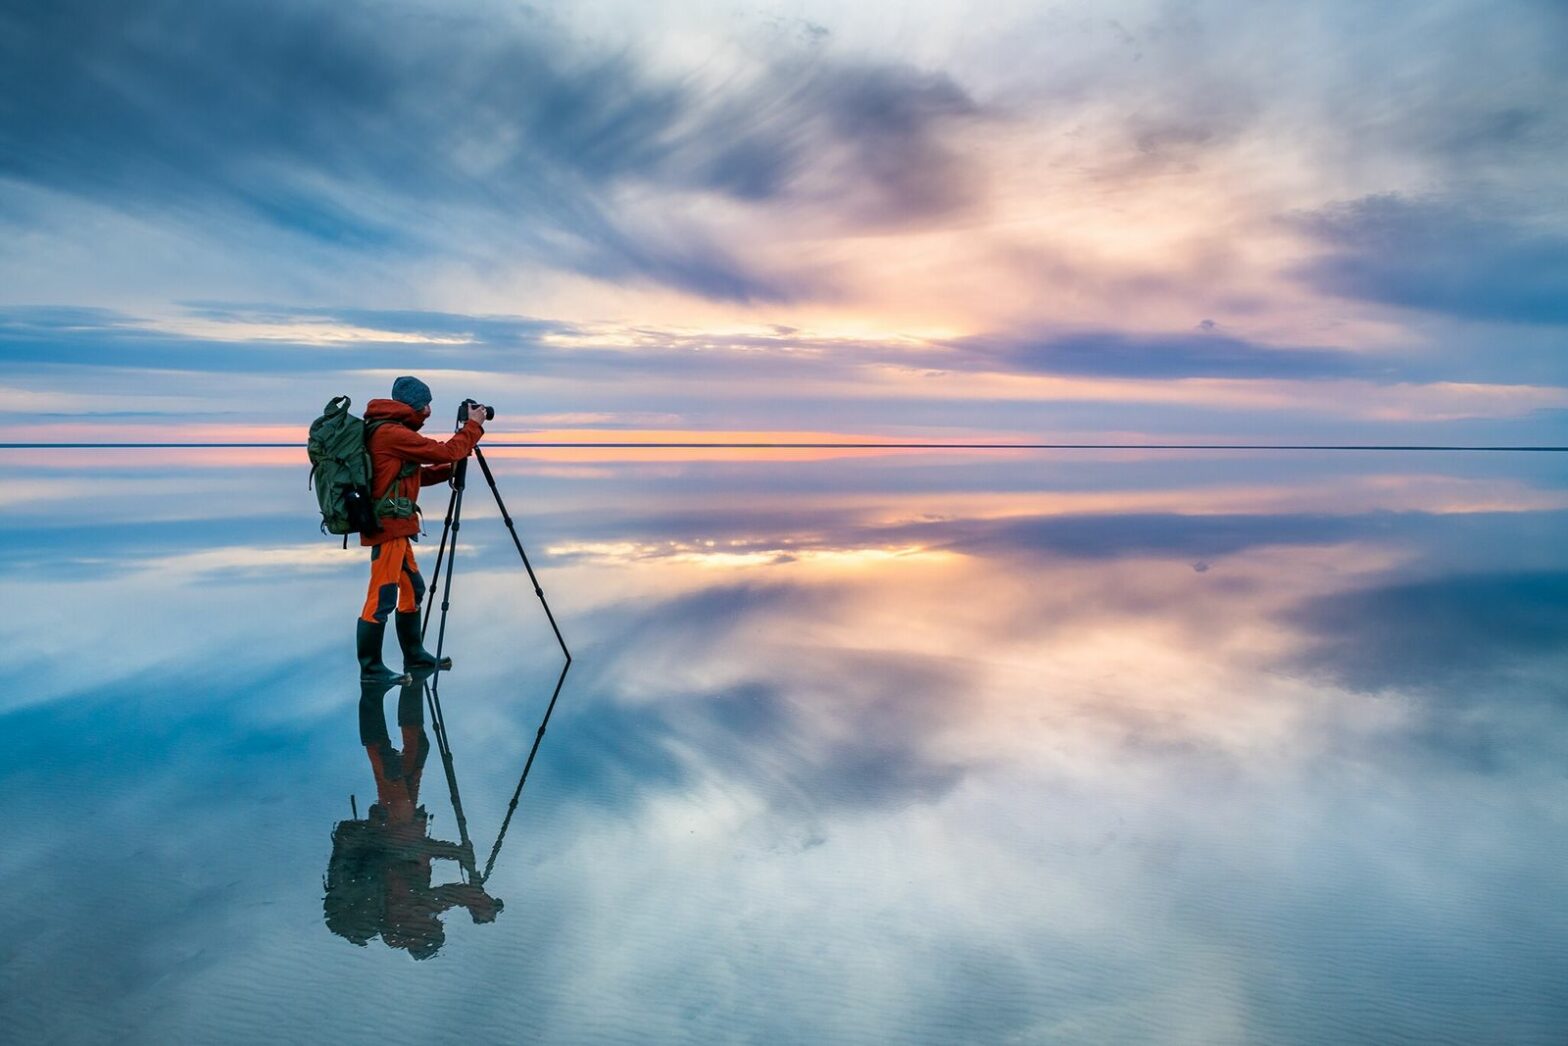
7. Do your preparation and research to line up the best shots
Our experts agreed that great travel photography normally needs hours of research and preparation ahead of a trip, whether you’re looking for the best locations or trying to secure an all-important interview.
“For magic to happen, most of the time we need to be in the right place at the right time with the right contact,” explained Yulia. “There’s a lot of research that goes into that, as well as logistical elements like setting up interviews,” she said. “That’s where tourism boards can be very helpful, because they’re the people who are most knowledgeable about a given area.”
8. Deliver a well-presented final product
For our panellists, much of the hard work comes at the end of a trip. From editing images to ensuring you’ve met your client’s brief, it’s important to think how you can create a final product that really stands out.
“You want to keep your final board [of images] very tight — think about what will catch the eye and stand out,” said Francesco. “[Aim for] 15 to 20 pictures, up to a maximum of 30, and put these all together in one single file — ideally a PDF. Make sure you start well and finish well, with dynamic presentation that will keep the interest of the editor.”
9. Stay humble and keep learning
A recurring theme across each travel photography session was the need to keep learning and developing your skills. “Be humble,” advised Lauryn. “There’s always someone doing better work than you, and you should always keep learning. The most important thing for me in the past decade is to keep learning on the job.”
Annapurna echoed Lauryn’s advice: “If you are passionate about photography, you naturally look at a lot of other people’s work,” she said. “It’s really nice to get ideas about different ways to use light and different ways to shoot stories.”
10. Be persistent and never give up
Finally, our experts emphasised the need to be persistent and patient as you build your travel photography career.
“This can be a really long game — you have to be patient,” said Yulia. “People often start pitching and stop when they don’t see immediate results. Those of us who are still in the industry are here because we didn’t stop pitching our stories and sharing our pictures. If we can do it, you can, too. If this is your passion, you just have to keep going.”
The Masterclasses by National Geographic Traveller (UK) will return in 2023.
Three photographers discuss the art and craft of intimate spring photography, and how to make your images stand out from the rest, with Claire Gillo
Now that Spring is upon us, why not try getting creative with your landscape and nature photography? Photographers Charlotte Gibb, Mark Gilligan and Jo Stephen share their tips for intimate spring landscape photography below.
Charlotte Gibb
Charlotte is a California-based landscape/nature photographer and educator. See www.charlottegibbblog.com, on Facebook @charlottegibbphotography and Instagram @charlottegibb. She is the author of Get Intimate: Making A Personal Statement with Intimate Landscapes and is exhibiting at the Ansel Adams Gallery, Yosemite National Park, from 23 April until 3 June this year.
‘Intimate landscapes are compositions that have been derived from the larger scene,’ says US photographer Charlotte Gibb. ‘It could be a photograph of a small section of beach, or a group of trees, or it could be a photograph of a section of an entire mountain.
‘Typically, the sky is not part of the composition, so intimate landscapes don’t rely on attention-grabbing sunsets. They are more subtle, and, for me, often have an element of symbolism in them,’ she continues. ‘It can be a challenge. Intimate landscapes can’t rely on grand, colourful scenes to inspire awe in the viewer, so the photographer has to be more clever about how to compose. Don’t feel dispirited if your photographs aren’t compelling when you start. Just keep at it.’
View of Yosemite Falls from a hotel room. Taken with a very long focal length of 560mm Canon EOS R, 100-400mm + 1.4x III extender, 1/80sec at f/16, ISO 400. Image: Charlotte Gibb
Rather than hunting for subjects, Charlotte studies a scene for design elements. ‘What shapes do I see?’ she says. ‘Pine trees are triangle shapes. Deciduous trees in winter are a series of lines. I look for repeating patterns, or contrasting colours. I also look for interesting light.’
Charlotte’s stamping ground is California. It’s home to a wide variety of landscapes, from rugged coastlines to ancient Redwood trees and deserts. ‘My heart-of-hearts is with the Sierra Nevada mountains and Yosemite National Park, though,’ she says. ‘There is tremendous diversity, and as much as I go back again and again, I always come away with a new composition. My most meaningful work has come from these places.’
Taking precautions
When asked how she keeps herself safe in this environment Charlotte replies, ‘Good question! Yosemite wildlife isn’t really dangerous unless you look for trouble. Sure, we have black bears, but they are more interested in your sandwich than in you. We do have mountain lions, and like bears, they can be dangerous if they have cubs nearby, but otherwise they are reclusive. I have never seen one in the wild, though. ‘The biggest danger in Yosemite is one’s own recklessness.
Although she has photographed rainbows on Yosemite Falls many times, this was the first time Charlotte witnessed two of them. Canon EOS R5, 70-200mm at 92mm, 1/100sec at f/13, ISO 400. Image: Charlotte Gibb
I also carry a Spot GPS device. It allows my husband to keep track of where I am, and would also let me call in the helicopters if I were to find myself in a critical situation. Fortunately, that has never happened.’
Charlotte has two Canon EOS R5 bodies and a variety of Canon RF lenses. ‘But my favourite lens is my Canon RF 70-200mm f/2.8 L IS USM – it’s my precious!’ she jokes. ‘It has the perfect range of focal lengths for the type of photography I do. Long lenses are great for creating atmosphere and zeroing in on smaller sections of the landscape.
I also love my Arca-Swiss d4 Tripod Head with a Classic Knob (Geared). It allows me to make minute adjustments when composing.’ When it comes to composition, Charlotte likes to stay spontaneous. ‘The feeling of connection with nature is key. I internalise what is around me.’
Dogwoods in bloom in abundance in Yosemite Valley in the spring, but congregate in just a few places. This scene was spotted near the east end of the valley Canon EOS 5D Mark II, 24-105mm at 105mm, 2.5secs at f/16, ISO 100. Image: Charlotte Gibb
Charlotte’s top tips for intimate spring landscapes
Slow down. Find solitude. Connect with nature. Explore. Be curious.
Zoom in. Either use a longer lens, or zoom with your feet. Getting up close will help to eliminate distracting elements in the scene and simplify the composition.
Eliminate the sky. The sky is usually the brightest part of the picture and will draw the eye away from your subject like a magnet.
Mark Gilligan
Mark has been a professional photographer for more than 40 years. He is a LEE Filters Master, a winner of the #OMGB in LPOTY, and runs workshops in the Lake District and Snowdonia. Find out more at www.wastwaterphotography.co.uk and follow on social media @wastwater1
Mark Gilligan enjoys hunting for less obvious landscapes. ‘As well as larger, grander, landscapes, I also derive pleasure in finding images that aren’t so obvious. These could be very close. Some are smaller views or segments of the view that you decide to isolate.’
Make use of empty space in your compositions to create a feeling of calm and tranquillity 1/30sec at f/3.2, ISO 200. Image: Mark Gilligan
In his kit bag, Mark has a Fujifilm X-Pro2 and to shoot his close-up landscapes switches between his Fujifilm XF 16-55mm f/2.8 and Fujifilm XF 55-140mm f/2.8 lenses. ‘The 16-55mm is my go-to lens, though,’ he says. ‘I often shoot using a shallow depth of field which works well with the longer zoom.’ Occasionally, he will hand-hold his camera, but most of the time uses his Gitzo tripod.
Mark loves the spring light. ‘The light begins to get harder, which I find works well with the water-based images,’ he says. ‘I like to retain the detail and “over cook” the surroundings to the limit, thus enabling me to get the image I want. I hardly do anything in post.’
Look for plain backgrounds to frame a plant or flower in the environment. Fujifilm X-T1, 18-55mm at 55mm, 1/2000sec at f/4, ISO 400. Image: Mark Gilligan
Seeking the right subject
To find the perfect subject for his intimate landscapes, Mark will scan the scene to find elements of interest, and doesn’t like to restrict himself. ‘If I see something and it appeals, I will try my best to photograph it and do it justice,’ he says. ‘I like that old word “serendipity”. I’ll happen upon it and if I like it, I’ll take it.
‘A forest can be a good location, but being by the waterside has produced many great images for me – I particularly like photographing reeds. They are usually at their best in the spring and summer, and hard light allows me to overexpose the water, which retains the detail in the plants. Sometimes I can isolate them but a “gaggle” of them can produce interesting abstracts and be just as appealing.’
Mark also finds quarry rock to be good in damp conditions. ‘Wet slate can produce some outstanding colours and potential images.’ To edit his images, Mark uses Lightroom. ‘As I shoot in raw, I make a couple of tweaks, but I use the spot meter on my camera (I know I am old school) and my LEE filters so my exposures are usually very accurate. In short, I can generally deliver an image in under a minute.’ Mark prefers to spend his days outside shooting, rather than sat for hours inside at the computer.
By blurring the backdrop and isolating an individual plant, Mark has created this effective result Fujifilm X-Pro2, 50-140mm at 140mm, 1/1250sec at f/4, ISO 100,. Image: Mark Gilligan
While traditional in his approach, he also pushes the boundaries. ‘Once I see a subject, I may take it faithfully or create the final result in camera by controlling the light,’ he says. ‘Intimate landscape means different things to many people. It is the one area of my photography where I am happy to experiment and not faithfully photograph what I see, because I am after something different. In order to do this, you need to understand what you are doing with your camera, so make an effort to learn how to control it.’
Mark’s top tips for intimate spring landscapes
Scope where you are. Not just for that day but for the future. Some things will be obvious, but take your time and look.
Never be downhearted; if it doesn’t always work – at least try!
Experiment and don’t be afraid to push the boundaries.
Use the harsher light conditions of spring to your advantage to get results like Mark’s shot of leaves and reeds Fujifilm X-Pro2, 50-140mm at 140mm, 1/500sec at f/4, ISO 200. Image: Mark Gilligan
Jo Stephen
Jo is a naturalist and environmentalist, and has been taking photographs in her local landscape for many years. She also works in nature conservation. Her photography explores her connection to the natural world and her place within it, and is created ethically with a minimal carbon and ecological footprint. Find out more at www.jostephen.photography, and follow on social media @joannunaki
Go in close to find a whole other world of flowers and species. Sony A58, 90mm, f/2.8 at 1/2500sec, ISO 100. Image: Jo Stephen
Spring has always been Jo Stephen’s favourite season. ‘I live in a village surrounded by woodlands carpeted in bluebells and wild garlic in the spring. Watching the landscape transform so dynamically in the spring inspires a lot of my work.’
Jo shoots on her old yet reliable Sony A58 and Olympus OM-D E-M10 III. ‘As much as I’d love a more capable camera, particularly one with in-camera multiple exposure, as an environmentalist I’m happy to continue using these,’ she says. ‘I shoot nearly everything with my macro lens, even landscapes. Spring is a wonderful time for more creative techniques, such as intentional camera movement and multiple exposure. Using movement when shooting is an effective way of communicating the dynamism of the season.’
To find the perfect subject, Jo likes to give herself freedom to experiment, and to explore colours, textures and forms that resonate in the landscape. ‘Don’t worry what anyone else is shooting and don’t get fixated on what kit you have – you can take great images on cheap cameras.’
Using layers of images, Jo has created this striking image of a pink cherry tree Sony A58, 90mm, f/2.8, ISO 100. Image: Jo Stephen
She continues, ‘Shooting up close opens myriad tiny worlds, so if like me you only shoot what’s on your doorstep, it’s still going to take several lifetimes to get bored with the vistas. It should be about the joy of creating, and that means sometimes you’ll come back with awful results, but that’s how you learn and evolve.’
To create her abstracts, Jo uses a couple of techniques. ‘Much of my work involves intentional camera movement (ICM) to varying degrees,’ she explains. ‘It may be that I take a few blurry shots to use as textures with static shots, or ICM may be the focus of the image I’m creating, as in the bluebell shot.
I like to use subtle movement and will pause during the motion to let elements of the composition “stick” and remain in focus. I look for texture and light in the composition; any highlights will become streaks and lines throughout the image, so you need to think about how you will use those if you start moving the camera erratically. It can be hit and miss whether the light will create interesting or jarring shapes. I like to make use of contrast, and often look for light subjects against a darker or boldly coloured background.’
This image was created with a forward circular movement, using half the exposure time to rest upon the bluebells and the remaining half to move the camera. Sony A58, 90mm, f/20, ISO 100. Image: Jo Stephen
Multiple exposures
Jo also likes to layer her images using multiple exposures. ‘As I only have an old entry-level camera, I am unable to do this in camera, so this work is made in post. I’ll collect a few images, both ICM and static, and maybe a few that are completely out of focus, to add colour and texture. After a while you get an idea of what you need to shoot to create the images you have in your mind later at the computer.’ When it comes to taking intimate landscapes, for Jo the joy is not so much in the final result but rather the act of being in nature.
‘Shoot what you love – for me that’s my walks in the woods and meadows. I think if you care about your subject, then you’ll connect with it and find a way to express that connection. For me, photography is about the process, not the resulting image.’ She continues with a word of warning. ‘Any nature photographer needs to be mindful of their subject. Basic field skills will help you to get closer to nature and understand the behaviours of the wildlife you’re watching.
But, more importantly is the need not to disturb or impact in any way on those natural behaviours. For this reason I won’t share locations of rare species and don’t geotag.’ Jo recommends any nature photographer to have a look at the RPS Nature Photographers’ Code of Practice, which outlines best practice for ethical nature photography.
Cherry blossom lends itself perfectly to creative photography. Image: Jo Stephens
Jo’s top tips for intimate spring landscapes
Visit the woods in the early morning or evening, as the light provides that beautiful contrast.
Shoot into the light with a wide aperture for airy, romantic images.
Look for pattern or contrast in the landscape (intimate or wide), as this makes for great ICM imagery.
This abstract spring image of wood anemones was made using ICM and multiple exposures. Sony A58, 90mm, f/13, ISO 100. Image: Jo Stephen
View more tips for Spring photography here: 33 Essential Spring Photo Tips
Further reading:
The world’s best nature photographs of 2021 revealed
Best lenses for wildlife and nature photography
Follow AP on Facebook, Twitter, Instagram, and YouTube.
From the Milky Way to stars, to solar and lunar eclipses, the night sky is full of wonders. However, photographing them is no easy task. Usually this has also been an expensive task, one you could only carry out with a chunky DSLR and an even chunkier lens. Phones are starting to catch up, and while the outcome doesn’t quite compare to what a DSLR or mirrorless camera can achieve just yet, there are ways of getting good smartphone photos of the night sky if you follow our guide.
Preparing to photograph the night sky
Whether you’re shooting with a DSLR, mirrorless, or a smartphone, this guide will outline what you need to consider when photographing the night sky.
What camera equipment do I need to photograph the night sky?
Cameras vs Smartphones: Yes, smartphones like the Xiaomi 12T Pro and the Google Pixel 7 and Pixel 7 Pro have made enormous strides when it comes to camera technology. However, a DSLR or a mirrorless camera is more capable when it comes to night photography thanks to having a larger sensor, and a bigger range of lens choices. Read more on the best cameras for astrophotography. If you don’t own a camera or one of the latest smartphones, however, don’t be discouraged. Smartphones can still photograph the night sky, but the results won’t be as clear.
Lenses: Photography literally means to draw with light. So, what do you do when you have so little of it? You let it all in. This means using the fastest, widest lens you can. You’ll find our recommendations for the best lenses for astrophotography.
Tripods: Whether you’re shooting with a camera or a phone, keeping your camera stable is key. In addition, a tripod coupled with a remote shutter-release cable is a helpful addition when shooting long exposures. This will decrease any camera shake or vibration. Find the best tripods available.
Photo credit: Sergio Capuzzimati via Unsplash.
A Flashlight: Unless you’re a photography ninja who can comfortably set up their camera in the dark, a torch, or red-light headtorch, will come in handy.
Spare batteries: It’s always good practice to take a few spare batteries with you, particularly if you’re using a camera and shooting long exposures (as you probably will if you’re shooting the night sky), as this will drain your battery life. If it is cold out, remember to keep them in your pocket as exposure to the cold will drain them quicker. If you’re using a smartphone make sure you bring a spare charger.
Spare memory cards: Shooting the night sky takes planning, but like any other type of photography it also takes some flexibility. Shooting in raw allows for this flexibility. The downside is raw files take up more space that JPEGs and if you’re looking to shoot both raw and JPEG, extra space is going to be a welcome addition.
Fingerless gloves: You’ll probably be outdoors a lot and if you live somewhere cold, a pair of gloves is a must to avoid your fingers from freezing off.
Timer: A shutter release cable will help minimise any potential camera shake and enable you to shoot exposures longer than 30 seconds. For those shooting on your smartphone, in place of a shutter release cable you can set up a self-timer. For those who use a camera with Wi-Fi or Bluetooth, see if you can use your smartphone as a remote release.
Photographing the night sky
Clouds don’t always need to spell the end for your night shoot. They can be used for dramatic effect. Photo credit: Ganapathy Kumar via Unsplash.
Main things to consider
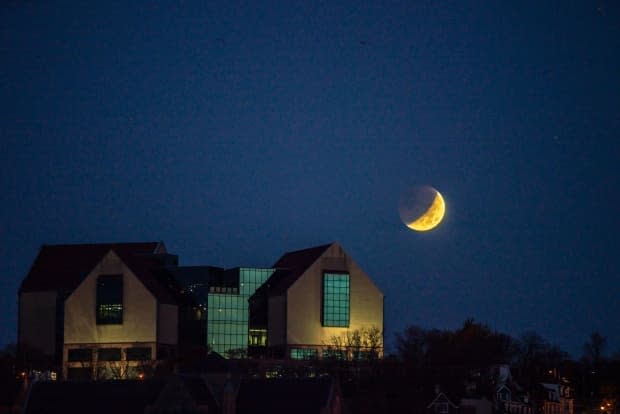
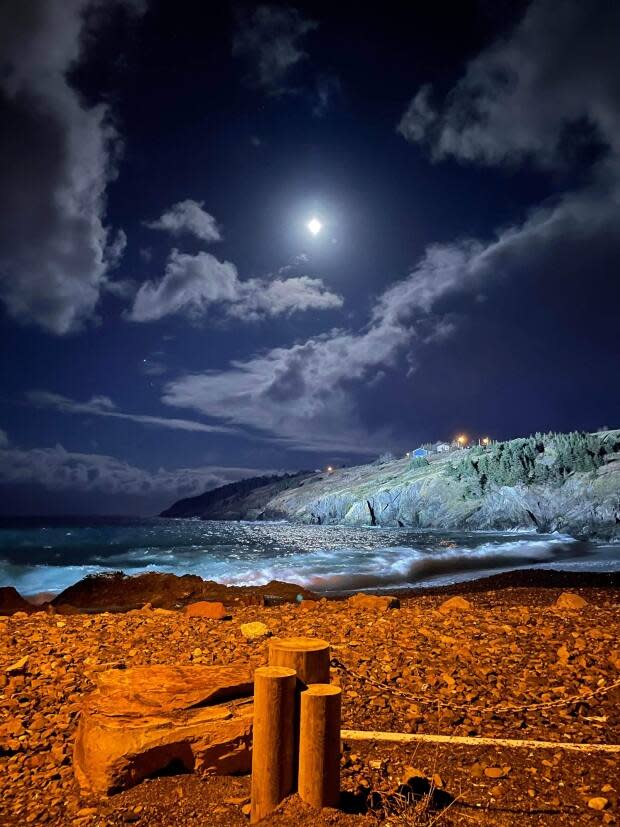
Finding a good location: Clear skies are critical to clearer shots and checking the weather forecast is a must. Light pollution is to be avoided, particularly from artificial light sources like street lights. National Parks are good spots for night-sky photography as they are often away from cities and towns. It is also a good idea to avoid a full moon, that is, unless you’re photographing the moon, of course. As it is a light source, and it will compete with the other light sources in the night sky like the stars or the Milky Way.
Pencil in a date for shooting: The moon, stars and the rest stop for no one. This is why to get your optimal shot of say, the full moon, it is a good idea to keep up with the moon cycle in advance to pencil in a date for your shoot.
Composition: The sky is not the limit. Playing around with letting in other interesting objects into your frame is a good way to add some more detail into your image, particularly if you’re shooting on a smartphone that doesn’t quite pick up all the fine details. You might even want to arrive at your location earlier to think of ways to compose your shots.
Be creative when taking your night photos. Photo credit: Yash Raut via Unsplash.
What camera settings should I use for night sky photography?
The holy trinity of settings: Namely ISO, aperture, and shutter speed settings.
Set your camera to Manual mode, turn off autofocus and set it to infinity. Use the rear screen to check focus using a magnified view (and live view mode when using a DSLR). If you have a modern Olympus/OM System camera, then you can use the Starry Sky AF setting.
To reduce noise, you’ll want to use the lowest ISO speed possible on your camera, so that any stars don’t get confused with noise. Make sure you check what the best “Base ISO” speed is on your camera, as some of the “LOW” or “L” ISO speeds have lower dynamic range.
If you want as much as possible in focus set your aperture to f/10 – f/16 on a full-frame camera, f/8 – f/14 on an APS-C camera, and f/5.6 – f/8 on a Micro Four Thirds camera. However, be aware that this will result in very slow shutter speeds. For those that have a bright, and high-quality lens, you can use it at brighter apertures, such as f/1.4, f/1.8, to f/2.8.
You will need to experiment with the shutter speed to find out what exposure works best for the scene. The longer the exposure, the more likely you’ll get star trails (as shown above), but if you want to avoid these then you’ll need a shorter shutter speed (and may need a higher ISO speed).
For smartphones, tap your screen to lock your focus and set the exposure manually if your phone has manual control. Alternatively look for a dedicated night mode. Google Pixel owners will be able to use the Astrophotography mode when the phone is used on a tripod or stable surface. For more tips on how to use manual focus, click here.
This Milky Way is already breath-taking, but you can add a dash of uniqueness to your image by having elements like buildings, mountains, people, or reflective lakes in your frame. Photo credit: John Fowler via Unsplash.
Can you take pictures of the night sky with a smartphone?
Thanks to smartphones getting better and better, you can also take photographs of the night sky with a smartphone. Make sure you read through our tips above, as the also apply when using a smartphone.
You’ll normally need to use a tripod (with smartphone adapter), or steady surface, in order to keep your camera still and as steady as you can. But a word of warning to smartphone photographers: Do not give in to the temptation to zoom excessively. Just because you can zoom in doesn’t mean you should. Your photos will most likely not be as clear, as often smartphones will simply use digital zoom in low-light conditions.
Check to see if your smartphone has a manual mode, or a dedicated Night mode. If you’re using a Google Pixel phone, then using it on a tripod or stable surface will enable the Astrophotography mode.
Many of the latest smartphones have very good night photography capabilities and many of the principles for shooting the night sky with a camera apply. Photo credit: Joey Huang via Unsplash.
Tips on how to photograph…
If you’re looking for something more specific, say, you really want to photograph the moon or star trails, have a look at our guides below.
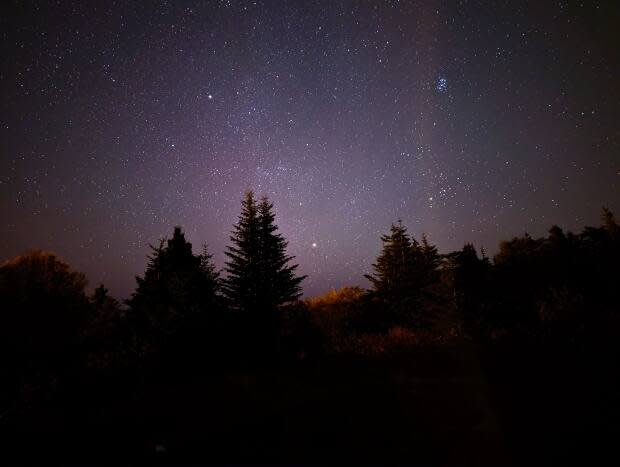
The Milky Way and other stars
Like with the moon, it’s all about timing with the Milky Way. It’s a good idea to do some research on the Milky Way’s pattern and the app Sky Guide is superb resource for this. It will allow you to check out where the Milky Way is to frame your shot. Given as the Milky Way’s vibrant colours tend to be what catches the eye, shooting in raw is essential. This way you can go back and make adjustments to your image, taking control of how much noise reduction is applied to get your image just right.
For the Miky Way and stars, have a look at this article on how to photograph the Milky Way and stars.
The Moon and stars
Are you a beginner Astro photographer? Consider starting with the moon. It is considered an excellent starting point because of its brightness.
When photographing the moon, the main thing you want to account for is the Earth’s rotation. The moon moves across the sky, and if your shutter speed is too slow, then it will blur as the earth rotates. To learn more, read our guide on how to photograph the moon.
Star Trails
There are a number of ways to photography star trails. One way is to take a number of photos quickly one after the other and stack them (you’ll need a tripod and a stacking software or video editing software for this one). Another way is to create a timelapse – using your camera’s timelapse settings.
Depending on what camera settings your camera has, and how long an exposure you can capture will influence what’s the best way to capture star trails – check what your slowest shutter speed is by having a look at a review of your camera. If you have a camera with Live Composite (such as an Olympus / OM System or Panasonic), then you can use this to watch the exposure on-screen as it happens.
How to shoot star trails
Fireworks
With New Year’s Eve right around the corner, there will be many celebratory fireworks shows around the world. To capture such special occasions, check out our essential tips for photographing fireworks for more.
Featured image credit: Kobu Agency via Unsplash.
Follow AP on Facebook, Twitter, Instagram, and YouTube.
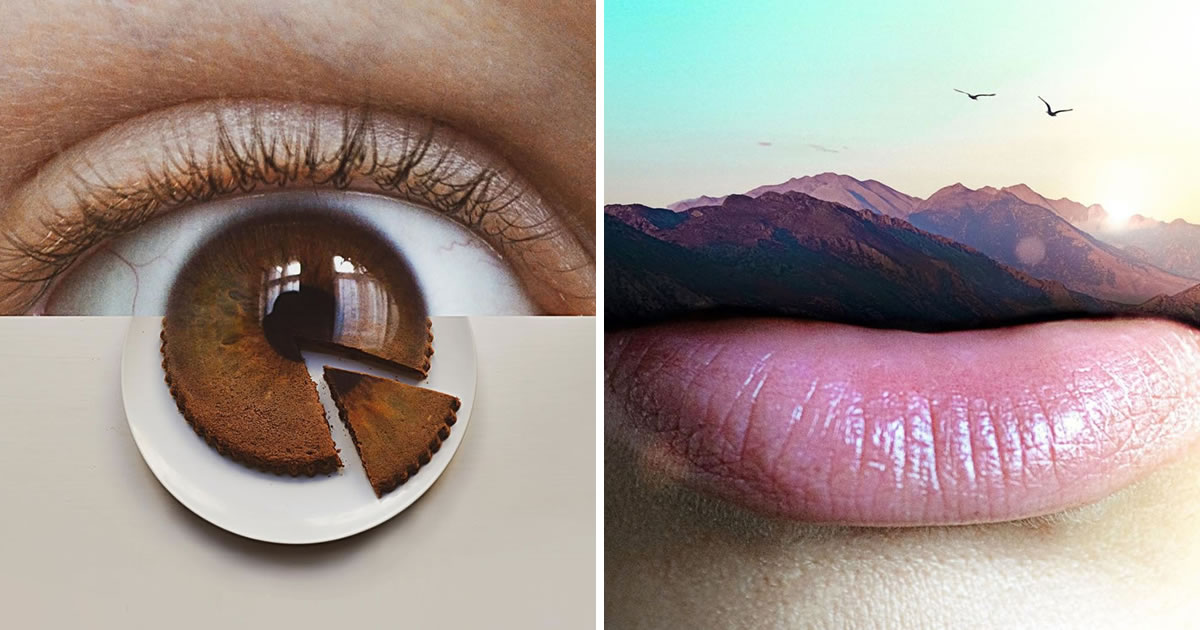
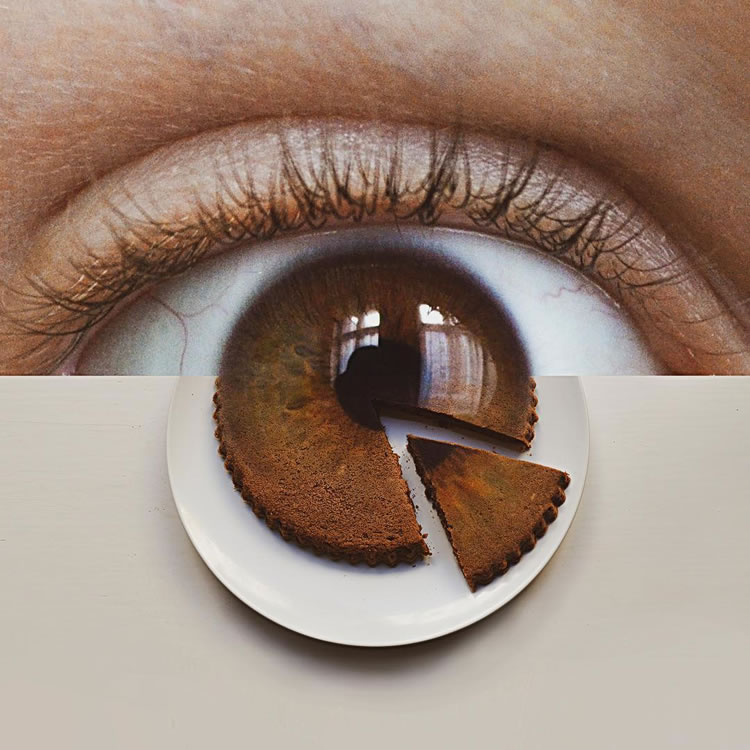
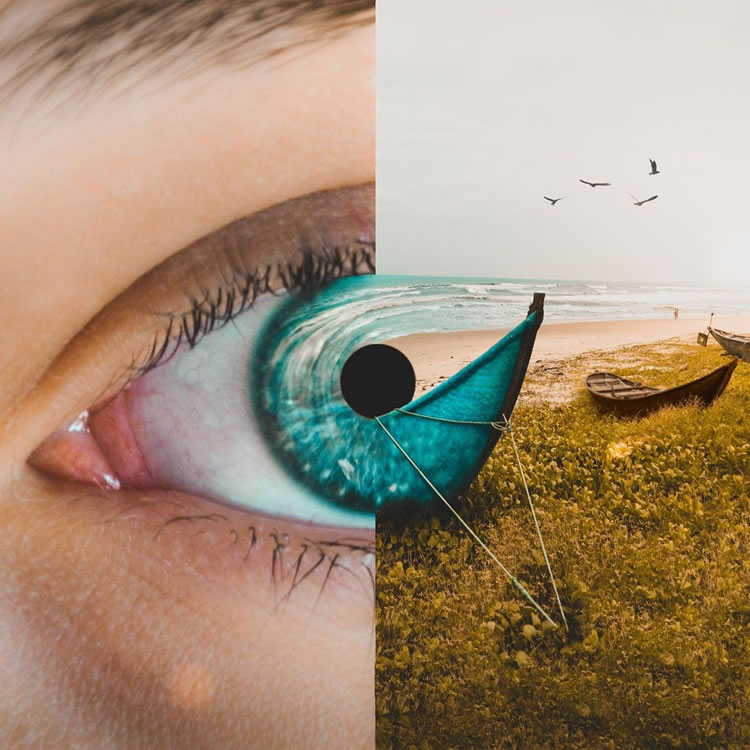
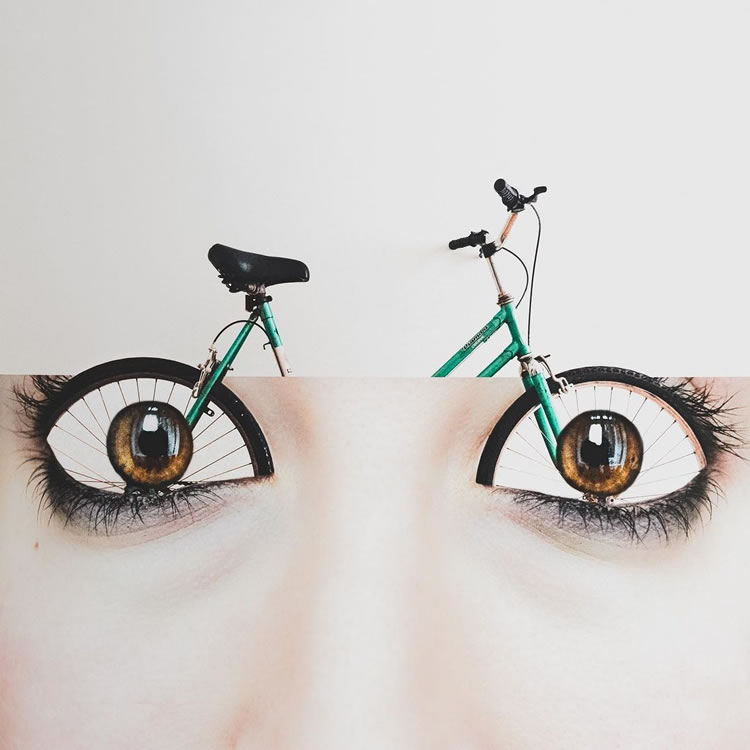
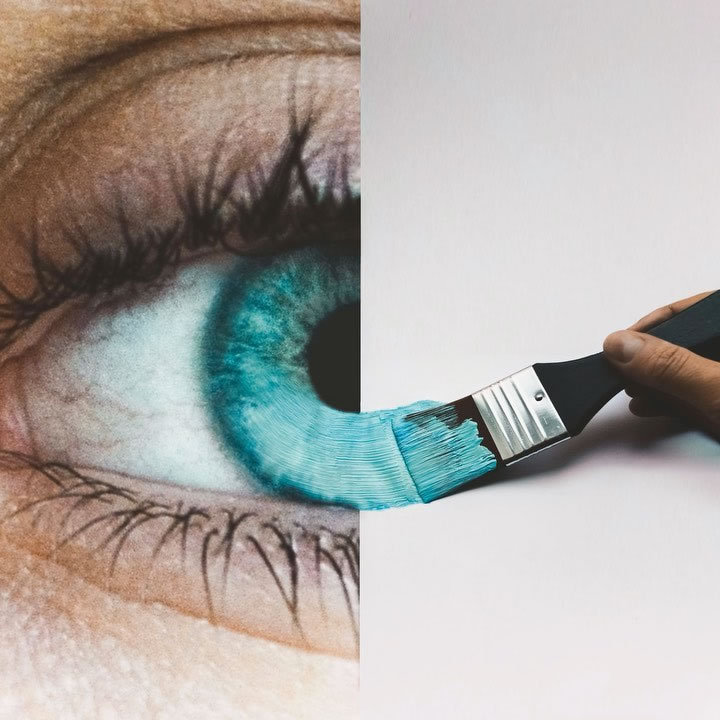
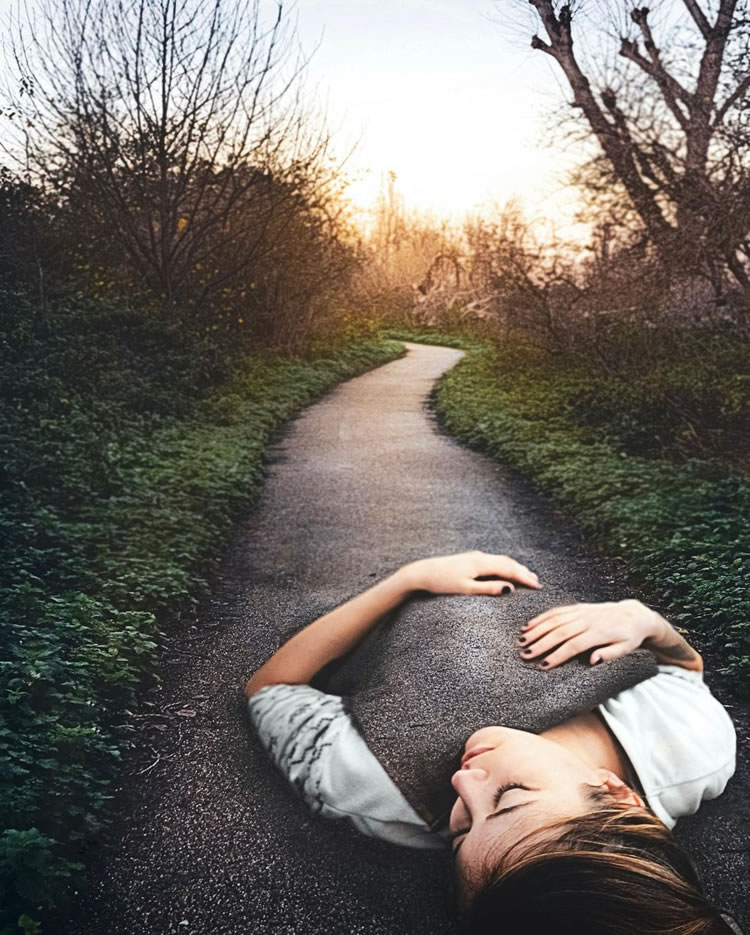
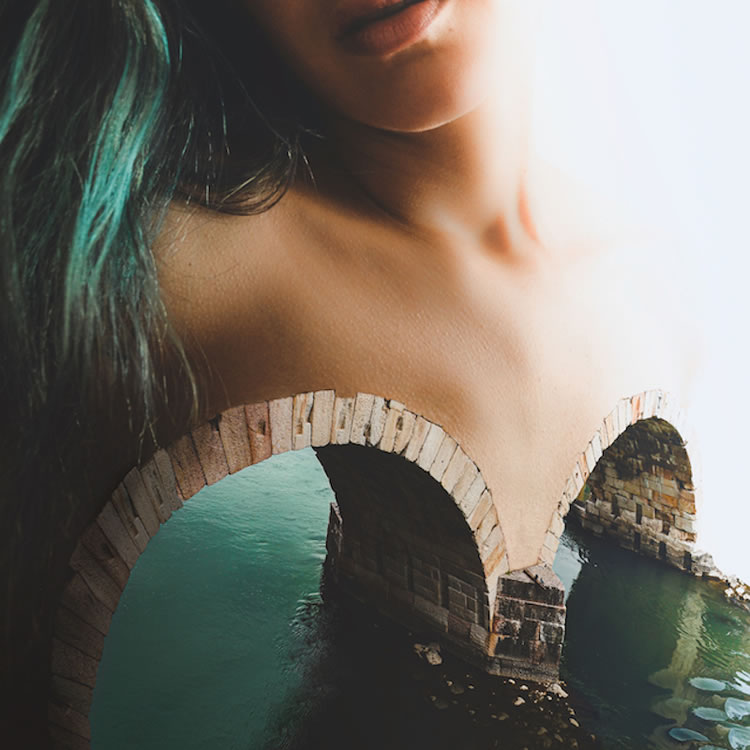
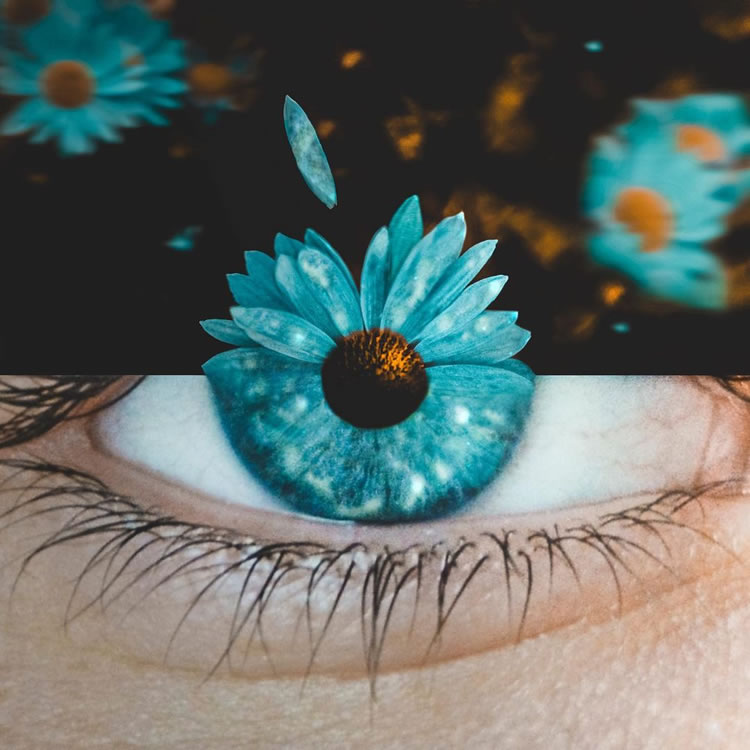
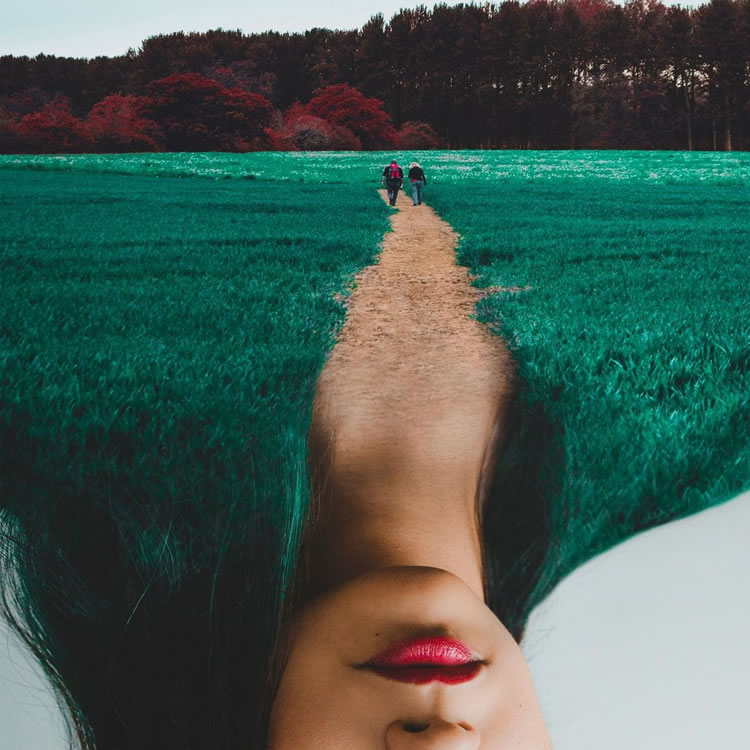
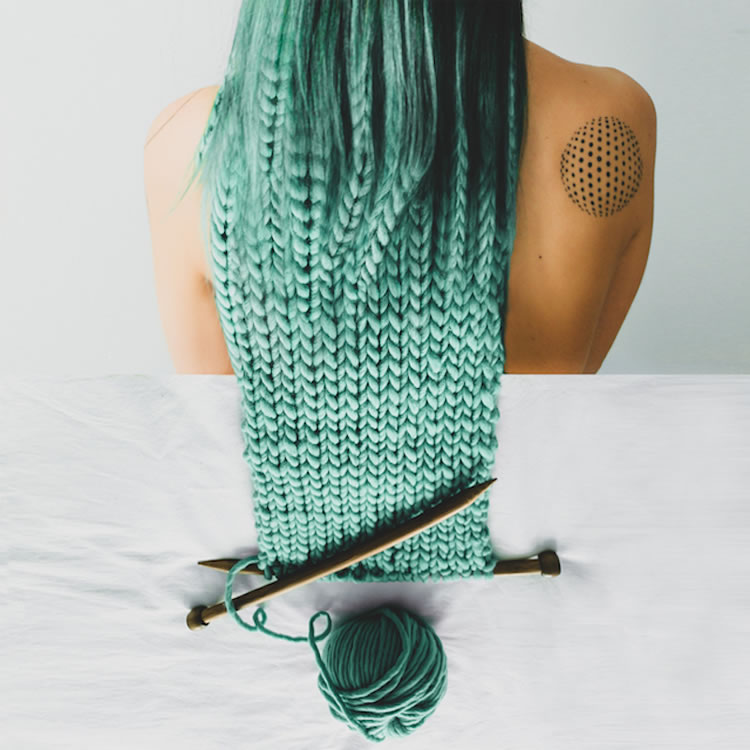
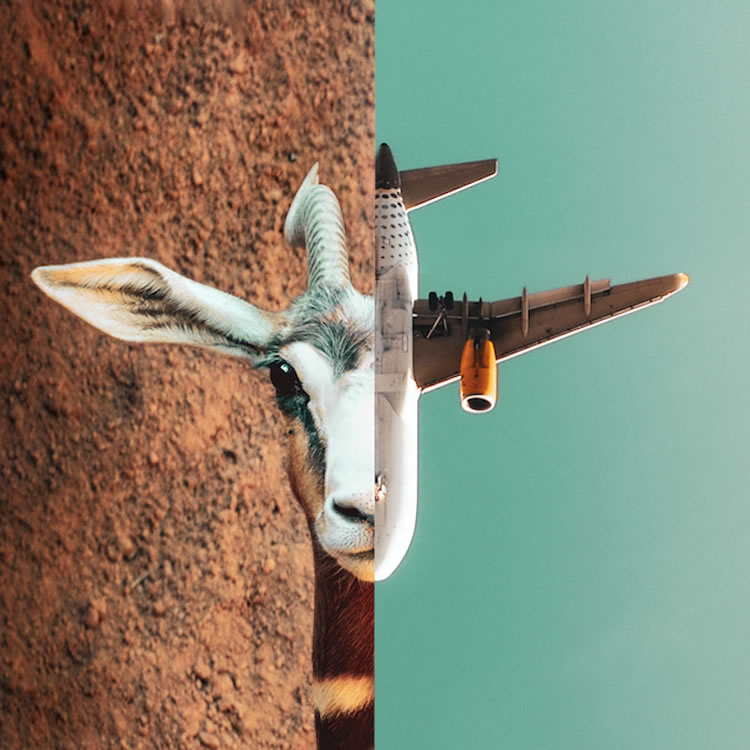
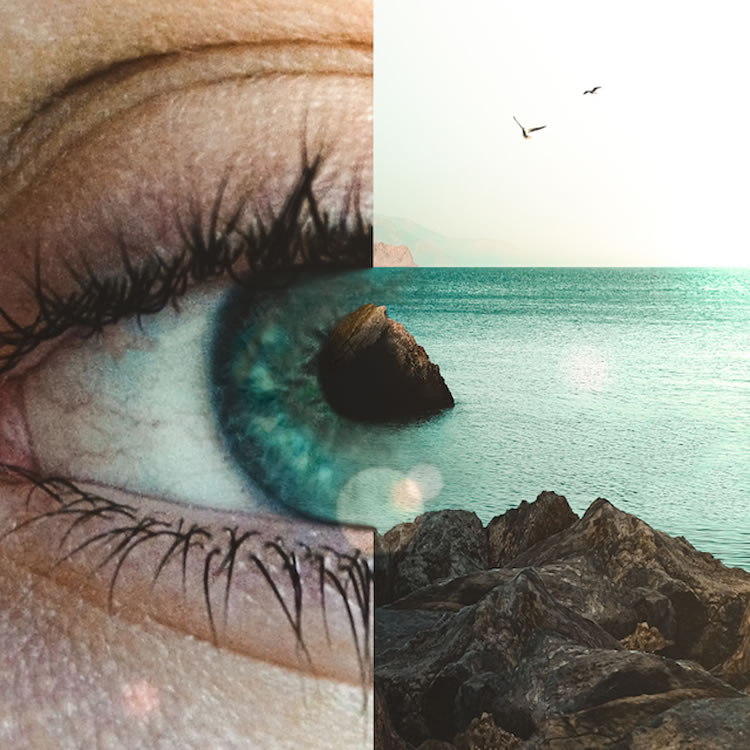
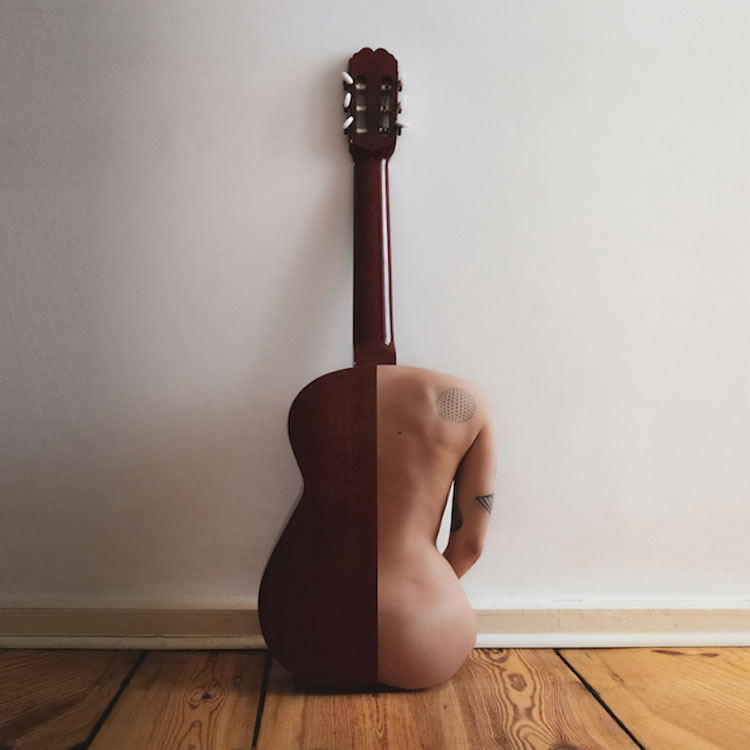
Photographer and artist Monica Carvalho combines similar objects into surreal photo manipulations. Monica is very passionate about finding similarities. From a young age, she had the fascination for magic tricks and illusionism.
She admired deeply the surrealists work and liked the infinite possibilities that the photography offers. She only uses her own original photography in her work, and says that her motto is to make the ordinary, extraordinary.
Check out some of her stunning work in the gallery below. Please check her more amazing work on Instagram account.
We asked Annie, the 14-week-old Cavalier King Charles Spaniel, what she liked best about crunchy fall leaves and she said
Submitted by James Osborne
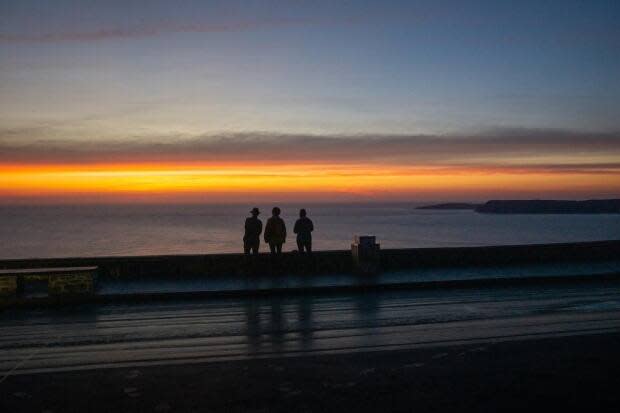
As the days get darker, we all look to seasonal comforts to keep ourselves bright and cheery, at least on the inside. Whether that’s hiking outdoors, staying under a blanket, or hitting up the bonfire with your buds, Newfoundland and Labrador has options.
If you’d like to send in a photo for next week’s gallery, scroll to the bottom to learn how.
Submitted by Jim Stacey
Submitted by Patty Brake
Submitted by Jordan Colson
Submitted by Angela Duke
Submitted by Rodger Rowsell
Submitted by Gloria Stone
Submitted by Kim Howell
Submitted by Gerard Hayes
Have a photo you’d like to share?
Here’s how to get in touch with us: email [email protected]. It’s a dedicated address just for photo submissions from across Newfoundland and Labrador.
Here’s what we need from you: your name, where the photo was taken and a caption that tells us what’s in the image. We encourage you to add any information you think our readers would enjoy!
We share the photos we receive here, and we might also use them on Here & Now each weeknight during Ashley Brauweiler’s weather segments, as well as on our Facebook page, our Twitter feed and on our Instagram account. And we always give credit. Providing a handle for Instagram would be appreciated!
Because of the volume of submissions we receive, we cannot respond to everyone.
We’ve seen some great images from the total lunar eclipse this week. But this one might top them all.
Astrophotographer Andrew McCarthy created this incredible composite image, showing the Moon in various stages of the eclipse throughout the night.
“The size and shape of Earth’s shadow is clearly visible here,” McCarthy said on Twitter. “These events are absolutely magical to witness and quite surreal.”
McCarthy witnessed and photographed the entirety of the eclipse from his backyard in Arizona. Besides the noticeable ‘band-aid’ shape of the image, if you look closely, you can see exactly how the Moon moved through Earth’s shadow throughout the eclipse.
The other striking feature of this composite is just how crisp, clear and detailed each image of the Moon is. How did McCarthy do it?
My finished shot from this morning’s total lunar eclipse. This image was captured by using two telescopes, one to capture intricate detail on the lunar surface, and one to capture the rich tones cast by Earth’s shadow across the disc. Go ahead, zoom in on it! pic.twitter.com/XpXcqihiId
“Overall, I shot around 150,000 images,” McCarthy told Universe Today. “My strategy was to first take photos using my c11 at the native 2800mm with the asi174mm’s fast but tiny sensor. I imaged the Moon in small segments capturing thousands of frames per segment, which were then sorted, stacked and sharpened, so when the panorama of the Moon was stitched together it had incredible detail.”
McCarthy said he did this three times throughout the night. Then, he used his Sony a7ii camera mounted to a 8-inch Celestron EdgeHD800 telescope at 2000 mm to capture the entire Moon with great resolution at each capture, which took around 500 photos throughout the night.
Then, these images were combined with a previously captured high-resolution photo of the Moon to provide incredible detail to create the final composite, which was assembled in Photoshop from these images.
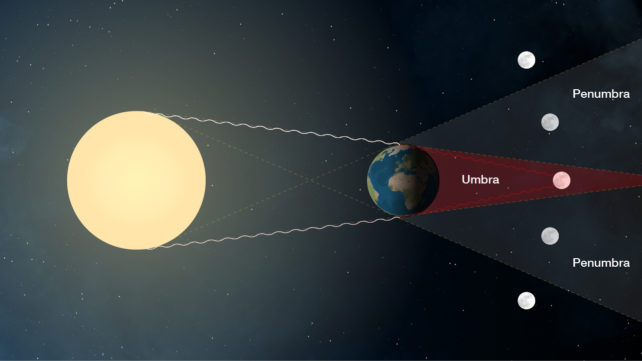
The geometry that creates a total lunar eclipse. (NASA)
McCarthy calls the photo “Shadows and Sunsets,” as during a total lunar eclipse, the Moon shines in the colors from all the sunrises and sunsets occurring on Earth.
The Moon looks reddish because Earth’s atmosphere absorbs the other colors while it bends some sunlight toward the Moon. Sunlight bending through the atmosphere and absorbing other colors is also why sunsets we see here on Earth are often orange and red.
Prints of this image are available in limited quantities on McCarthy’s website.
“The full-size image is nearly 190 megapixels, so it is insanely detailed and can print up really huge without losing detail!” McCarthy said on Twitter.
Support McCarthy on Patreon to download high-resolution versions of his photography. He said he knows this hobby is expensive, and requires gear to improve my images.
A composite image from this morning’s eclipse showing the moon in various stages throughout the night. The size and shape of Earth’s shadow is clearly visible here. These events are absolutely magical to witness and quite surreal. pic.twitter.com/mbakrEyCYl
“However as I got deeper into this hobby it became apparent this is my calling, so I am leaning on my patrons to help support me as I begin doing this full-time,” he says on his website.
McCarthy said he bought his first telescope in 2017 and became hooked on observing and astrophotography, saying that now his mission is to “connect people with the universe and to inspire a new generation of celestial explorers.”
He even moved to a new state to have a better view of the night sky.
“Making sure I can shoot events like this uninterrupted is part of the reason I recently moved to Arizona,” McCarthy explained.
“I constructed a simple observatory in my backyard which has two permanent piers inside it, allowing me to safely run equipment the entire night and easily close up at dawn (or during bad weather). While these were captured from home, I was prepared to travel across the country if weather didn’t look favorable.”
McCarthy has put together a great thread on Twitter, answering his most often-asked questions and suggesting what type of gear is needed to do the type of astrophotography he does.
This article was originally published by Universe Today. Read the original article.
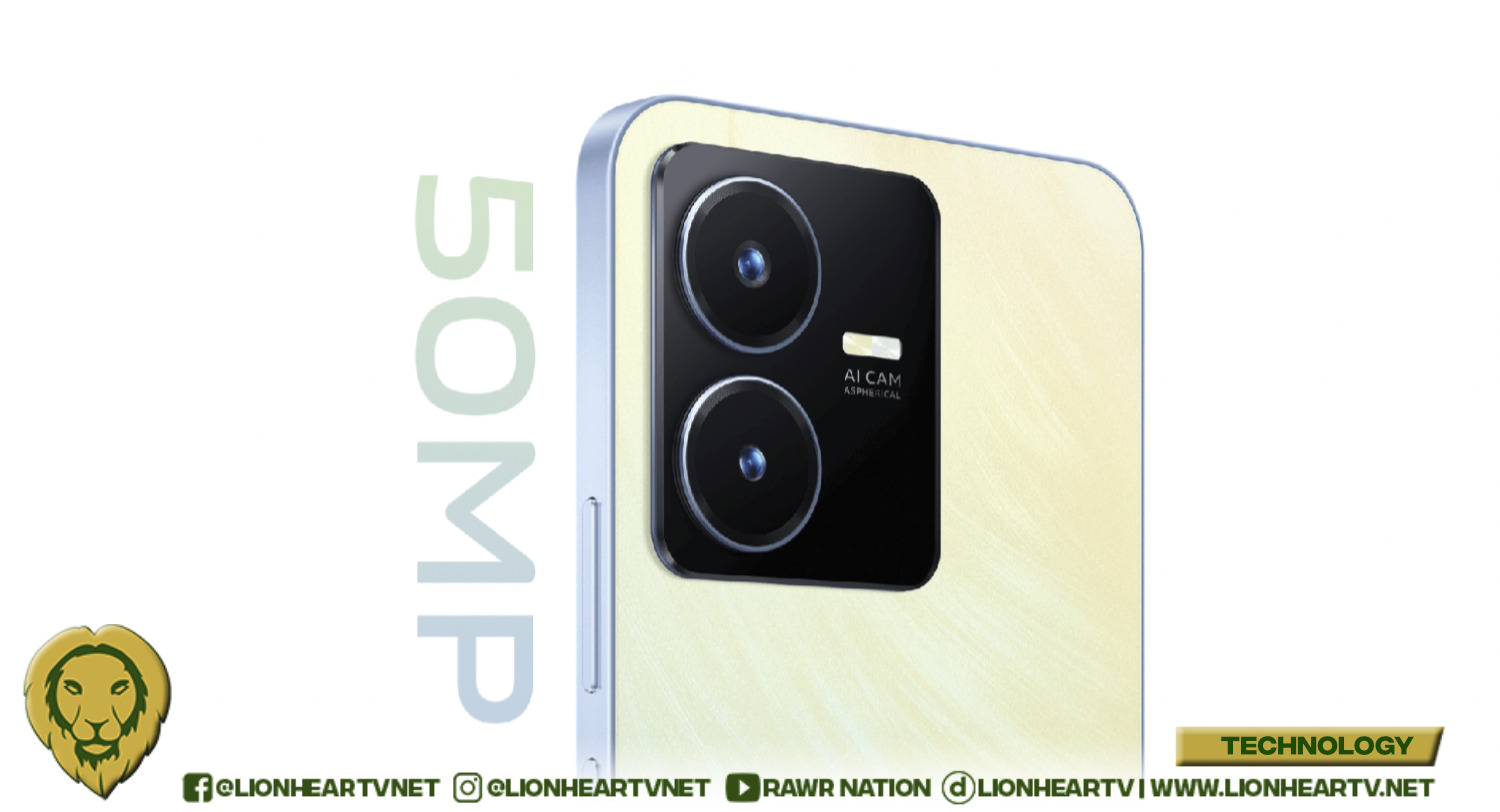
It is undeniable that almost everyone now carries a camera with them via their smartphone all the time. What’s more noteworthy is that these gadgets keep on improving with better specs and functionalities. Case in point: the vivo Y22s. It unapologetically flaunts supreme photography with its 50MP Super Night main camera, 2MP Macro camera, 8MP Front camera, and relevant features.
You’ve got the tool, but how about your skills? Are they at par with the ever-upgrading camera phone capabilities? If not, maybe this list can help. If you want to take more stunning snapshots with your mobile phone, here are a few tips and tricks to guide you.
1. Start with a clean lens
This may sound mundane and trivial, but most people don’t remember to do it. It is so easy to ignore the dust, dirt, and smudges that accumulate on your camera phone. So make it a habit to clean your lens before a shoot. You’ll be amazed how a quick wipe could produce crystal clear images.
2. Let there be natural light
Light is one of the most vital factors for any picture to look good, but it might be best to avoid using flash as it is still better shooting with natural light. It makes the images look great, pure, and clean. Photos taken during the golden hour look divine because of the hues and the soft, flattering effect.
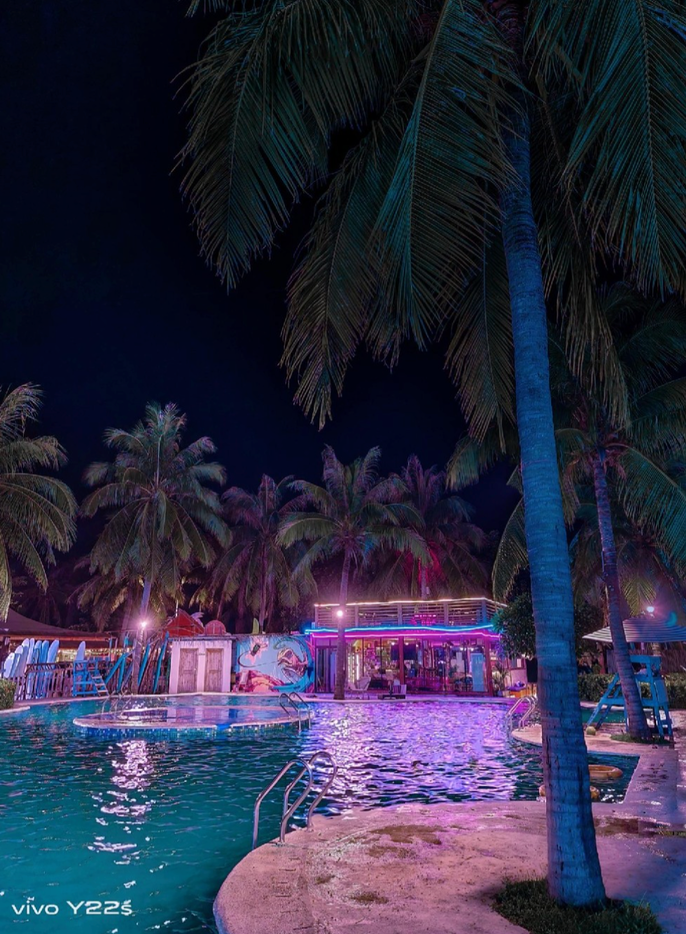
And if you shoot in low-light conditions or at night, this is where vivo Y22S’ Super Night camera comes in handy. It utilizes a large sensor that gathers light like a professional camera, delivering industry-leading 50MP high-definition images every time. You can most certainly relive the most significant and remarkable moments captured in photos with full vivid details. Meanwhile, the 2MP Macro camera highlights tiny and exciting gems hidden from your naked eyes, with a focus that draws as close as 4cm.
On the flip side of the smartphone, the 8MP Front camera shows your vibrant self no matter how bright or dim your surroundings are. The Super Night Selfie uses noise reduction technology and a selfie softlight band to generate a gentle light giving you a fresh looking selfie photo even after a long day at work.
3. Keep the focus
Because of technological advancements, mobile phone cameras can now take a hint at what you want to photograph. They smartly recognize faces and other main subjects in clear scenes. However, in more complex or less-than-ideal situations, a simple tap on the screen, on the point where you want the camera to focus, can be done to avoid blurry shots and get a sharp result. Making smartphone photography easier and more professional looking, the vivo Y22s is also equipped with Bokeh camera feature to capture the subject’s depth. When mastered, this trick can bring more life to photos and deliver a realistic image as seen by the naked eyes.
4. Get creative with your composition
Follow the rule of thirds and try to steer clear of placing your subject right in the center. Imagine breaking an image down into thirds (both horizontally and vertically—basically 9 even squares). Place the subjects in the intersections or along the lines of your photo to create a more balanced and fascinating composition.
Also, symmetry often does wonders and makes pictures more interesting. Using a natural frame, like a window, a doorway, or an arch, around your subject is also aesthetically pleasing. And especially for panoramic shots, straighten the horizon by turning on your camera grid to display a set of lines across the screen.
5. Experiment and edit your images
Getting good pictures from your phone doesn’t start and end with your camera. You can also utilize photo-editing apps to tweak your shots as you please. Thankfully, the vivo Y22S features Multi-Style Portrait mode for both the rear and front cameras. This is specifically designed to include face beauty, bokeh, among many styles.
For the rear camera, you may choose among natural, vintage, northern lands, fashion, summer party, Japanese style, monochrome, silver salt, and wet settings. On the other hand, the front camera, fresh, texture, 1980s, rococo, gray, film, holiday, Kyoto cherry, and Tokyo style are available for you to use.
Take unlimited shots and pick the best later
Some of these guidelines are unbelievably basic, while some techniques may need more time for you to get used to. The key to making all this work perfectly is to practice. Take as many photos as you can. Study the results and take notes on how they can be improved. Fortunately, the vivo Y22s won’t let you down with the amount of files you can save as it boasts up to 16GB Dynamic RAM and 128GB memory that supports 1TB expansion. There’s no need to worry anymore about great pics going to waste.
Allow some time to practice these tricks and find yourself mastering smartphone photography in no time. The vivo Y22s got your back should you want to spend the day refining your photography skills, thanks to its 5000 mAh battery plus an 18W FastCharge support to quickly get back on track to learn more and find your style. Of course, it helps greatly to master what your own camera phone can do, too. After which, you’ll be delighted to see significant improvements in your pictures you never imagined possible.
Officially available nationwide, the vivo Y22s comes in two variants: vivo Y22s 8+128GB sells for only Php 12,999 while the vivo Y22s 4+128GB variant retails at Php 10,999. vivo fans can also avail for installment plans via Home Credit and credit card options. A purchase of the vivo Y22s 8+128GB variant comes with an exclusive limited edition bluetooth neckband earphones until supplies last. Be the first to find out more about the vivo Y22s by following vivo’s official channels on Facebook, Instagram, YouTube, Twitter, and TikTok.
The world of wildlife photography is an interesting one. First, there are the difficulties associated with actually taking the photographs. In the days when I first got started (back at the end of the 20th century) the difficulties were almost beyond imagination. Imagine a scenario in which there was no such thing as a digital camera. Imagine a scenario in which you may wait for hours until a species or an event finally happens, you take a photo of this species or event, but you don’t know if you “got it” for several days. Such was the case back in the days of film cameras.
Today, with digital cameras, you can take a photo and know almost instantly if you “got it,” or not. Regardless of the wait time (seconds or days) there is still the spirit-crushing anguish associated with the knowledge that the event you attempted to capture on film may not occur again for another year, or even worse, never. Missing a photo can be devastating.
There is also this notion of “authenticity.” What are the rules that govern a photo’s acceptability in different publications? What are the taboos that should be avoided in the world of wildlife photography? Well, the first one (the big one) is pretty reasonable: No photos of wildlife in captivity. It doesn’t matter how beautiful the animal is, nor how “natural” the setting may appear, you just don’t do it. This suggests that the notion of “wildness” has to be respected and maintained by the people trying to represent it. Seems very reasonable, right?
Then there is the notion of background. Unless the content of the story with which a particular photo is associated specifically mentions the specifics of a particular photo’s qualities, it is usually desirable to avoid including certain manmade objects in the background. Again, there seems to be a certain chauvinism against humanity that is associated with the notion of wildness; the idea that somehow, if any trace of humanity is included in a photograph, then it is somehow tainted. Of course there are exceptions to every rule. A bird nest inside an old rusty mailbox might be more desirable than the bird nest by itself, if you know what I mean.
So this brings us to an examination of the photos that I provide with my columns. What sort of photos are acceptable and what sort are not? Are the rules different for me, compared to the rules that might be imposed on a photographer for National Geographic magazine? The inescapable reality to this question is a resounding yes. I can get away with things in this column that I could not get away with in most magazines and it all comes down to context.
The focus of my column has always been the nature that you can experience in your own neighborhood and your own back yard. Over the years this has included the theme of backyard birdfeeders and this is especially true when winter rolls around and the bustle around birdfeeders increases. I am allowed to take photos of birds at feeders because I am specifically trying to show you how to identify the birds that may come for food. And let’s face it, you could wander around in the woods for hours, days and weeks without seeing the sort of activity that you can observe at a backyard birdfeeder in an hour or two.
As a result, I can use photos that have obvious artifacts of human civilization in the background. The railing of my deck has been featured in my photos more times than I care to count. The different feeders that I use have also appeared so predictably that I have no idea of the actual numbers. But even I still endeavor to capture an image of a backyard bird that is taken in a more “natural” setting whenever possible. This week’s photo is a perfect example.
I was sitting in my Thinking Chair on that unusually warm weekend at the beginning of November and I was taking photos of all the birds that were gathering around me. The only reason that they were congregating in my vicinity was because I had put out food. In fact, I do this so regularly that the birds are often waiting for me before I even arrive. Once the food is out, the level of activity grows as the word spreads and it is always interesting to see how a group of chickadees can attract the attention of other birds.
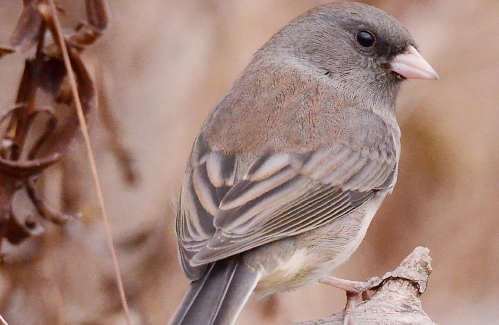
So it was that a dark-eyed junco (Junco hyemalis) happened to appear on the fringes of the day’s crowd. Curious about all of the commotion, the bird quickly saw that there was food available and though it was understandably shy at first, it eventually joined in and got some breakfast. I happened to snap this photo of the bird as it sat and assessed the safety of the situation and in so doing I captured a wild bird in its wild habitat; perhaps the finest photo of a junco that I’ve taken in many years.
But here’s the thing … later in the winter this same bird may visit my deck to look for food. In fact, every day this same wild bird may spend hours of its life around the feeders on my deck as it tries to survive the winter. So doesn’t that make my deck the “natural” habitat of this wild bird living its wild life? Clearly the answer is yes, but there still remains a certain authenticity associated with a photo with a “natural” background. Fortunately, I think we all just want to see the birds wherever and whenever we can.
Bill Danielson has been a professional writer and nature photographer for 25 years. He has worked for the National Park Service, the US Forest Service, the Nature Conservancy and the Massachusetts State Parks and he currently teaches high school biology and physics. For more in formation visit his website at www.speakingofnature.com, or head over to Speaking of Nature on Facebook.
The best power banks can power our devices in any location. We expect more and more from our electronic devices when we’re out in the field. An astronomer or astrophotographer’s kit bag will feature an array of electronic devices like headlamps, lens heaters, GoTo Mounts and star trackers. Even smartphones are used for star-tracking apps and remote shutters. None of these things hold their charge forever, and no one wants to cut their observation session short because they’ve run out of power.
This is where power banks come into their own. We’ve scouted the market for the power banks that we think are most appropriate for astronomers and astrophotographers.
Given that such activities occur at night, it’s dark, we don’t want to damage our night vision and we’ll often need multiple devices charging at once. It’s good to know how much power is left using an accurate power indicator and that the power bank should to continue to operate reliably in cooler, possibly damp conditions.
We also need something that charges up quickly and is a good size and weight for carrying to and from dark skies. Of course, we need enough capacity in the power bank to see us through our night(s) skywatching. Additional in-built functionality such as a LED torch or a handwarmer is a bonus.
Here’s our round-up of all the best power banks for astronomers and astrophotographers. Be sure to also check out our other guides to the best headlamps for astrophotography, best star trackers for astrophotography and discover what equipment do you need for stargazing in a city?
Best power banks in 2022 for skywatchers and astrophotographers
Why you can trust Space Our expert reviewers spend hours testing and comparing products and services so you can choose the best for you. Find out more about how we test.
(Image credit: B&H Photo)
Explore Scientific 8300mAh Power Bank with Red LED Flashlight
Made with the astronomer in mind, power your off grid all night skywatching sessions
Specifications
Capacity: 99.6Wh/ 8300 mAh
Output ports: USB Port 5 VDC, 2A 12 VDC, 6A
Charging time: 6 hours max
IP rating: None
Weight: 635g
Reasons to buy
+
Operates in extreme temperatures
+
Designed with astronomers in mind
+
Red LED Flashlight built-in
Reasons to avoid
–
Charge one device at a time
–
Brick-like
–
No cables supplied
Designed with the astronomer in mind, the Explore Scientific USB Power Bank with Red LED Flashlight will ensure you have enough power to see your electronic devices through the night. The integrated LED with red cover will ensure you can see through the night too. It won’t light up vast areas like some of the best headlamps for stargazing but it will allow you to read star charts or locate knobs and buttons to tweak your astro setup while keeping your valuable night vision intact.
This device is by no means as ‘sleek’ as some of our other picks. It wears a substantial rubber armor that protects the electronics from minor impacts and seals the power switches from dirt and moisture ingress. It can operate in temperatures from -4 to 140F (-20 to 60C), so there is no need to worry about protecting it from extreme temperatures.
The flashlight is turned on and off with a tactile toggle switch and there is a two-point attachment point so you can hang the device from somewhere convenient, say your tripod frame. The five LED indicators show the amount of power that’s left so you don’t get caught out.
(Image credit: Tantse Walter)
A 3-in-1 power bank, hand warmer and flashlight to help you cope in any situation while stargazing
Specifications
Capacity: 6000 mAh
Output ports: 1 x USB Type A
Charging time: 6-12 hours
IP rating: IP65
Weight: 6.2 oz (177 g)
Reasons to buy
+
Multi-functional
+
Extremely rugged
+
Cheaper than catalyst hand warmers
Reasons to avoid
–
Micro-USB charging (USB-C preferred)
–
Smaller capacity than comparably priced models
Not only is the Celestron Elements FireCel Mega 6 a 6000mAh power bank, capable of approx 2.5x smartphone charges or 4.5x sport camera charges, but it is also an ergonomic and practical hand warmer and four-mode flashlight.
It is IP65-rated water resistant, dustproof and drop tested, making it a fine outdoor companion ready for any astro adventure. Should you encounter any problems, you’re covered by Celestron’s two-year warranty.
The red LED function is ideal for adjusting your stargazing setup or reading maps while preserving your night vision. It also has white LEDs for when night vision preservation isn’t essential.
In our Celestron Elements FireCel Mega 6 power bank review we found that the hand warmer was extremely effective and it is capable of giving your hands up to eight hours of continuous heat. The ergonomic aluminum body helps enhance heat transfer across your whole hand. Unlike catalyst hand warmers, there is no smell (from burning fuel).
The FireCel Mega 6 ships with a paracord strap and a carabiner to attach to your keys, belt, tripod etc. It also comes with a soft carry bag and a USB charging cable. The blue LED battery indicator helps you track how much power you have left.
If you need more capacity, Celestron also has the Elements ThermoCharge 10 (opens in new tab), which, for a few dollars more, gives you 4000mAh more, and an additional 1A USB-A port but doesn’t feature the flashlight function.
(Image credit: Amazon)
Celestron PowerTank Glow 5000 Red Torch Powerbank
A handy 2-in-1 red LED flashlight meets 5000 mAh 5V DC power bank
Specifications
Capacity: 25 Wh/ 5000 mAh
Output ports: 1 x USB Type-A
Charging time: 0-3.5 hours
IP rating: IP65
Weight: 179g
Reasons to buy
+
Three levels of LED brightness
+
Multi-purpose device
Reasons to avoid
–
Not for seeing anything other than close-up
–
Quite expensive for what it is
As we discussed in our best headlamps buying guide, using a red light rather than a white one is crucial for preserving your night vision, and while in that guide we give various hand-free lighting options, the fact that this small red LED torch, with three levels of brightness, doubles as a 5000mAh power bank, it would make a fantastic gift for a newcomer to astronomy or astrophotography and it is a handy bit of kit to keep in your bag.
It ships with silicone mount straps to attach the device to somewhere useful, like your tripod leg. It also comes with a wrist strap.
It comes with a minimum of 500x charge cycles and has overcharge protection for maximum longevity.
This is a product for a beginner or someone who doesn’t need the best of the best kit, it does what it’s supposed to but might have a limited lifespan the more you develop your skywatching prowess.
(Image credit: Amazon)
BioLite Charge PD 20/40/80
A compact, no frills and FAA carry-on-compliant, reliable power bank
Specifications
Capacity: 74Wh/ 20,000 mAh
Output ports: 1 x USB C-PD, 2 x USB A
Charging time: 5 hours by 18W USB C-PD
IP rating: None
Weight: 465g
Reasons to buy
+
Quick Charge 3.0 Protocol (fast charging)
+
Portable and durable
+
Reliable
Reasons to avoid
–
No % charge indicator
–
Multiple cables needed (USB-C to USB-C and USB-A to everything else)
–
No water resistance
BioLite has three versions of ‘Charge’ power banks. Here we’ll look at the Charge 80 as it is the most powerful with the biggest charge capacity.
BioLite is best known for creating affordable and ruable products for life outside and off-grid. So it’s no surprise the BioLite Charge 80 PD fits this bill. Moreover, we’re fully on board with BioLite’s mission to provide 20 million people with clean energy and avoid 3 million tons of CO2 emissions by 2025. By purchasing a BioLite mission, you are, in part, helping with this mission.
It is rugged, and simple to use, and the capacity-to-size ratio is spot on. It has enough capacity to charge multiple devices, multiple times, over a couple of days. It can charge the BioLite HeadLamp 425 (which features on our best headlamps for astrophotography list) approximately 16 times. It is produced with a rubberized finish, with a hard orange plastic casing where the ports sit.
One of the standout features is the Quick Charge 3.0 Protocol which is needed to activate fast charging modes in compatible devices.
We don’t think an LCD screen showing exact numbers is necessary. It has an LED indicator which does what it needs to. Four bars let us know how full it is (25%, 50%, 75% or 100%).
The Charge PD ships with a USB-A to USB-C cable, but you’ll have to supply your own USB-C to USB-C cable or something with multiple ends to be more of a universal fit.
The operating temperatures are -20C to 40C, so unless you’re going to the most extreme environments, you won’t have any problems with it not working, though you’ll need to keep it somewhere dry.
(Image credit: Amazon)
Anker PowerCore+ 26800 with Quick Charge 3.0
A premium, colossal capacity power bank
Specifications
Capacity: 26,000 mAh
Output ports: 3 x USB Type A
Charging time: 4 hours
IP rating: None
Weight: 591g
Reasons to buy
+
Huge capacity
+
A good choice for large devices
Reasons to avoid
–
Large
–
Expensive
–
No IP rating
The Anker PowerCore+ 2600 is one of the more cumbersome power banks in this guide (7 inches long and 3 inches wide). That said, Anker is one of America’s Leading USB Charging Brands, and we are big fans of Anker. We can happily vouch for the reliability and performance of their products, so if you’re not too concerned about having the smallest or lightest power bank, don’t let the larger size stop you.
It doesn’t offer much in the way of features — there is no flashlight or handwarmer, but this is an extremely high-capacity power bank that can charge three devices at once. It charges from empty to full in just over four hours with the included Qualcomm Quick Charge wall charger.
It has intelligent PowerIQ technology, which identifies the connected devices and delivers the optimum high-speed charge to all devices.
It has ten tiny LEDs that indicate its level of charge. Before March 2022 the device shipped without a wall charger or cables, so we are pleased to see that post-March 2022, a USB-C to USB-C cable and a wall charger are included as standard, as is a no-fuss 18-month warranty.
(Image credit: Amazon)
Zendure SuperTank Pro 100W
Massive capacity power bank encased in an aluminium shell with an informative OLED screen to boot
Zendure is one of the fastest-growing EnergyTech start-ups with a mission to make energy available and accessible.
The vast capacity Zendure SuperTank Pro 100W power bank is about as big as you can legally carry in your hand luggage on a flight. It is encased in anodized aluminum with ABS plastic, which gives it a rugged, but premium feel.
The Zendure SuperTank Pro 100W charges in a phenomenal 105 minutes (in lab conditions), so perfect if you’re planning a last-minute night of stargazing. You can power four devices at the same time with a total 138W output. Have your lens warmer, headtorch, star tracker and smartphone all plugged in simultaneously. Amazing.
The OLED screen gives you real-time information about your power usage and remaining charge, meaning you can plan and adapt your setup accordingly.
The downside of this power bank is that there is no USB-A port. While USB-C is becoming the standard, many devices still require USB-A charging. Adaptors are an option, but this adds to what you must remember to put in your kit bag.
While the initial financial outlay is relatively sizeable, the promised firmware updates should keep the power bank relevant.
The SuperTank Pro 100W has a two-year limited warranty for added peace of mind.
(Image credit: Amazon)
Otterbox Fast Charge Power Pack (15,000mAh)
Take this fast charging, rugged power bank with you in any weather
Specifications
Capacity: 55.5Wh/ 15,000mAh
Output ports: USB-C, USB-A, Qi Wireless 10W
Charging time: 4 hours approx
IP rating: IP54
Weight: 0.99lbs / 450g
Reasons to buy
+
Durable with drop protection
+
Limited lifetime warranty
+
Supports wireless charging
Reasons to avoid
–
Heavy for it’s size
–
Basic LED power indicator
The Otterbox 15,000mAh (also available as 10,000mAh) is a reliable outdoor companion. At 450g, it’s pretty heavy for its pocketable size, but that is largely down to the dense, protective rubber shell. It is waterproof and drop-proof, giving the most clumsy or careless skywatchers peace of mind.
A basic LED indicator shows when the power bank is charging, and when it is fully charged. It ships with a 150mm long USB-A to USB-C cable. The device delivers up to 18W Fast Charge. There is also an easy alignment QI wireless indicator pad for wireless charge-compatible devices.
The IP54 rating means it is totally protected from dust ingress and allows for some water ingress. No need to worry about the elements.
It comes in three colors; Twilight Black, New Blossom Pink and White Sands. The latter two make them easier to see when amongst predominantly black photography gear.
(Image credit: Amazon)
Celestron ThermoTorch 3 Astro
A handy 3-in-1 power bank, hand warmer and red flashlight for night time adventures
Specifications
Capacity: 3550 mAh
Output ports: 1 x USB Type A
Charging time: 2 hours
IP rating: IPX4
Weight: 10.58 oz (300 g)
Reasons to buy
+
Multi-functional
+
Rechargeable (no external batteries)
+
Two year warranty
Reasons to avoid
–
Micro-USB Charging (USB-C preferred)
–
Low capacity power bank
Another model from Celestron, first and foremost, it’s a night vision-preserving red flashlight. However, as with the FireCel MEGA 6, it also operates as a hand warmer and low-capacity power bank.
Although it has a fairly small capacity compared to other models in this guide, it has enough juice to keep your phone and other small devices charged for a night of stargazing. The hand warmer function provides up to 4 hours of continuous heat, and can be used with the torch simultaneously. The internal battery charges within two hours, so it’s ideal for last-minute adventures.
There is also a white LED version of this model, so make sure you choose the Astro version for the red light capability.
(Image credit: Zendure)
Zendure SuperBase Pro 2000
A serious multi-output power station to keep all of your devices charged for days
Specifications
Capacity: 2096Wh
Output ports: 6 AC ports, 2 USB-C ports, 1 car charger port, 3 DC output ports
Charging time: To 80% (recommended in 1 hour)
IP rating: None
Weight: 46.5lbs/21.2kg
Reasons to buy
+
Perfect for multi-day trips
+
Can be used as an emergency power source
Reasons to avoid
–
Very expensive
–
Heavy
–
No USB-A port
With a luggage-inspired design with a telescopic and fixed handle mounted on industrial-grade wheels, this 47lb power station is a serious bit of kit. It has 2096Wh Capacity with 2,000W Output (that can be boosted to power up devices that typically need 3000W using the AmpUp feature).
While it’s obviously not something you can pop in your backpack and trek to a dark sky area with, it is an ideal companion for multi-day/night off-grid bouts of sky-watching and camping.
You will have absolutely no problem charging your devices for several days — laptops, camera gadgets, drones, plugging in a mini-fridge or heater, this thing can even give an electric car enough power to drive five miles.
The body is reinforced with a shock-resistant outer shell and it has a reinforced interior. Its optimum operating temperature is between 59°F to 95 °F (15°C to 35°C) but it will still work — but drain quicker — from -4°F to 14°F (-20°C to 40°C). It won’t accept a charge below freezing and, unsurprisingly, you can’t get it wet.
When not used in astronomy and astrophotography, this can be an emergency backup power source in your home.
Like the rucksack-friendly SuperTank Pro 100W, this product comes with a Zendure two-year limited warranty.
Best power banks in 2022: What to look for
From key-ring-friendly portable devices to see you through the night and give your devices a few charges, to huge capacity power stations capable of charging an electric car, hopefully, something on this list will make it to your kit bag.
Not all power banks are created equal, however. If it’s a pure power bank you need to charge devices then by all means find the best value, highest capacity power bank available so that you have the juice when you need it. But for astronomers that spend a lot of time setting up in the dark an in-built flashlight might be handy indeed. Especially if you can find one with a red light so as not to disturb night vision while stargazing.
Additional comforts come in the form of hand-warming capabilities for skywatchers that will be observing in colder climes. This can be more cost-effective than catalytic hand warmers so during the cost of living crisis it may make more economical sense and save you money. But be conscious that this will also use power that would otherwise go into charging devices.
The capacity of batteries is indicated as XXXX mAh (milliampere/hour). The higher the number, the bigger the capacity — the more power you can draw from it. A higher mAh usually means a bigger and bulkier device. So it’s important to find a good balance dependent on your needs.
If you’re going to be traveling on a plane with your power bank and plan to have it in your hand luggage, it must not exceed the 100Wh (27, 000mAh) limit set by the Federal Aviation Administration, something else to bear in mind.
All of the power banks listed here have been selected as being good value-for-money with features that are especially helpful to astronomers and astrophotographers above anything else. We will review and update this guide often and keep an eye out for discounts and deals to help you save money.
How we test the best powerbanks for skywatchers and astrophotographers
In order to guarantee you’re getting honest, up-to-date recommendations on the best power banks to buy here at Space.com we make sure to put every power bank through a rigorous review to fully test each device. Each power bank is reviewed based on a multitude of aspects, from its construction and design, to how well it functions as a power bank and its performance in the field.
Each power bank is carefully tested by either our expert staff or knowledgeable freelance contributors who know their subject areas in depth. This ensures fair reviewing is backed by personal, hands-on experience with each power bank and is judged based on its price point, class and destined use.
We look at how much capacity each power bank has, whether it includes a built-in flashlight and if there’s a red light option for night vision protection and even whether they have in-built hand warming capabilities.
With complete editorial independence, Space.com are here to ensure you get the best buying advice on power banks, whether you should purchase a device or not, making our buying guides and reviews reliable and transparent.