Complete guide to outdoor light in photography

[ad_1]

August 1, 2022

Understanding light is an essential skill when it comes to mastering your photography, and in this complete guide to outdoor light, professional photographer David Noton guides us through the importance of light in photography, as well as some of the best times to shoot. 


Welcome to the AP Improve Your Photography Series – in partnership with MPB – This series is designed to take you from the beginnings of photography, introduce different shooting skills and styles, and teach you how to grow as a photographer, so you can enjoy producing amazing photography (and video), to take you to the next level, whether that’s making money or simply mastering your art form.

Improve your photography from AP and MPB

Each week you’ll find a new article so make sure to come back to continue your journey, and have fun along the way, creating great images. If you’ve found these articles helpful, don’t forget to share them with people you know who may be interested in learning new photography skills. You’ll find a whole range of further articles in this series.


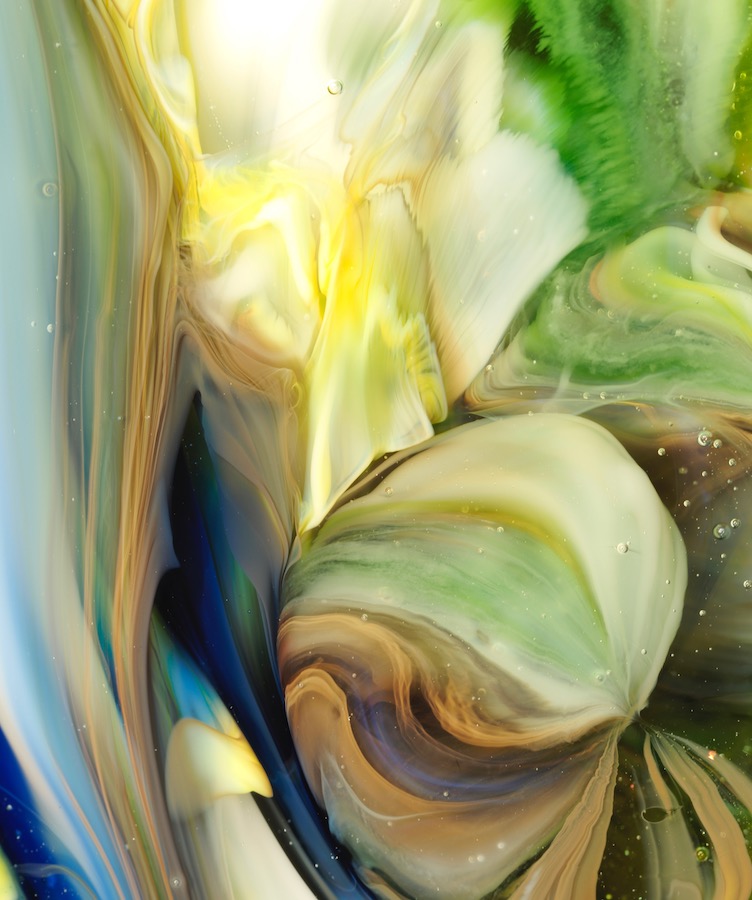
My college lecturer used to assert that a good photographer could make a lump of coal look appealing with the skilful use of lighting. I never felt the need to prove his point, but my subsequent decades behind the lens have convinced me he was right. Even the Grand Canyon can look uninspiring under the flat grey light of an overcast day, whilst a view of some flat Essex fields can be transformed into a breathtaking vision by evocative dawn light.

What is the importance of light in photography?

Light is our raw material; the building block that makes or breaks our pictures. In fact, lighting is so important to the finished image that I often feel I photograph the light more than the subject.

We photographers need to see the light, and I mean really see it, feel it and understand it in all its endless forms and subtleties. When contemplating a scene the first thing to do is consider where the light is coming from. And beyond seeing what is happening now we need to predict the light that will best illuminate the picture we have in mind at different times of the day and year.

Anticipating what could happen with the light in a few minutes, an hour, later the same day, the next morning, in a few months or next year is a fundamental photographic skill. It comes with experience and is the product of every photographic vigil, productive or otherwise. Standing by the tripod watching the light paint a landscape is never time wasted.

We have the obvious time options – daylight, dawn, dusk or night. Beyond those we have the directional aspect to consider; do we want the main light to come from the front, back, side or above the subject, or a combination? Then there’s the nature and colour quality of the light: high or low, hard or soft, warm or cool? In truth, most lighting situations in the natural world are a subtle fusion, and the permutations are endless.

Guide to outdoor light – Colour temperature

All light sources have a colour temperature, expressed in Kelvin. The light our planet receives from the sun is constant, but as the Earth rotates what we receive on the surface goes through radical daily transformations.

What are the different types of light called?

  • Daylight
  • Golden hour
  • Twilight
  • Blue hour
  • Night

All have their appeal, but atmospheric conditions, the weather, our position on the globe and the time of year are all factors affecting the nature of the light painting the landscape. That’s why, after a lifetime behind the lens, I still feel I’m only beginning to appreciate the endless subtleties of natural light.

Take any photo group out at sunset or sunrise and most will be transfixed by the sun peeping over the horizon. It takes mental effort to turn away and observe the far more subtle lighting effects playing on the landscape and sky to the north or south, but that’s where the photographic gold dust lies.

Seeing it is one thing, predicting it is something else. Our ability to pre-visualise these lighting situations is what sets photographers apart. It’s a skill to be honed, so read on for details on how to shoot using various types of natural light.


Guide to outdoor light – Daylight

Outdoor light Chocolate Hills

Chocolate Hills, Bohol, The Visayas, Philippines. Canon EOS 5D Mk II, 24-70mm, 1/40sec at f/5.6, ISO 100

At noon the overhead sunlight has had the shortest passage through the atmosphere so it is neutral in colour balance; what we term daylight, with a colour temperature of 5200K, give or take a few Kelvin. Generally speaking the hard vertical light of midday is the least favourable to work with.

Shadows are hard, contrast is high; time was I wouldn’t touch the camera after 10am and before 4pm. But ideas change and I’m confronting some of my more entrenched assumptions. Sometimes the skies in the middle of the day have billowing cumulonimbus and streaking cirrus clouds that beg to be captured.


Guide to outdoor light – The golden hour

Outdoor light Loch Maree and Slioch

Loch Maree and Slioch, Wester Ross, Scotland. Canon EOS 5DS R, 24-70mm, 1sec at f/11, ISO 100

The contrast between the warm highlights and the cool shadows enhances the scene with the complementary colours of orange and blue. The last golden light of a crystal-clear evening after a rain shower is perfect for revealing all the form, texture and scale of a landscape. How soft the light of the golden hour is depends on the clarity of the atmosphere. Light that is too soft can be too insipid for big views but perfect for details.

When is the golden hour in photography?

The golden hour is the “hour” just before sunset, or just after sunrise, known as the golden hour, or sometimes the “magic hour” and gives a warm glow to objects in your scene lit by this light. You can see it clearly on light buildings, where the orange contrasts beautifully with the blue sky. The length of time this lasts will change depending on the time of year, so may last less time than a full hour.


Guide to outdoor light – Night photography

Outdoor light Milky Way

The Milky Way and night sky over Lago Roca, Patagonia. Canon EOS -1D X, 14mm, 20 secs at f/4, ISO 12,800

The night sky is an enticing subject, and we have the ability to capture it in all its glory. Including a landscape in the scene as well as being in the right place at the right time takes planning, and a truly clear night is essential. The capability of modern DSLRs to work with minimal noise at high sensor speeds makes this possible.


Guide to outdoor light – Twilight

Outdoor light Malham Moor

Malham Moor, Yorkshire Dales at dawn. Canon EOS-1Ds, TS-E 24mm, 5 secs at f/13, ISO 100

Minutes before the sun rises and after it sets, the light reaching Earth goes through some great transformations. Whilst direct rays are absent we are still bathed in twilight from the sun below the horizon. That twilight reaches us as the last rays of sunlight bounce off the bottom of clouds and down into the landscape, and as residual ambient light that the atmosphere has scattered. The two combine, which is why this time of day is so special and worth rising before the crack of dawn or lingering as dinner beckons to witness.

When is twilight in photography?

Twilight happens in the minutes before the sun rises, and the minutes after the sun sets, just after the golden hour. As the amount of light reduces, you’ll be able to see the colour of the scene change before your eyes.


Guide to outdoor light – The blue hour

Outdoor light, dawn at Loch Maree

Dawn, Loch Maree, Scotland. Canon EOS 5DS R, TS-E 24mm, 6secs at f/16, ISO 100

The residual ambient half-light that either brightens as dawn approaches or dims as dusk settles has had all of the warmth stripped from it after being bounced and scattered through the atmosphere. Its colour temperature is sky-high, well in excess of 10,000K, resulting in a very blue light, and virtually non-directional. This cool monochromatic twilight is a favourite for those hooked on seascapes with slow exposures of swirling water. It’s also the perfect light for night shots of illuminated landmarks, when the artificial lights of our towns and cities perfectly match the lingering tones of the twilight sky.

When is the blue hour in photography?

The blue “hour” is again, not necessarily a whole hour long, depending on the time of the year (and where you are located). It happens after sunset, and before sunrise, and covers the scene with a blue light. As there isn’t much light, it can stretch your camera’s low-light performance, but can give your images a beautiful look that’s different to the norm.


Guide to outdoor light – Direction of light

With such wide discrepancies dependent on our location when planning a shoot we need to know when the sun is due to come and go, and where in the sky it will rise and set. I have to admit I rely on experience, but it pays to be precise. Apps such as The Photographer’s Ephemeris and PhotoPills are handy, but I’m cautious of relying on them. We still need to ascertain which direction we want the light to be coming from to paint the landscape best – front, back, side or above.

Side lighting

Outdoor light, Malham, Yorkshire Dales

Late-afternoon cross lighting reveals all of the detail and form in the landscape at Malham in the Yorkshire Dales. Canon EOS-1DS Mark III, 70-200mm, 1/6sec at f/11, ISO 100

Side lighting is my favoured default for landscape work. The low rays of a rising or setting sun slanting across a scene reveal every shape, texture and contour in the landscape. Shadows provide strong shapes and every detail from the poppies in the foreground to the distant mountains beyond is apparent.
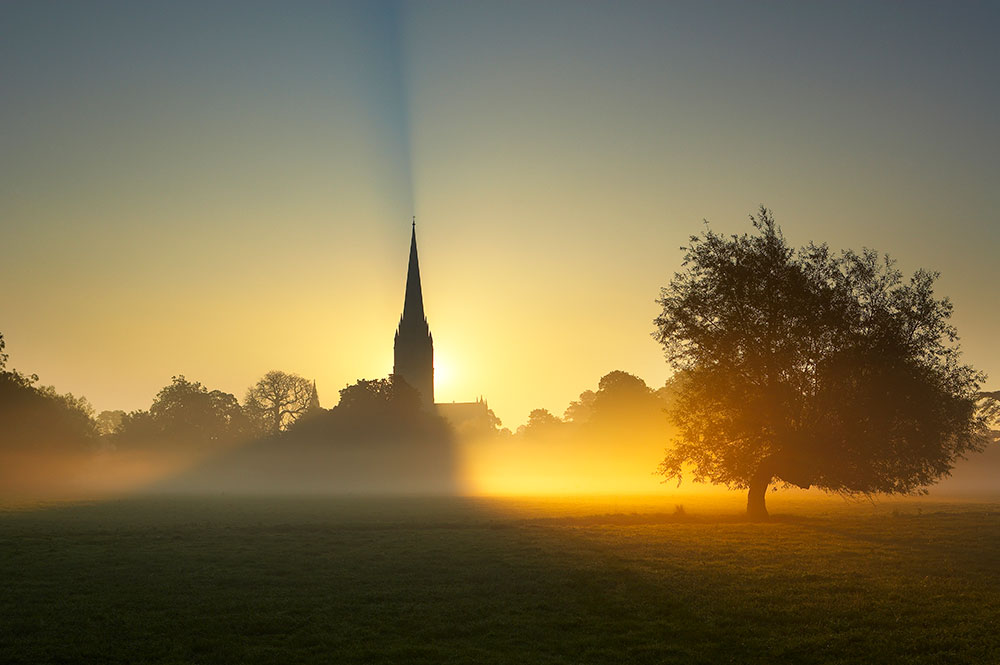

Backlighting

Outdoor light sun rising behind Salisbury Cathedral

Sun rising behind Salisbury Cathedral, Wiltshire. Canon EOS-1DS Mark II, 24-100mm, 1/100sec at f/11, ISO 100

Backlighting can often be the route to graphic impact. Shooting into the light is beset with problems – flare, exposure and contrast to name a few, but strong shapes backlit and silhouetted against a dramatic sky often have a bold simplicity that can be very powerful.

The big drawback though is any tantalising detail in the shadowy foreground will be lost. How much detail is sacrificed depends entirely on the contrast range between the rocky vegetation and the bright sky; softer light allows us to retain more foreground detail, whilst stronger more dramatic light renders silhouettes and foregrounds black.

We have strategies for tackling that immense contrast range; namely graduated filters or exposure merging, but there is a limit to what can be achieved without the loss of all credibility. In my book any such wizardry needs to be done with subtlety if believability is to be retained.


Front lighting

Outdoor light Snowdonia

The exception to the rule: front lighting on Llyn Dinas at dawn, Snowdonia, Wales. Canon EOS 5DS R, 24-70mm, 1/125sec at f/8, ISO 200

Full frontal light from directly behind the photographer leaves little to the imagination; all is revealed with maximum stark illumination, usually with the photographer’s shadow thrown in, but the harsh flattening effect and lack of shadow/highlight contrast rarely shows a landscape or indeed any subject off to its best; it’s an unappealing light that I avoid like the plague.


Top lighting

Outdoor light Lison

Diffuse top lighting is perfect for shooting woodland and water. Canon EOS 5D Mark III, 24-70mm, 1.6sec at f/16, ISO 100

When the clouds coalesce into an oppressive grey ceiling the low-contrast diffuse top lighting can be just the job for woodland and canyons. When the clouds close in there’s also the option of turning the camera on faces; it’s the perfect light for portraiture.


Guide to outdoor light – Light on my local patch

Outdoor light Durdle Door

Durdle Door and St Oswald’s Bay, Jurassic Coast, Dorset. Canon EOS 5D Mark IV, 100-400mm, 13secs at f/32, ISO 100

Dorset’s Jurassic Coast is my home patch where I have the luxury of being able to choose precisely the best time of year to shoot a specific location. The east-west aspect of the coastline makes shooting most locations between the spring and autumn equinoxes unfeasible; the sun is rising and setting over the land to the north, which casts its shadow across the cliffs and beaches. In the short days of winter though, when the sun is rising to the southeast and setting in the southwest, tantalising side lighting bathes the white cliffs and coves. It’s a view I never tire of, and one that provides endless inspiration.


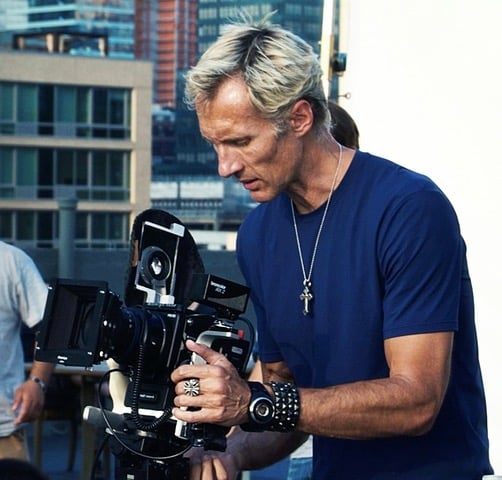
David Noton is recognised as a leading landscape and travel photographer. His passion for photography, travel and the world’s beautiful places are the defining influences that have shaped his life, work and his creative approach to photography. His images sell all over the world – both as fine-art photography and commercially in advertising and publishing. Visit davidnoton.com.


Tune in next week, for the next article in the series of the AP Improve Your Photography Series – in partnership with MPB.

Find the latest Improve Your Photography articles here.


Follow AP on Facebook, Twitter, Instagram, and YouTube.

SubscribeSubscribe


[ad_2]

How To Photograph the Total Lunar Eclipse

[ad_1]

Are you hoping to capture a photo of the upcoming total lunar eclipse on November 8th? If so, you are not alone. Amateur photographers and astrophotography enthusiasts around the world will do their best to take pictures of the upcoming lunar eclipse using a wide variety of camera equipment.

A total eclipse of the moon is a truly breathtaking astronomical event that anyone can appreciate. The best part about it is that you do not need expensive astrophotography equipment or special filters to take a great picture of the total lunar eclipse. It’s all about using the best settings on the camera you are using (even if it’s a phone).

I recommend practicing your moon photography skills before the night of the upcoming lunar eclipse, so you don’t waste precious time fiddling with camera settings during the celestial event. With that out of the way, let’s get to the key information you need to take a great picture of the total lunar eclipse. 

camera settings for a lunar eclipse

Fast Tips:

  • Practice your camera settings on the moon before the night of the lunar eclipse 
  • If you are using a smartphone through a telescope, use a smartphone adapter to hold it in place
  • Use your cameras manual or ‘pro’ mode for full control over settings like ISO, Aperture, and Exposure
  • Capturing the moon during totality is often easier to accomplish due to less extreme lighting variations
  • Use a tracking equatorial mount when shooting at high magnification (star trackers work great)

How to Photograph a Lunar Eclipse

Over the years, I have photographed a number of total lunar eclipses using a variety of cameras – from my smartphone to a dedicated astronomy camera. The key to a great image isn’t the specific camera you use, it’s all about magnification and the correct settings

Without enough ‘reach’, the moon will appear small and lack the details you are hoping for. I recommend capturing the lunar eclipse with at least 300mm of focal length or more, which means an astronomical telescope or telephoto camera lens is best.

Then, it’s all about choosing the best camera settings to capture such a challenging subject in terms of light conditions. The moon will change in brightness as it goes through the different stages of the eclipse, and you must adjust your camera settings accordingly. 

What about those of you that don’t own a telescope or a long lens? The good news is you can still capture a great nightscape-style shot at a wider field of view. However, these types of photos look best if the moon is closer to the horizon while eclipsed. 

lunar eclipse photography

A total lunar eclipse captured in the early morning hours using a DSLR and standard kit lens. 

Wide-angle nightscape images that include a large portion of the night sky including an eclipsed moon can be done using a DSLR and tripod. For a 30-second exposure, a tracking mount is not necessary. At a focal length of 18mm or wider, star trailing will begin to show after about 20-25 seconds, so just keep that in mind. 

To capture the stars and constellations in the night sky, an ISO of 800 or above is recommended. However, this exposure will likely record the eclipsed moon as a featureless ball of light.

To properly capture both the starry sky and a detailed moon, you will need to capture exposures of varying lengths and blend them together into a composite image. This is because the moon is much brighter (even while eclipsed) than the surrounding starry sky.

A composite image can be made by masking the area of your night sky exposure and blending in a shorter exposure of the moon with surface details. This technique will take some time and experience to master, but the results can be amazing.

When and Where is the Lunar Eclipse Happening?

For a celestial event like this, a little planning goes a long way. You’ll definitely want to know exactly when the lunar eclipse is taking place, and where it will be in the sky from your location. 

For example, you may have to travel to a location with a low western horizon for a total lunar eclipse occurring in the morning if your backyard is full of tall trees.

Lunar eclipses are visible from different parts of the world at different times. There are many times when a lunar eclipse is taking place on the other side of the earth that you are unable to observe.

Here are some helpful resources to help you plan for the lunar eclipse:

lunar eclipse photography methods

Upcoming Lunar Eclipses (NASA)

Date Eclipse Type Visible From
November 8, 2022 Total Asia, Australia, Pacific, Americas,
May 5, 2023 Penumbral Africa, Asia, Australia
October 28, 2023 Partial Americas, Europe, Africa, Asia, Australia
March 25, 2024 Penumbral Americas
September 18, 2024 Partial Americas, Europe, Africa
March 14, 2025 Total Pacific, Americas, Europe, Africa
September 7, 2025 Total Europe, Africa, Asia, Australia

The 7 Stages of the Lunar Eclipse

There are 7 stages of a total lunar eclipse, and many amateur photographers like to capture the event in each stage. This can later be made into a composite photo showing the transition of the moon as Earth’s shadow covers it. A time-lapse video is another excellent way to capture each stage of the eclipse.

The maximum eclipse stage is when most photographers want a great shot. This is when the moon turns “blood” red and the surrounding night sky becomes much darker from our point of view on Earth. It is an unforgettable experience for those lucky enough to witness this moment.

Stages of the total lunar eclipse:

  1. Penumbral Eclipse begins
  2. Partial Eclipse begins
  3. Full Eclipse begins
  4. Maximum Eclipse
  5. Full Eclipse ends
  6. Partial Eclipse ends
  7. Penumbral Eclipse ends

An interesting thing happens when the moon is completely eclipsed by the shadow of Earth. Not only does the moon turn to an eerie reddish hue, but the stars and constellations surrounding the moon begin to appear as they would on a moonless night. Capturing a scene like this requires careful planning and execution.

Ways to Photograph the Total Lunar Eclipse

Here are 6 different ways to photograph the lunar eclipse, depending on the equipment you own:

Examples and Best Practices

There are many ways to photograph the total lunar eclipse, but for the best results, I recommend using a DSLR camera and a small refractor telescope on a tracking mount. 

This will allow you to get an up-close shot of the moon in each of its phases in detail. Some of the most incredible images of the lunar eclipse I have ever seen were captured this way. 

If you do not own a telescope, you can use your longest focal length camera lens to pull the moon in close. For the photo of a nearly total lunar eclipse below, I used a Canon EF 400mm F/5.6 telephoto lens. 

lunar eclipse

The 2021 Partial Lunar Eclipse on November 19, 2021. DSLR and 400mm lens. 

An equatorial tracking mount, such as a star tracker is the best way to take a clear photo of the moon during an eclipse when using high-magnification optics. This essentially freezes the moon in place for an extended period of time.

When you have compensated for the rotation of the earth, your subject is no longer moving, and you have many more options to choose from in terms of camera settings. Now, you can dial back ISO settings and f-stop if necessary and let a longer exposure time collect the light. 

This makes everything easier because the Moon will stay ‘still’ in the image frame while you adjust your camera settings based on the current stage of the eclipse. During the first stage of the eclipse, the moon will be very bright, whereas, during totality, it will be much dimmer. 

Below, you will see the camera and telescope I used to take a crisp photo of the total lunar eclipse that occurred in September 2015. This telescope has a focal length of nearly 500mm, which was enough to reveal some amazing details on the lunar surface.

Basic astrophotography setup

Moon photography

The camera and telescope used to capture a total lunar eclipse. Canon EOS 70D and Explore Scientific ED80. 

Using a DSLR and Telescope

A DSLR camera (or mirrorless camera) and telescope can provide an up-close view of the eclipsed moon in detail. The prime focus method of astrophotography is best, as the camera sensor’s focal plane is aligned with the telescope. You can directly attach a DSLR camera using a T-Ring adapter (see below) to utilize the telescope’s native focal length.

The prime focus method requires that the telescope tracks the apparent rotation of the night sky to avoid any movement in your shots. To learn more about the process and equipment involved in deep-sky astrophotography, have a look at a typical DSLR and telescope setup.

t-ring adapter

A DSLR camera and T-Ring Adapter attached to a telescope

If your goal is to capture an up-close view of the moon during the eclipse, there are many benefits to this technique. A small refractor telescope will have an adequate amount of focal length (magnification), offer precision focus, and have a stable base to attach to an equatorial telescope mount. 

With the camera connected to the telescope, experiment with different exposures and ISO settings in manual mode, using live-view to make sure you have not under/overexposed the image.

The shortest exposures will only be useful during the partial stages of the lunar eclipse, as the lunar eclipse is beginning and ending. This is a challenging phase of the event to capture in a single shot, as the shadows and highlights of the image are from one end of the spectrum to the other.

Remote shutter release cable

A remote shutter release cable will help to avoid camera shake in your image. 

When the moon enters totality, you will need to bump up your ISO, and/or your exposure length to reveal the disk of the moon as it becomes dimmer. Use a timer or external shutter release cable to avoid camera shake if possible.

Ideally, you’ll keep the ISO as low as possible for the least amount of noise. With an accurately polar-aligned tracking mount, exposures of 2-5 seconds will work great.

To record the lunar eclipse with a DSLR camera, no filters are necessary. A stock DSLR camera is best as the additional wavelengths available with a modified camera are unused in moon photography.

total lunar eclipse photo

Canon EOS 7D, Explore Scientific ED80 Refractor, Sky-Watcher HEQ5 Tracking Mount.

Without a tracking equatorial mount like the Sky-Watcher HEQ5, a 2.5-second exposure like the one above is impossible. Even 1-second of movement at this focal length will record a blurry image if the telescope or lens is not moving at the same speed as the moon.

The benefit of shooting a long exposure during the maximum eclipse (totality) is that you also record the starry sky behind the moon. To do this in a single exposure on a normal full moon is not possible as the dynamic range is too wide.

A dedicated one-shot-color astronomy camera is more than capable of taking a brilliant photo of the eclipse as well. The computer software used to control these devices have countless options to control the Gain and exposure settings of these cameras. 

For projects like this, I personally enjoy the freedom and simplicity of a DSLR. Camera settings such as ISO, exposure, and white balance can easily be changed on-the-fly as the eclipse is taking place.

Without A Tracking Mount

Since the moon is very bright, it is possible to take a fast exposure (1/500″ or faster) of the moon without tracking. You will still want to use an optical instrument such as a telescope or long lens, and without tracking, it will be tricky. 

Even at 10X magnification, the moon will slowly move across the eyepiece as you look at it through the telescope. This a subtle reminder that the earth is always spinning, and why astrophotography is so challenging overall. 

Thankfully, unlike dim deep-sky objects like nebulae and galaxies in the night sky, solar system subjects like the moon are incredibly bright. You can take an ultra-fast exposure of the moon through a telescope that is still sharp, without tracking. 

Many visual observers enjoy the affordability and performance of a Dobsonian Telescope like the one shown below. They are a fantastic choice for anyone interested in astronomy, and why I consider them to be the best telescope for beginners

Apertura AD8 Dobsonian Telescope


It is possible to produce a comparable close-up image using a digital camera or smartphone through the eyepiece of a non-tracking telescope such as a Dobsonian, using the eyepiece projection method. For the best results, use a smartphone adapter that allows you to secure your phone to the telescope.

Photographing a Lunar Eclipse with Your Phone

This type of astrophotography is often referred to as the eyepiece projection method. To do this, you’ll simply position your digital camera or smartphone into the eyepiece of the telescope. This method usually requires a fair amount of trial and error, but you may be quite surprised with your results.

An eyepiece smartphone adapter may help to steady your shot of the lunar eclipse. Although you’ll have much less control over exposure and record less detail, this technique can be used with a non-tracking telescope as a traditional Dobsonian telescope like the one pictured above, or a smaller tabletop model. 

The moon is one of the few subjects that are relatively easy to photograph with a non-tracking mount compared to deep-sky astrophotography. However, the transition phases of the eclipse can be difficult due to the changing lighting conditions and exposure levels.

I recommend capturing the lunar eclipse during its maximum phase if you’re using this method. You likely won’t be able to capture a well-exposed image using the camera’s auto-exposure mode. Experiment with your camera’s manual settings that allow for variations in shutter speed. 

I have had great results using the Celestron NexYZ smartphone adapter when photographing the moon. This model features a 3-axis design that allows me to line up the camera on my bulky Samsung S21 Ultra phone with the eyepiece. It clamps onto the eyepiece itself and is much more secure than models I have used in the past. 


smartphone adapter

Use a smartphone adapter to line up your camera lens and secure your phone. 

Camera Settings

Once you have secured your phone in the adapter, and the camera lens is lined up with the eyepiece, you can start experimenting with settings. To fully control the exposure, it is best to use manual mode (often called ‘pro’ mode) rather than the standard auto setting. 

Chances are, when you are pointing at the moon with your smartphone and telescope, it will appear very bright, and your camera will have trouble finding the correct exposure to show the lunar surface details. To fix this, adjust the basic camera settings like exposure length, ISO, and f-stop to properly expose the bright moon through the eyepiece. 

A shorter exposure time 1/500′ and a moderate ISO setting of 400 is a good place to start (see below). If the moon looks too bright or too dim using these settings, make small adjustments to the exposure time until it is well exposed to reveal the moon’s surface. 

Use manual focus mode to ensure that the moon is in critical focus, rather than relying on the autofocus capabilities of your phone camera. This can be tricky to get right, but keeping the camera steady via the smartphone adapter will make this a lot easier.

how to photograph the lunar eclipse with your phone

Capturing the lunar eclipse using the ‘pro’ mode on my smartphone. 

Using a Telephoto Camera Lens

If you don’t own a telescope, a telephoto camera lens with at least 300mm of focal length will work well. At longer focal lengths like the ones necessary for a close-up of the moon, you must use fast exposure to capture a sharp photo of the moon. This is because the Earth is spinning, so you’re essentially trying to photograph a moving target. 

The image below was captured using a Canon EOS 70D and a Canon EF 400mm F/5.6 Lens. 

partial eclipse phase

The final stages of the partial eclipse phase are challenging to photograph because there is a bright highlight on a small portion of the moon. For the photo below, the camera settings included an ISO setting of 6400 and a shutter speed of 1/8.

A tracking telescope or camera mount such as the iOptron SkyGuider Pro (pictured below) is recommended. An equatorial mount that is polar aligned with the rotational axis of the Earth will allow you to take longer exposures, and get more creative with your camera settings.

Owners of astronomical telescopes for astrophotography usually own an equatorial telescope mount, and this is an ideal configuration for moon photography. This allows the user to enter any celestial object into the hand controller, and the mount will automatically slew to that object once it has been properly star-aligned.

An iOptron SkyGuider Pro camera mount with a DSLR and 300mm Lens attached

The key to capturing details of the moon’s surface in your lunar eclipse photo is reach and exposure. By this, I mean that you need enough magnification to show the detailed craters of the moon’s surface, and a fast enough shutter speed to not blow out any of the highlights in your image. 

To do this, a precise exposure length must be used. One that preserves the data in your image while also bringing enough of the shadowed areas forward is ideal. For my photos, I found an ISO of 200 and an exposure of 1/200 to work quite well. This was enough to showcase a starry sky behind the eclipsed moon.

I use Adobe Photoshop to process all of my astrophotography images, including photos of the moon and our solar system. Adobe Camera Raw is a fantastic way to edit your images of the lunar eclipse because it gives you complete control over the highlights and color balance of your image. 

Adobe Photoshop

Adobe Camera Raw offers powerful tools to edit your photos of the Total Lunar Eclipse

Capturing a Lunar Eclipse Without a Telescope 

If you are simply using a point-and-shoot camera or a DSLR and lens on a stationary tripod, you can still take an amazing photo of the lunar eclipse. This is often a great way to capture the landscape and mood of the moment. The photo below was captured back in October 2014 using a Canon EOS 7D and an 18-200mm lens on a tripod.

This is a wide-angle shot captured at 18mm, while the inset image was captured at the lens’s maximum focal length of 200mm. A zoom lens is handy for photographing the moon at varying magnifications. 

Total Lunar Eclipse - Moon Photography

When capturing the lunar eclipse without a telescope, you’ll want as much manual control over the camera settings as possible. “Auto” mode, flash, and autofocus won’t work on a photo of the total lunar eclipse. Adjusting individual parameters such as exposure length and ISO is essential to properly expose the moon. 

Practice taking shots at night beforehand, so that you are ready when the eclipse happens. Ideally, find a location that includes some interesting foreground and background details to capture a dramatic scene on the night of the event. In the case of the lunar eclipse shown above, it took place in the early morning hours as the moon was setting. 

What is Happening During a Lunar Eclipse?

Do you understand why a lunar eclipse happens? There are two types of lunar eclipses: partial and total. As you know, the Earth orbits the sun, and the moon orbits the Earth. During a total lunar eclipse, the Earth is sitting directly between the sun and the moon.

Although the moon is covered in Earth’s shadow, some sunlight still reaches the moon. When the moon enters the central umbra shadow of the Earth, it turns red and dim. This distinctive “blood” color is due to the fact that the sunlight is passing through Earth’s atmosphere to light up the disk of the moon. 

What is a lunar eclipse?

A diagram of what happens during a total lunar eclipse – NASA

Unlike a solar eclipse, observing a total lunar eclipse is completely safe to do with the naked eye. This natural phenomenon can be enjoyed without the aid of any optical instruments, although binoculars can really help to get an up-close view of the action.

camera settings for lunar eclipse

Camera settings used for my lunar eclipse photo

This article was originally posted in January 2019, and updated on November 4th, 2022. 

Related Posts:

Related Posts

Share This

Related Tags

[ad_2]

30 Interesting & Surprising Photos That Show How Big Things Really Are

[ad_1]


Here are the 30 interesting and surprising photos that show how big things really are. There is a Twitter page called Human for Scale, which is more than 105K followers. This page shares “Photos which feature a human to aid the eye in determining the size of things.” You can follow them for more interesting and surprising photos.

Scroll down and enjoy yourself. All photos are linked and lead to the sources from which they were taken. Please feel free to explore further works of these photographers on their collections or their personal sites.

#1 6’9″ compared to 5’1″

Human for Scale Size of things photos

Image Source: Human For Scale

#2 Coiling Dragon Cliff Skywalk,Tianmen Mountain National Park, Zhangjiajie

Human for Scale Size of things photos

Image Source: Human For Scale

#3 The manpupuner rock formations and a man

Human for Scale Size of things photos

Image Source: Human For Scale

#4 The African land snail

Human for Scale Size of things photos

Image Source: Human For Scale

#5 The absurd size of the motherland calls statue

Human for Scale Size of things photos

Image Source: Human For Scale

#6 Absolute door unit

Human for Scale Size of things photos

Image Source: Human For Scale

#7 The sun and planets to scale

Human for Scale Size of things photos

Image Source: Human For Scale

#8 Me standing next to a nuclear cooling tower

Human for Scale Size of things photos

Image Source: Human For Scale

#9 Two people sitting on the Abraj Al Bait clock tower in mecca

Human for Scale Size of things photos

Image Source: Human For Scale

#10 Jadayupara, the world’s largest avian sculpture

Human for Scale Size of things photos

Image Source: Human For Scale

#11 Whale skull

Human for Scale Size of things photos

Image Source: Human For Scale

#12 Petra in Jordan

Human for Scale Size of things photos

Image Source: Human For Scale

#13 Baobab trees at Madagascar

Human for Scale Size of things photos

Image Source: Human For Scale

#14 Croatia

Human for Scale Size of things photos

Image Source: Human For Scale

#15 Botanical Park of Rio de Janerio Brazil, Founded in 1808, it is considered one of the most important in the world

Human for Scale Size of things photos

Image Source: Human For Scale

#16 400 years old Vasa ship

Human for Scale Size of things photos

Image Source: Human For Scale

#17 Elephant seal

Human for Scale Size of things photos

Image Source: Human For Scale

#18 Japanese spider crab!

Human for Scale Size of things photos

Image Source: Human For Scale

#19 Chonky carp

Human for Scale Size of things photos

Image Source: Human For Scale

#20 A rocket being transported to launch site, India

Human for Scale Size of things photos

Image Source: Human For Scale

#21 This massive owl

Human for Scale Size of things photos

Image Source: Human For Scale

#22 A fallen Redwood and me

Human for Scale Size of things photos

Image Source: Human For Scale

#23 The aircraft carrier USS Gerald R Ford in drydock

Human for Scale Size of things photos

Image Source: Human For Scale

#24 The second largest whale in the world – Fin Whale

Human for Scale Size of things photos

Image Source: Human For Scale

#25 World’s largest wine barrel

Human for Scale Size of things photos

Image Source: Human For Scale

#26 Did you guys know how big cactus can get?

Human for Scale Size of things photos

Image Source: Human For Scale

#27 True Size of the great Pyramid of Giza

Human for Scale Size of things photos

Image Source: Human For Scale

#28 Ouse Valley Viaduct Uk

Human for Scale Size of things photos

Image Source: Human For Scale

#29 The Quetzalcoatlus Northropi, The largest known flying animal that ever existed

Human for Scale Size of things photos

Image Source: Human For Scale

#30 I never realized how big the Typhoon class was

Human for Scale Size of things photos

Image Source: Human For Scale

Related Articles:


[ad_2]

Japanese Garden Photography Wall Art

[ad_1]

The Art of Japanese Gardens

Humans have always struggled to find ways of keeping in touch with nature as farming, industry, and modern cities have pushed away and fenced off the natural world around us.

Solutions to this problem have ranged from National Parks to municipal landscaping, but none have rivaled the harmony and perfect synthesis of the traditional Japanese garden. For a millennium and a half, these sculpted enclaves of nature have provided inspiration and relaxation, and today they are widely viewed by photographers, artists, architects, and more as one of the most beautiful and important expressions of art and design.

Heaven's Gate | Japanese Maple Tree Photograph for Sale by Aaron Reed

A legendary Japanese maple at the height of its autumn spendor sits on a hillside inside the Japanese garden in Portland, Oregon. Fine Art Limited Edition of 100.

The History of Japanese Gardens

Japanese gardens were first imported from China in the 6th century Asuka period, when Chinese gardening methods and design elements were fused with aspects of the local landscape. The high mountains, great forests, running streams, and deep valleys were all reproduced in miniature around the palaces of nobles, the only ones who could afford such stylistic expression at the time.

Chinese influence increased during the Heian Period (794-1185), when much of the Tang Dynasty governmental apparatus, writing system, and culture were imported to the Japanese islands. Zen Buddhism began to flourish during this period, and more complex ideas about organization, flow, and aesthetic were combined with philosophical doctrines to produce the first set of stylistic principles for garden design.

These ideas were further developed and cemented during the Kamakura Period (1192-1333), rendering these gardens more recognizable and popular. By the time of the Muromachi Period (1338-1573), they were seeing wider adoption by the public in shared and private spaces. This resulted in a profusion of new styles and philosophies, and by the Edo Period (1603-1867), garden design had become a nationwide artform, engaged in by every level of society.

Since the 1800s, many Japanese households have transformed their traditional interior courtyards into smaller gardens. Because of the spatial constraints, miniaturization is often taken to the extreme, and looking out from the rooms of the house, one has the sense of gazing out over a vast wild landscape. This importation into the home has also allowed each individual or family to design their gardens according to their own aesthetic sensibilities. Today, new creative ideas and elements are emerging all the time alongside a continued respect for and preservation of the antique gardens still standing.

A Twisted Japanese Maple Tree During Fall Inside Portland's Japanese Garden | Tree Photography for Sale by Aaron Reed

A small twisted Japanese maple tree shows off its autumn color inside the Japanese garden in Portland, Oregon. Fine Art Limited Edition of 50.

Beauty By Design | Essential Elements

The many different styles of Japanese garden each have their own sets of elements and features, but there is much overlap, and some parts which are shared by all.

Water

Water is a core aspect of Japanese gardens. Water can either be represented literally, by small streams, miniature waterfalls, small ponds, or placid lakes. Dry riverbeds are also relatively common, invoking the essence of a flowing river or paying homage to the islands’ dry season. In Zen rock gardens, sand and gravel represent water while not impinging on the spatial balance. Japanese gardens always have water, either a pond or stream, or, in the dry rock garden, represented by white sand. In Buddhist symbolism, water and stone are the yin and yang, two opposites that complement and complete each other. A traditional garden will usually have an irregular-shaped pond or, in larger gardens, two or more ponds connected by a channel or stream, and a cascade, a miniature version of Japan’s famous mountain waterfalls.

Electric Slide
Fine Art Limited Edition of 50 – Japanese gardens first appeared on the island of Honshu, the large central island of Japan. Their aesthetic was influenced by the distinct characteristics of the Honshu landscape: rugged volcanic peaks, narrow valleys, mountain streams with waterfalls and cascades, lakes, and beaches of small stones. They were also influenced by the rich variety of flowers and different species of trees, particularly evergreen trees, on the islands, and by the four distinct seasons in Japan, including hot, wet summers and snowy winters.

Trees/Shrubs

One of the most stunning aspects of Japanese gardens is their botanical variety. Twisted and moss covered trees are one of my personal favorite photographic subjects. Most gardens are populated by carefully manicured evergreens, their twisting forms calling to mind windswept coastlines or high mountain passes. Cherry trees spread their rosy blossoms over rolling meadows bounded by expertly carved shrubbery. Japanese maple trees have become synonymous with the natural harmony of these gardens, and their star-shaped leaves exchange their vibrant colors with the passing of each Autumn before falling silently to rest on the soil below. Emerald mosses are encouraged to mottle the grey stones of walkways and paths.

Rocks & Sand

Rock, sand and gravel are an essential feature of the Japanese garden. A vertical rock may represent Mount Horai, the legendary home of the Eight Immortals, or Mount Sumeru of Buddhist teaching, or a carp jumping from the water. A flat rock might represent the earth. Sand or gravel can represent a beach, or a flowing river. Rocks and water also symbolize yin and yang (in and in Japanese) in Buddhist philosophy; the hard rock and soft water complement each other, and water, though soft, can wear away rock.

In ancient Japan, sand (suna) and gravel (jari) were used around Shinto shrines and Buddhist temples. Later it was used in the Japanese rock garden or Zen Buddhist gardens to represent water or clouds. White sand represented purity, but sand could also be gray, brown or bluish-black.

A Photograph of a Japanese Maple Tree With Expansive Branches and Red Leaves During Fall | Tree Photography for Sale by Aaron Reed

The Portland Japanese garden boasts multiple maple trees, but none more famous than this lace leaf maple photographed at the height of autumn. Fine Art Limited Edition of 200.

Islands

To replicate the foggy mountainscape of Japan’s high places, artificial islands are constructed in many gardens. Their tops offer stunning vistas of the miniature landscape below and their bases are often bordered by lakes and ponds, representing the ocean. These features, along with the trees, create a much more interesting and diverse topography, with many different levels and angles serving to alternatively hide and reveal various aspects of the space.

The Burning Bush | Short Tree With Bright Red Leaves on a Hill During a Foggy Morning | Fine Art Photography for Sale by Aaron Reed

Elevate your home with Aaron Reed’s limited edition photography print, The Burning Bush, from his Amazing Tree Photography collection. Order yours today! Fine Art Limited Edition of 50.

Statues

Beneath the shady boughs and in many a hidden glen, visitors to Japanese gardens will find collections of statuary. These sculptures may depict monks, philosophers, ordinary folk, or even the Buddha himself. Like the many stones in these gardens, they too are encouraged to affect a mosaic of colored lichens and moss.

Bridges and Walkways

Not only the appearance of Japanese gardens is important, but also their presentation. Paths and promenades wind through the landscape, revealing new scenes and vistas with every turn. Allowing visitors to experience each little spot of beauty one at a time creates a much more immersive and interesting experience than laying everything out all at once. To cross the many ponds and streams, various ornamented bridges are included. The eye-catching moon bridges can be difficult to cross at times because of their profound arc, but add to the mystic ambience of the gardens.

Silent Lucidity Pano

Transform your space with Aaron Reed’s luxury fine art photography print, Silent Lucidity, from his Panoramic Wall Art collection. Order yours today! Fine Art Limited Edition of 100.

Shrines

Some gardens, especially those constructed in the Zen tradition, may feature small shrines and temples to various deities and religious figures. Not all of these are accessible to the visiting public, but their towering pagodas or secluded refuges are a nice human touch which blend with the nature around them.

Lanterns

Another kind of sculpture which deserves its own section are the Japanese stone lanterns or tōrō. These can be hidden away among the shady trees and shrubbery or gathered in rows or collections along the garden paths. Traditionally, lanterns are composed of five parts representing the five elements of nature—earth, water, fire, air, and spirit. Much improvisation and creative innovation has taken place in lantern design, and not all elements may be present, but most still retain their carved base, taloned cap, and void-like central chamber.

A maple tree photograph with large leaves in a garden on a foggy autumn morning.

A beautiful autumn morning blanketed by fog inside the Kubota garden in Seattle, Washington. Fine Art Limited Edition of 50.

Fish

The use of fish, particularly nishiki-goi (colored carp), medaka or goldfish as a decorative element in gardens was borrowed from the Chinese garden. Goldfish were developed in China more than a thousand years ago by selectively breeding Prussian carp for color mutations. By the Song dynasty (960–1279), yellow, orange, white and red-and-white colorations had been developed. Goldfish were introduced to Japan in the 16th century. Koi were developed from common carp (Cyprinus carpio) in Japan in the 1820s. Koi are domesticated common carp that are selected or culled for color; they are not a different species, and will revert to the original coloration within a few generations if allowed to breed freely. In addition to fish, turtles are kept in some gardens. Natural environments in the gardens offer habitats that attract wild animals; frogs and birds are notable as they contribute with a pleasant soundscape.

Feeling Green

Adorn your walls with Aaron Reed’s limited edition photography print, Feeling Green, from his Oceans & Rivers Luxury Art collection. Order yours today! Fine Art Limited Edition of 50.

The Art and Experience of the Japanese Garden

Together, these and many other design elements have been mixed and matched to derive a multitude of unique styles and aesthetics. Regardless of how they are arranged, though, a deep harmony is always achieved which has fascinated and inspired artists and the public for centuries.

Gardens have figured heavily in Japanese art since their creation. Paper prints, screens, and household items from many eras display nobles strolling alongside lakes beneath maples and cherry trees. Other works focus on the gardens themselves, reproducing quiet scenes from the interior courtyards and temple grounds that have always dotted cities Kyoto and Tokyo. Even today, gardens are often seen in manga and animated shows and movies, given meticulous detail to further publicize the beauty and history of their design.

Photographers have been especially taken with the artistic precision and attention to composition and view in these spaces. Photography is one of the best ways to capture the numerous unique perspectives and minute details of these gardens, and many professional photographers visit them throughout the year to document and capture the seasonal changes and variations in light and atmosphere. The fine artworks produced by professional photographers have also helped to drive greater appreciation for these sacred spaces across the globe.

Anyone who has visited a Japanese garden will be familiar with the sense of calm and peaceful tranquility which pervades them. Many come to see the wonders of their natural design, others to unwind, relax, and reflect. Throughout the world they are known as pinnacles of aesthetic excellence, and though much has changed since their inception, they still speak to the deeper need we all have to join our daily lives to the natural world.

Zenetics | Abstract Photography | Aaron Reed

Transform your space with Aaron Reed’s limited edition photography print, Zenetics, from his Abstract Nature Photography collection. Order yours today! Fine Art Limited Edition of 50.

The Portland Japanese Garden

As a Portland native, the Portland Japanese Garden will always be a special place to me and one that I visit almost every year to photograph during the autumn season when the garden springs to life with color.

The Portland Japanese Garden sits nestled in the hills of Portland, Oregon’s iconic Washington Park, overlooking the city and providing a tranquil, urban oasis for locals and travelers alike. Designed in 1963, it encompasses 12 acres with eight separate garden styles, and includes an authentic Japanese Tea House, meandering streams, intimate walkways, and a spectacular view of Mt. Hood. This is a place to discard worldly thoughts and concerns and see oneself as a small but integral part of the universe.

Born out of a hope that the experience of peace can contribute to a long lasting peace. Born out of a belief in the power of cultural exchange. Born out of a belief in the excellence of craft, evidence in the Garden itself and the activities that come from it. Born out of a realization that all of these things are made more real and possible if we honor our connection to nature.

Colorfall

Transform your space with Aaron Reed’s limited edition photography print, Colorfall, from his Vertical Luxury Photography collection. Order yours today! Fine Art Limited Edition of 100.

Portland Japanese Garden Art

The Portland Japanese Garden is a natural vehicle through which to explore Japanese art and design. Art exhibitions explore ideas and aesthetics integral to the fabric of life in Japan. Introducing a wide array of artists and art forms, these exhibitions will reflect on ways we experience peace through connections to art, nature, and one another.

Of all the work I have produced over the years, images created inside the Portland Japanese Garden has been some of my most successful. The simplicity, serenity and peace found inside the garden can be brought inside your home through beautiful artwork created here. To see more and take a virtual stroll through the garden from your chair, please browse the rest of my Japanese Gardens Art Collection and find a piece to bring home to your collection today!

A photograph of a green Japanese maple tree backlit by the sun with golden light shining through.

While fall is the season of choice to photograph this popular Japanese Maple tree, the end of summer provides fresh green growth and a distinctly difference yet equally beautiful image inside the Portland Japanese Garden in Oregon State. Fine Art Limited Edition of 100.

The Shining

Elevate your home with Aaron Reed’s limited edition photography print, The Shining, from his Newest Work Photography collection. Order yours today! Fine Art Limited Edition of 50.

[ad_2]

Astrophotographer to give tips on night sky pics

[ad_1]

The Andromeda Galaxy as captured by award winning astrophotographer James Cahill.
JEC ASTROPHOTOGRAPHY PHOTO

MOUNT DESERT — Astrophotography is no longer limited to NASA and other organizations with big telescopes. Recent improvements in technology have enabled more amateurs to take amazing photographs of the night sky, from near objects such as the moon and the planets, to galaxies, nebulae and other objects in outer space.  

On Tuesday, Nov. 8 at 6:30 p.m., the MDI Photo Club will be hosting a Zoom talk by award-winning amateur astrophotographer James Cahill. The public is welcome to join the presentation in which Cahill will share the equipment and techniques needed for night sky photography and show some of his stunning deep space photographs.   

Cahill is an IT specialist by day and amateur astronomer and astrophotographer at night. His work is shot primarily in Bucks County, Pa., but he also visits dark sky areas in Maine, Pennsylvania and other states on the East Coast. His work in astrophotography ranges from capturing nearby solar system objects to deep sky objects and wide field shots of the Milky Way.  

Cahill started with a webcam, imaging the moon and other planets. After that, he was hooked, adding equipment to start taking pictures of objects farther away like nebulae, galaxies and star clusters. Pairing a digital camera and using the telescope as a “lens” has enabled him to take pictures of what has always been his passion –the night sky.  

Cahill recently received the patron’s award for the 2020 Phillips Mill Photography Exhibition, in New Hope, Pa. His astrophotography can be viewed on Instagram @jec_astrophotography. 

Non-members of the MDI Photo Club who are interested in attending this presentation should send an email to [email protected] to receive the Zoom link. 

[ad_2]

UNCG photography students working to share view of the world through the eyes of the blind

[ad_1]

GREENSBORO, N.C. (WGHP) — Tens of thousands of people drive or walk by a large rick building on West Gate City Boulevard in Greensboro every day. Many, with no knowledge of what goes on inside. But under that roof, hundreds of people with a similar impairment found a new way of navigating the workforce.

“Some people have gone through some things, some people have experienced some great lifestyle changes,” said Sherrie Thompson, a receptionist at the operation.

The business is Industries Of The Blind, a non-profit that’s secured several large contracts since its first one-million-dollar contract in 1962. Presently, workers construct anything from pens to items for the U.S. Army. Its mission statement is “To provide opportunities for employment and personal development for people who are blind or visually impaired to achieve greater independence.

“I still have a very good memory of how things used to be,” Thompson said.

When she was 19, Thompson said she was a freshman in college, engaged, with a baby on the way. In a matter of three weeks, an overabundance of fluid on her brain and spine stole her sight.

“I’ve had to experience not-so-good things, but to be where I am now, I wouldn’t trade it for anything, honestly,” she said.

While Thompson and colleague Michelle Torain both lost their vision after being able to see for much of their lives, their stories are dramatically different.

“I woke up on February the 14, 2013, I woke up blind,” Torain said. “I cried for three days. I shut my door and I cried for three days. Just cried, cried, cried.”

Torain said she lost her vision due to hereditary Type 2 Diabetes. While also out of her control, her first major life challenge happened about 48 years earlier.

“When I was three months old my mother gave me away,” she detailed.

It was a cold October night, when she said her birth mother left her on her father’s sister’s doorstep. She said her aunt kept hearing a crying child, and after checking her house, opened the door to find Torain with her one bottle and a blanket. Her aunt’s dog had found her first and laid on top of her to protect her from the cold.

“How I got saved was by that dog. That dog laid on top of me and kept me warm,” she said.

Though Thompson and Torain’s life stories have few mutual details, both were about to share them with students who meet just across the train tracks running behind Industries Of The Blind.

“They’re talented students,” Thompson said. “I want to see how they’re going to put their minds to it.”

Industries of the Blind has teamed up with students at UNC Greensboro to create pieces of art demonstrating what the world looks like through the eyes of the visually impaired. This year, they’re doing so through photography.

“We start talking and it’s like how do I transform that into something physical,” said UNCG senior Jenna Futrell, who’s been paired with Thompson.

The students interview the employees, learning about their lives and perception of the world in an attempt to bring it to light, even though their view has long been dark.

“I still have a very good memory of how things used to be,” Thompson said, saying her every day is similar to waking up in your room at night, trying to make your way through the room with only shadows as guides.

“I can see shadows, I can see the light,” Torain said, glancing up at the light FOX8 used while interviewing her.

“You want to make sure it’s perfect because it is about someone else,” Futrell said.

The students will complete their projects in a few weeks. Once they’re completed, they’ll be put up on the side of the Industries Of The Blind building, just as previous students’ projects have been.

“It just brings tears to my eyes when I talk about this story, because it hurts me. It really hurts,” Torain said. “It hurts.”

For more information about Industries of the Blind, click here.

[ad_2]

16 Most photo-worthy spots in Birmingham!

[ad_1]

Birmingham is a city in the north central region of the U.S. state of Alabama. Birmingham is the seat of Jefferson County, Alabama’s most populous county. As of 2020, Birmingham had a population of 200,733, making it Alabama’s second-most populous city after Huntsville. The broader Birmingham metropolitan area had a 2020 population of 1,115,289, and is the largest metropolitan area in Alabama as well as the 50th-most populous in the United States. Birmingham serves as an important regional hub and is associated with the Deep South, Piedmont, and Appalachian regions of the nation.

In Birmingham you will find some beautiful attractions that you just cannot miss! Places like Birmingham Museum Of Art, Bon Secour National Wildlife Refuge, and Ruffner Mountain Nature Center and many more. Continue reading to know more.


Birmingham


© Provided by Microsoft Travel (SeanPavonePhoto Getty Image)
Birmingham


The bright and beautiful, Birmingham Museum of Art.


© Provided by Microsoft Travel (Smartin69 Getty Image)
The bright and beautiful, Birmingham Museum of Art.

Founded in 1951, the Birmingham Museum of Art in Birmingham, Alabama, has undoubtedly one of the finest art collections in the Southeastern United States. The Museum features a large collection of paintings and sculptures from the Renaissance and Baroque periods. There are more than 25,000 objects that represent a rich panorama of cultures from Asian, European, American to African, Pre-Columbian periods.


Bon Secour National Wildlife Refuge is 7,157 acres filled with wildlife and greenery perfect for outdoor activities.


© Provided by Microsoft Travel (Richard_Pearlman Getty Image)
Bon Secour National Wildlife Refuge is 7,157 acres filled with wildlife and greenery perfect for outdoor activities.

Bon Secour National Wildlife Refuge, located in Alabama, is one of the best places to visit and do outdoor activities. It features a 40-acre lake where visitors could fish or just admire the sea turtles during summer. The place is also perfect for those who want to watch migratory birds as it features a migratory bird stopover.


Visit the Ruffner Mountain Nature Center where it offers various outdoor activities and beautiful views of nature.


© Provided by Microsoft Travel (Alabamarecreationtrails Image)
Visit the Ruffner Mountain Nature Center where it offers various outdoor activities and beautiful views of nature.

Ruffner Mountain Nature Center, located in Alabama, is perfect for those who love the great outdoors. The center is perfect for various outdoor activities and offers breathtaking scenery. The center features 14 miles of trails and a protected area for native flora and fauna.


Admire the wondrous views the DeSoto State Park offers as it is situated atop the Lookout Mountain.


© Provided by Microsoft Travel (Scgerding Getty Image)
Admire the wondrous views the DeSoto State Park offers as it is situated atop the Lookout Mountain.

Visitors would surely love to check out the DeSoto State Park as it is situated atop Lookout Mountain and offers magnificent views overlooking nature. The mountain also has waterfalls and wildflowers which visitors should not miss out on seeing. The place is also perfect for various outdoor activities such as hiking and camping.


A sandstone canyon located near Phil Campbell in Franklin County, Alabama.


© Provided by Microsoft Travel (Wikimedia Image)
A sandstone canyon located near Phil Campbell in Franklin County, Alabama.

Dismals Canyon is a natural gorge and is marked as National Natural Landmark because of its uncommon wild rugged character. Many native plants are grown in the canyon. There is a 1.5-mile hiking trail from the canyon floor following the waterfalls. You can also enjoy canoeing and camping here. However, camping is allowed at specific camping sites and cabins.


A mix of nature and history awaits visitors here.


© Provided by Microsoft Travel (Staticflickr Image)
A mix of nature and history awaits visitors here.

This nature preserve is not only composed of awesome natural settings filled with trails for running and hiking. There are historic mines that can be visited, albeit with certain rules or protocols. However, one of the main objectives of this preserve is to conserve plant and animal life like chestnut trees, bats, and frogs. Educating people about the value of preserving biodiversity is another goal of Ruffner Mountain Nature Preserve. The natural park does this partly through the Nature Center, which has informative exhibits.


Aldridge Botanical Gardens is a place filled with beautiful and vibrant flowers located in the heart of the busy city.


© Provided by Microsoft Travel (Jacqueline Nix Getty Image)
Aldridge Botanical Gardens is a place filled with beautiful and vibrant flowers located in the heart of the busy city.

Aldridge Botanical Gardens, located in Alabama, will surely delight those who love gardening and admiring the beauty of nature. It is a 30-acre garden that features different flora and fauna which visitors would surely love to see. Different varieties of flowers are always in bloom every season. Tourists should not miss out on this garden.


Arlington Antebellum Home & Gardens in Alabama was once a plantation and currently houses 6 acres of landscaped gardens.


© Provided by Microsoft Travel (Wikimedia Image)
Arlington Antebellum Home & Gardens in Alabama was once a plantation and currently houses 6 acres of landscaped gardens.

Arlington Antebellum Home & Gardens, located in Alabama, is a mansion that was a former plantation house. It features an Antebellum-era Greek Revival architecture that would surely leave guests in awe. The house also features a collection of 19th-century furniture and textiles that visitors could admire and learn more about.


Cahaba River is the longest free-flowing river in Alabama where it features beautiful scenery.


© Provided by Microsoft Travel (Bjray1 Getty Image)
Cahaba River is the longest free-flowing river in Alabama where it features beautiful scenery.

Cahaba River, located in Alabama, is famous not only due to its length where it is the longest free-flowing river in the city but also because of the beautiful views of nature it provides. The river and its surroundings are also a great place to do outdoor activities such as fishing or hiking.


Birmingham Civil Rights Institute houses an expensive archive of documents regarding civil rights.


© Provided by Microsoft Travel (Wikimedia Image)
Birmingham Civil Rights Institute houses an expensive archive of documents regarding civil rights.

Birmingham Civil Rights Institute, located in Alabama, is an interesting and educational attraction as it houses an expansive archive of documents about civil rights. It also includes nearly 500 recorded oral histories of these rights. Its collections date back to the events of post-World War I racial segregation to the present racial progress.


Sloss Furnaces is considered to be a historical landmark as it is one of the first industrial sites in the states.


© Provided by Microsoft Travel (Wikimedia Image)
Sloss Furnaces is considered to be a historical landmark as it is one of the first industrial sites in the states.

Visitors should try exploring the Sloss Furnaces in Alabama as it once operated as an iron-producing blast furnace from 1882 to 1971. It is considered a historical landmark since it is one of the first industrial sites in the country. Visitors will also learn more about the country during the industrial age through this attraction.


A place perfect for lovers of plants, art, exercise, and healing.


© Provided by Microsoft Travel (Wikimedia Image)
A place perfect for lovers of plants, art, exercise, and healing.

The foot of Red Mountain in the city of Birmingham holds a unique natural refuge that benefits different types of travelers. The Birmingham Botanical Gardens features around 10,000 plants spread across 25 different gardens. For art and photography enthusiasts, the gardens also feature original outdoor sculptures. In case gentle exercise (along with deep or casual conversations) is desired, this area has several miles of walking paths.


A fiery god dominates this tourist attraction.


© Provided by Microsoft Travel (Wikimedia Image)
A fiery god dominates this tourist attraction.

Only the Statue of Liberty is larger than the cast-iron statue of the Roman god Vulcan, which can be found at this site. The mythical god of fire and forge has an imposing presence here to symbolize Birmingham’s origins as an iron manufacturing powerhouse. The museum, on the other hand, is also noteworthy since it features exhibits on geology, metallurgy, mythology, map reading, and fine arts.


The 16th Street Baptist Church is both a Civil Rights historical landmark and an ongoing house of worship.


© Provided by Microsoft Travel (SeanPavonePhoto Getty Image)
The 16th Street Baptist Church is both a Civil Rights historical landmark and an ongoing house of worship.

The Sixteenth Street Baptist Church was established in 1873 as the First Colored Baptist Church in Birmingham. In the early twentieth century, the church relocated to 16th Street and 6th Avenue North. During the Civil Rights Movement, the church served as an organizational headquarters.


This park is perfect for those who love outdoor activities as well as learning about history.


© Provided by Microsoft Travel (Jacqueline Nix Getty Image)
This park is perfect for those who love outdoor activities as well as learning about history.

Tannehill Ironworks Historical State Park, located in Alabama, is the perfect place for those who love doing outdoor activities and history enthusiasts. Visitors could not only learn more about the history of the American iron history in New England but also do outdoor activities. Also, the park offers stunning views of nature. Visitors would surely love the park and visiting it.


Catch a heart-pumping football game at the outdoor stadium of Legion Field.


© Provided by Microsoft Travel (Toddmedia#458603765 Getty Image)
Catch a heart-pumping football game at the outdoor stadium of Legion Field.

Those who want to watch an exciting game of football should head on to the Legion Field, where it is usually used as a venue for American football. The stadium is located in Alabama and has been named after the organization of military veterans. It also prides itself as the “Football Capital of the South,” so football enthusiasts will surely have a pleasant time here.

Visit Birmingham to book a budget friendly trip!

BOOK NOW

[ad_2]

Ladybug Glass Celebrates Second Anniversary

[ad_1]

To celebrate its second anniversary in Algoma, Ladybug Glass Studio & Gallery is featuring new glass and photography pieces by Kimberly Lyon. An opening reception will be held during First Friday Art in Algoma on Nov. 4, 5-8 pm, and it will continue Nov. 5, 10 am – 4 pm. The gallery will also have some specials to kick off its third year. 

Work by Kimberly Lyon.

Lyon works in fused and stained glass and has developed a distinctive photographic style by using a macro lens to explore some of her glass creations. The resulting abstract photographs are mostly printed on metal to enrich the colors and brightness, and fabrics created from the photos are turned into table linens, scarves and bags. 

In addition to Lyon’s work, Ladybug Gallery sells astrophotography, jewelry, paintings and textile arts created by local artists, and it typically highlights the work of a guest artist.

[ad_2]

Spotlight: From Bowie to Beyoncé, Markus Klinko’s Celebrity Photography Defined the Aughts

[ad_1]

Every month, hundreds of galleries add newly available works by thousands of artists to the Artnet Gallery Network—and every week, we shine a spotlight on one artist or exhibition you should know. Check out what we have in store, and inquire for more with one simple click.

What You Need to Know: Founded in 1997 by Jeff Jaffe, Pop International Galleries has come to be recognized as invaluable to both the New York City gallery scene and contemporary art community for its laser focus on genres with mass appeal like Pop art, urban art, and photography. Recently, Pop International Galleries announced their representation of world-renowned celebrity photographer Markus Klinko. Originally from Switzerland, Klinko and his work were discovered early in his career by fashion editors Isabella Blow and Ingrid Sischy, both of whom commissioned him for magazine covers and other editorial shoots. Shortly after, Iman and David Bowie hired him to photograph them for projects. Since then, Klinko has photographed some of the world’s most famous people and created numerous iconic images that have become hallmarks of 21st-century pop culture—and his work has appeared in such legendary publications as Harper’s Bazaar, Vogue, GQ, and Interview. More recently, Klinko was the subject of the Cube Art Fair collaboration with Versace, which saw 30 of his images exhibited in Versace’s Miami flagship store.

Why We Like It: The 2000s had a distinctive, high-gloss aesthetic, and Klinko was a shaping force of visual culture in the early aughts. Many of the most iconic and recognizable photos of pop stars and celebrities have been captured by his camera lens, including as album covers for Beyoncé’s Crazy in Love and Mariah Carey’s The Emancipation of Mimi. His photographs of music stars like Britney Spears and Lady Gaga not only became famous in their own right, but also helped shape the stars’ respective celebrity brands. Printed by Weldon Color Lab on Fujicolor Crystal Archive Digital Pearl Paper, Klinko’s work comes to life and beckons viewers to look back at era-defining moments and celebrities. As one of the most admired photographers of the 2000s through today, Klinko’s representation by Pop International Galleries—dedicated to fostering a high-quality yet accessible collecting experience—is more than fitting.

Photographer Markus Klinko on set. Courtesy of Pop International Galleries, New York.

Photographer Markus Klinko on set. Courtesy of Pop International Galleries, New York.

According to the Artist: “Jeff at Pop International Galleries shows some of my all-time favorite artists ever: Warhol, Basquiat, Lichtenstein, Haring…it doesn’t get any better! To see my work on display at Pop International right next to these heroes of mine is just incredible. Andy Warhol’s creative director for Interview magazine, Marc Balet, gave me my start in the industry, and having that work now at Pop, it feels like things are coming full circle!”

See featured works by Markus Klinko below.

Markus Klinko, Beyonce, Dangerously in Love (2003). Courtesy of Pop International.

Markus Klinko, Beyoncé, Dangerously in Love (2003). Courtesy of Pop International, New York.

Markus Klinko, Britney, The Forest (2004). Courtesy of Pop International.

Markus Klinko, Britney, The Forest (2004). Courtesy of Pop International, New York.

Markus Klinko, The Protector (2002). Courtesy of Pop International.

Markus Klinko, The Protector (2002). Courtesy of Pop International, New York.

Markus Klinko, The Savior (2001). Courtesy of Pop International.

Markus Klinko, The Savior (2001). Courtesy of Pop International, New York.

You can browse Pop International on Artnet or visit the gallery at 195 Bowery, New York.

Follow Artnet News on Facebook:


Want to stay ahead of the art world? Subscribe to our newsletter to get the breaking news, eye-opening interviews, and incisive critical takes that drive the conversation forward.

[ad_2]

Philippe Cousteau to speak at library | Community

[ad_1]

The Pioneer Library System is set to host filmmaker, explorer, advocate and Emmy-nominated TV host and producer Philippe Cousteau.

He will speak at 6:15 p.m. Nov. 11 during the “Spark a Change: Let’s Talk About the Environment” event at Norman Public Library Central, 103 W. Acres St. 

Attendees can learn more about the environment and conservation efforts through aconversation with Cousteau, moderated by Oklahoma State Director of the Nature Conservancy Mike Fuhr, whose nature photography will be revealed in an exhibition prior to the event.

Seating will be available for the first 300 attendees.

The event caps off Pioneer Library System’s PLS Reads initiative, a year-long look at the topic of the environment in which community members have learned how small changes can make a big impact on the world around them through reading, conversation and exploration.

“Philippe and his family have done so much to raise awareness for the environment and to foster regeneration and restoration efforts. We’re honored to have him in Oklahoma, to hear his story and to learn how we can work together in protecting our beautiful planet,” PLS Director of Community Engagement and Learning Ashley Welke said. 

The event will be featured as part of Norman’s Second Friday Art Walk in partnership with the Norman Arts Council.

Attendees can meet NAC Executive Director Erinn Gavaghan at MAINSITE before heading out on a guided walk to ​Norman Public Library Central.

The gathering will depart the gallery at 5:30 p.m., stroll through Andrews Park to see the “In Their Words” installation, then arrive at the library for the event. 

Inspired by the legacy of his grandfather, Jacques Cousteau, Philippe Cousteau is a multi-Emmy-nominated TV host and producer, author, speaker, and social entrepreneur.

He is the host and executive producer of the weekly syndicated series “Awesome Planet,” now in its sixth season.

His conservation efforts are focused on solving global social and environmental problems.

In 2005, he founded EarthEcho International, a leading environmental education organization. To date, EarthEcho has activated over two million youth in 146 countries through its programs.

Cousteau’s children’s book, “Follow the Moon Home,” has been chosen for the Texas Bluebonnet Award Master List. He has co-wrote “Going Blue” and “Make a Splash,” both of which have won multiple awards.

His new book series, “The Endangereds,” with Harper Collins, launched in September 2020. His latest book, “Oceans for Dummies,” which he co-authored with his wife, Ashlan, was released in February 2021.

For more information about the event at bit.ly/3NIdAFJ.


[ad_2]