Story Behind The Image “Supervised Play” – Barger Nature Photography

[ad_1]

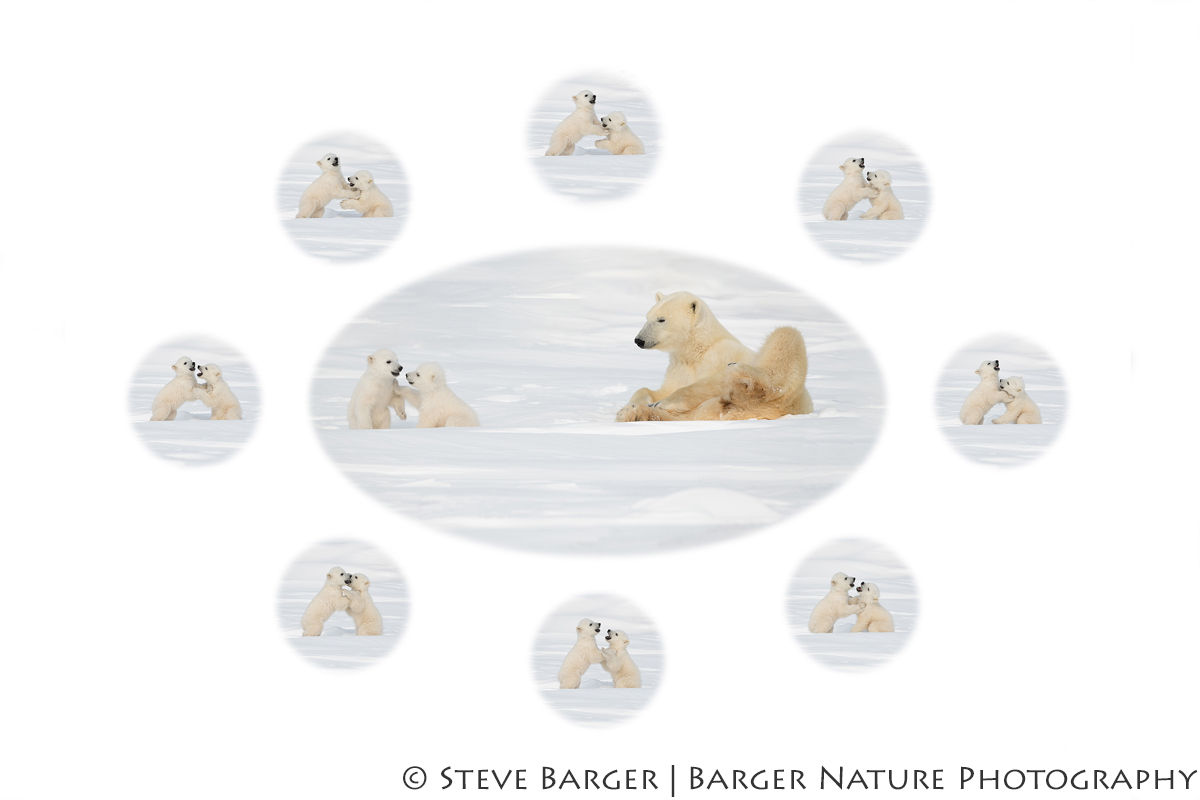
A sequence of images of young polar bear cubs playing on the tundra in Wapusk National Park, Manitoba, Canada while their mother watches intently.

These images of a mother polar bear with her two cubs playfully sparring while she watched intently, were captured this past winter in Wapusk National Park, Manitoba, Canada. I spent the first two weeks of March this year in the Canadian tundra with a small group of photographers. Our primary goal: photograph these awesome mammals in their natural environment. The cubs in these images are only a few months old, so they are extremely small in size.

Local guides are required to enter the Park. Travel is done using vehicles modified to negotiate the rough tundra terrain. Travel in these vehicles is very slow and bumpy, Typical speeds for these vehicles would max out at 10 miles per hour.

Early in the morning on my first full day in the Park, two of our guides spotted a polar bear family sleeping on the tundra. After a long, slow, and bumpy ride, which took over an hour, we arrived at the site early in the afternoon to find all three bears curled in a big ball, sleeping, and covered with snow. The sound of the tundra vehicles as they approach does not alarm them, since the mother is familiar with the sound and the cubs follow their mother’s actions.

Proceeding in a slow and methodical manner, I set up my camera, lens, and tripod maintaining the Park Services recommended viewing distance. For the next couple of hours, I patiently waited in the cold temperatures and blowing snow as the bears slept. Periodically, there would be a hint of activity when the mother would open her eyes and raise her head to make sure all was OK. She would then lower her head, close her eyes and continue resting, always aware of her surroundings. Several times, the cubs would wake up and move a bit, always maintaining physical contact with their mother.

Around three o’clock in the afternoon, all three finally woke-up and began to move. The cubs then proceeded to climb all over their mother pulling her fur, ears, and paws, while maintaining physical contact with her. After 30 to 40 minutes of this, the cubs then began playful sparring. At first, they would stay close to her, but after a short time began to move away but no farther than 15 to 20 feet off to her side. This is when these images were taken.

It is always a challenge how to depict motion in a single wall print. After thinking about it for awhile, I decided to make a montage using the images from the sequence. The image featured in the center would be the mother intently watching her cubs sparring close by. This image would then set the stage for the remaining images of the cubs sparring which would be placed around the center image. The spacing between the cubs and their mother was outside the field of view of my lens so I could not include the mother in these images.

[rl_gallery id=”513″]

After further thought, I decided to use the images of the cubs sparring, to make a sequence. Since the action occurred quickly, I was able to pick 10 images where the background remained constant, using these images for the time lapse sequence.

[responsive_vimeo https://vimeo.com/412780199]

[ad_2]

Source link

Add your own keyboard shortcuts in PixInsight

[ad_1]

PixInsight has many keyboard short cuts build in right from the start (you can find an overview of them here.), some very useful while others won’t get used at all probably. One thing that bothered me though is that I can’t start processes using keyboard short cuts so I decided to look for a way around this. Luckily there is this great open source program called AutoHotkey that will let you define your own keyboard shortcuts and basically have them do anything you like. Even better; you can also program mouse buttons and movements!

Using AutoHotkey

You can download AutoHotkey for free here. As far as I’m aware, this only works on Windows at the moment. AutoHotkey will work with so called scripts, in which you can program the keystrokes or mouse behaviour it needs to react on and define what the program will need to do once it detected the particular keystroke(s).
This scripting can seem a bit complicated from the start, but there is a lot of great documentation and examples available. I’ll post some example code specificaly for PixInsight further down in this post.

Now let’s run briefly through the required steps to use AutoHotkey to add custom keyboard shortcuts to PixInsight:

  1. Download and install AutoHotkey
  2. Download AutoHotkey here and simply run the installer

  3. Add AutoHotkey to Startup
  4. It will be really convenient for AutoHotkey to always run in the background, so add it to Startup

  5. Create a script
  6. Now it’s time to start creating a script for AutoHotkey;

    1. Right-Click on your desktop.
    2. Find “New” in the menu.
    3. Click “AutoHotkey Script” inside the “New” menu.
    4. Give the script a new name. Note: It must end with a .ahk extension. Ex. MyScript.ahk
    5. Find the newly created file on your desktop and Right-Click it.
    6. Click “Edit Script”.
    7. A window should have popped up, probably Notepad.

    Now we can start editing the file to create some shortcuts for PixInsight.

  7. Special keys and their symbols
  8. First we need to be aware of the symbols we’ll need to use to define certain keys like Alt, Ctrl and Shift. AutoHotkey uses the following symbols for the keys:

    Symbol Key
    # Win (Windows key)
    ! Alt
    ^ Ctrl
    + Shift
    Use the left key of the pair. e.g.
    > Use the right key of the pair. i.e. >+a = right Shift + a

  9. Add a custom shortcut for an existing keyboard shortcut in PixInsight
  10. Let’s start really easy and simply use another keyboard shortcut to toggle the ScreenTransferFunction. The default shortcut for this is F12, which I don’t find convenient for frequent use. Let’s say we want to use Alt+S instead. We can do this with this simple line of code:
    !s::send, {F12}

  11. Save the script and run it
  12. Save the file and double click it on your desktop to run it. Now open up PixInsight and open an image on which you can test the ScreenTransferFunction Toggle. Hit Alt+S to toggle the ScreenTransferFunction!

Now you have your first script succesfully working, let’s dive in a bit deeper and use the PixInsight Console to open up Processes

Open up Processes with keyboard shortcuts

Most people probably won’t know this, but the PixInsight console is more than just a monitor for processes to output to and which you can keep an eye on to see what’s going on when you execute processes. It is also a really extensive input console which you can use to do really a lot of (complicated) stuff. This is very useful in this case because it is the console we will use to fire up Processes instead of mimicking mouse movements and menu clicks which are far less reliable. Luckily there is even a keyboard short cut to open up the Console in PixInsight, so scripting a custom keyboard shortcut in AutoHotkey for PixInsight is remarkably easy!
Basically we need to do 6 things when we want to open up a process;

  1. Define the keyboard shortcut that needs to trigger the opening of the process.
  2. Let’s open up the ScreenTransferFunction with Ctrl+Alt+Shift+S. We can do this by starting the script with ^!+s::
    Note: Please be aware of existing keyboard short cuts like Ctrl+S to save a file, and avoid using those.

  3. Open the Console
  4. We can open the console with ^!c

  5. Wait for the Console window to open
  6. We can’t start typing right away, we’ll need to wait till the window is opened. This can be done by using the sleep command and specifying the time in miliseconds that AutoHotkey needs to wait. sleep, 600 is what I use to make sure PixInsight has opened up the Console window.

  7. Type in the name of the process we want to open
  8. We can simply send keystrokes to mimick typing. To open up the interface window of a process from the console, all we have to do is add ‘–interface’ to the name of the process.

  9. Hit Enter
  10. To mimic hitting enter we can simply add; {enter}

  11. Tell AutoHotkey we are done with the actions for this particular shortcut
  12. If we use only one line of code like before, we don’t need to specify the end of the script and we can simply begin a new shortcut on a new line in the file. If we use multiple actions like we are doing now, we need to tell AutoHotkey when this collection of actions end so that we can start up a new shortcut after it.
    We do this by simply adding “Return”

If we combine this we’ll get the following code:

^!+s::
send, ^!c
sleep, 600
send, ScreenTransferFunction --interface {enter}
Return

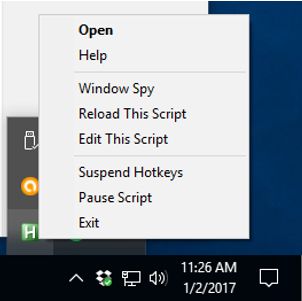
Now save the file and right-click the AutoHotkey icon in the Taskbar and Reload the script.

Go to PixInsight and try it out!

Add more keyboard shortcuts in the same script file

You can just continu adding more shortcuts by placing the code for new keyboard shortcuts after the previous ones. We’ve seen two examples already, now let’s just add a third one to open another Process interface; Windows key + S for Starmask.

#s::
send, ^!c
sleep, 600
send, StarMask --interface {enter}
Return

It is usefull to add comments in the script file, so you can keep track of what everything means. You can do this by starting a line with “;”.
If we combine all three examples and add comments, our script file will look like this:


;ScreenTransferFunction - Toggle
!s::send, {F12}

;ScreenTransferFunction – Interface
^!+s::
send, ^!c
sleep, 600
send, ScreenTransferFunction –interface {enter}
Return

;Open StarMask interface
#s::
send, ^!c
sleep, 600
send, StarMask –interface {enter}
Return

Limit the keyboard shortcuts to only work in PixInsight

It is very useful to limit the keyboard shortcuts to only work in PixInsight. This enables you to use the same keyboard shortcuts again in other programs for instance.
You can do this by simply using the #ifWinActive statement with the title of the window. So in our case we’ll be adding the following to your script: #ifWinActive PixInsight 1.8 and place the keyboard shortcuts for PI between {}
So if we add this, now our script file looks like this:


#ifWinActive PixInsight 1.8
{
;ScreenTransferFunction - Toggle
!s::send, {F12}

;ScreenTransferFunction – Interface
^!+s::
send, ^!c
sleep, 600
send, ScreenTransferFunction –interface {enter}
Return

;Open StarMask interface
#s::
send, ^!c
sleep, 600
send, StarMask –interface {enter}
Return
}

Add more commands

In addition to opening up the process windows, you can also execute them with certain settings and do a lot more using the Console in PixInsight.
Just type in –help in addition to the process name to see all the things you can do in the Console with that particular process.
Please let us know in the comments below if you have any good ideas for more keyboard shortcuts!


[ad_2]

Source link

5 Must-Know Facebook Tips For Photographers

[ad_1]

Having a successful Facebook page is the highest level of digital branding.

Why? It’s because this social media platform has the largest market share with 2.93-billion active monthly users. So, success on Facebook means great exposure and sales.

No wonder why every professional is in a constant struggle to improve their page’s performance. You’ll find them posting daily, developing strategies, and whatnot. Some even use growth services that help get Facebook free likes and followers.

However, growing a Facebook page isn’t that hard. Today, we’ll share some amazing must-know Facebook tips for photographers to help boost your page instantly. Let’s dive in!

Facebook Tips For Photographers

Post Consistently

Both algorithms and people prefer Facebook pages that are active.

When you post consistently, the viewers stay updated with the latest things going on in your photography business. This helps them feel involved and connected.

Plus, a study suggests that when one thing pops up again and again in front of someone, it encourages them to make a purchase. So, consistent posts are an excellent way to boost sales too.

As for algorithms, the activeness of a page triggers the bots to increase visibility. It shows the post on others’ feeds and even sends suggestion notifications.

Optimize Your Page

Never underestimate the power of optimizing your Facebook page. It helps increase the ranks of your page in the search results. So, when someone searches for photographers or photography, your page will pop up.

Here are some Facebook SEO tips to follow:

  • Fill in the About Us accurately
  • Use keywords in the content
  • Claim the vanity URL
  • Get backlinks

The keyword point is the most important. These key terms should be sprinkled naturally in your page title, about us, contact, and even the captions.

Facebook Tips For Photographers

Use Videos & Livestreams

Perhaps, we don’t need to emphasize the need for high-quality images for your page. As a photographer, you would know that people are attracted to flawless images. But, while trying to build a portfolio, don’t forget videos and live streams.

Research says that videos are 1200% more effective in delivering the message. They generate more likes and shares than any other content form. So, make sure you upload at least 1 to 2 videos every week.

These videos can be anything from a recap of the last year’s work or behind-the-scenes of a current project. You can even skip the trouble of video making and editing by going live.

Be Human

Engagement with the audience is crucial to create a loyal community. You need to interact, socialize, and let them know that there’s a real person behind the screen.

Post about your struggles and achievements. Make people feel comfortable and connect with them on similar grounds. They would feel more confident in doing business when they know you and them are alike.

Also, do not overstress about publishing overpolished content. Too much perfection often gives a fake and cold feel to your business.

Facebook Tips For Photographers

Run Facebook Ads

Facebook ads are a great marketing tool that lets the platform handle the duty to increase exposure. Of course, it’s not free, but it’s worth the money.

All you have to do is select the post and sponsor it. Facebook will drive the results for you!


Related Articles:

[ad_2]

Source link

Art In Nature : Middle of Nowhere, Nevada

[ad_1]

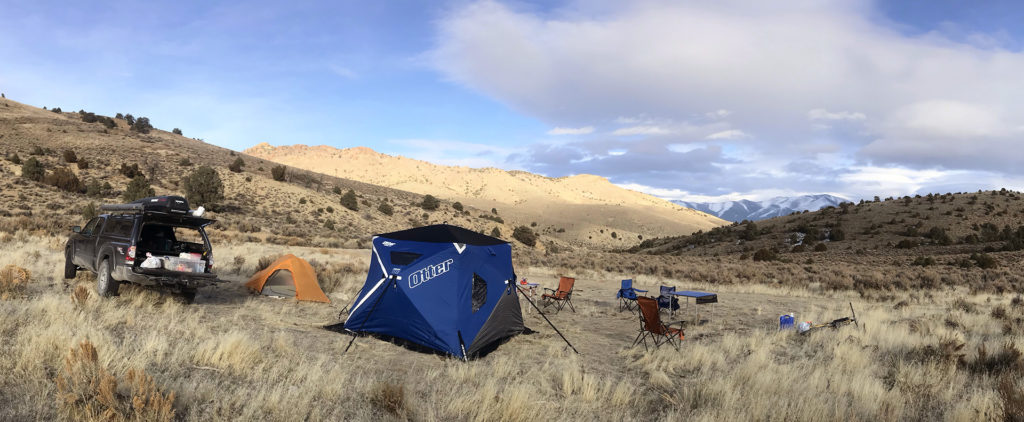
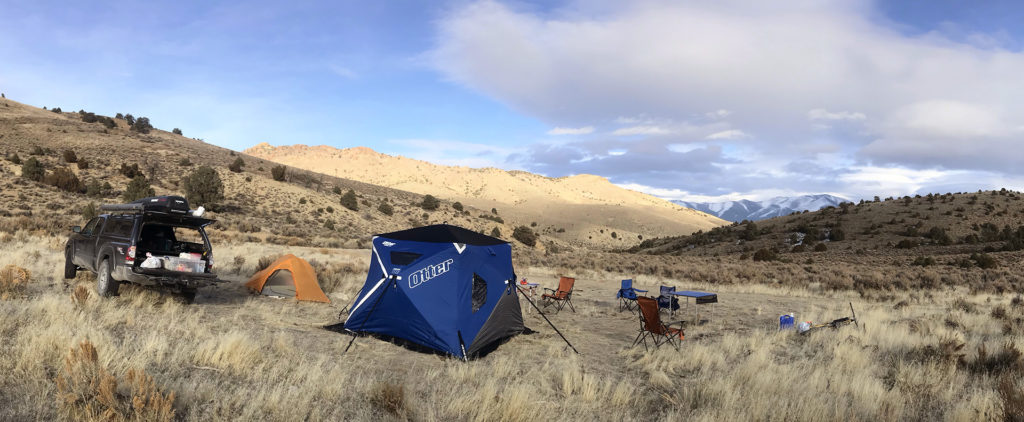
A few weeks ago Aubrey, myself, and some friends celebrated George and Abraham’s birthday by driving out to west-central Nevada to see what we could find in and around the Toiyabe Mountains. We found some hot springs, wide open spaces, pinyon pines, junipers, burros, and many empty roads. It was a lovely break from the busy life of a young professor! I look forward to returning to the area in the spring, when there may be some flowers out and about.

The blue thing is our new replacement of our red cube: an ice fishing hut! It served us well as a portable living room.

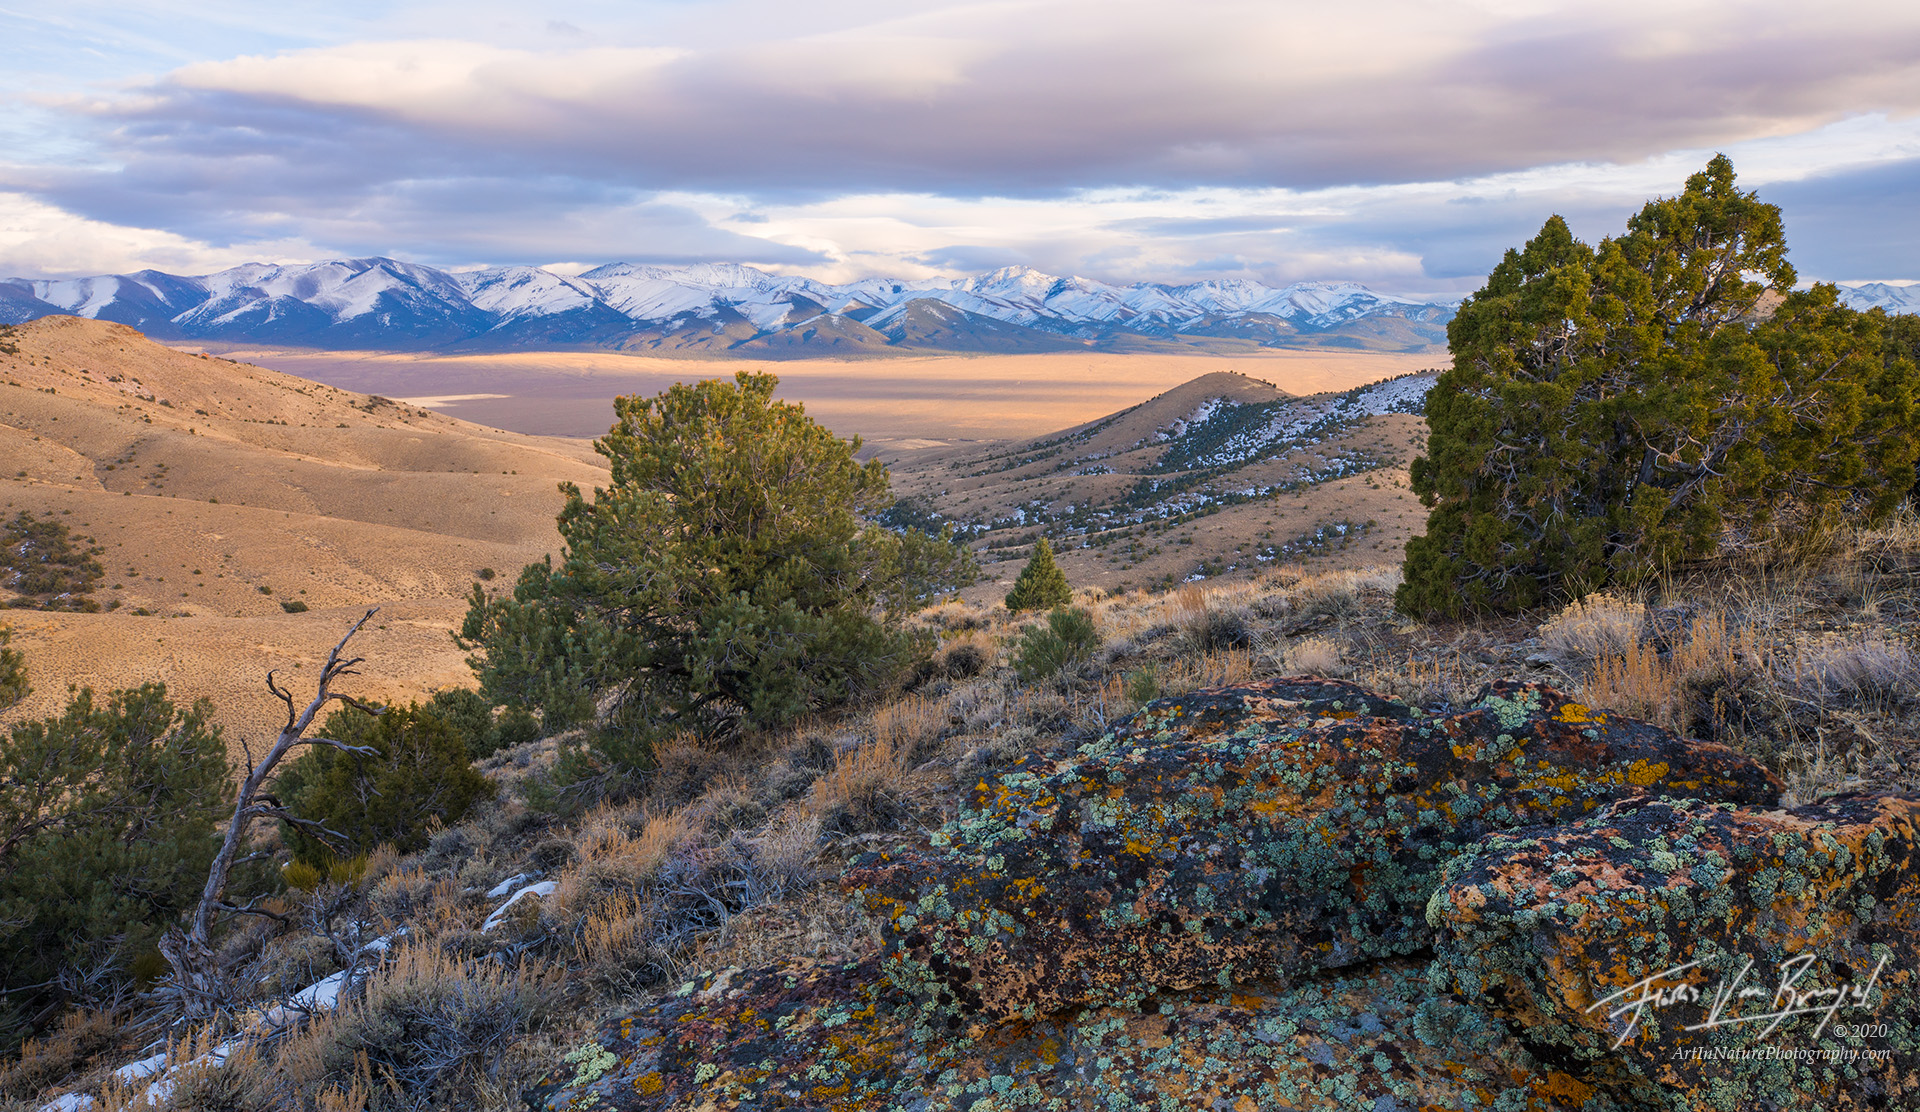
nevada, open spaces, warm, mountains, deserts

Late afternoon sunlight dances across the basin and range of Nevada. Pictured here is the western side of the Toiyabe Mountains, with some Juniper and Pinyon Pine in the foreground.

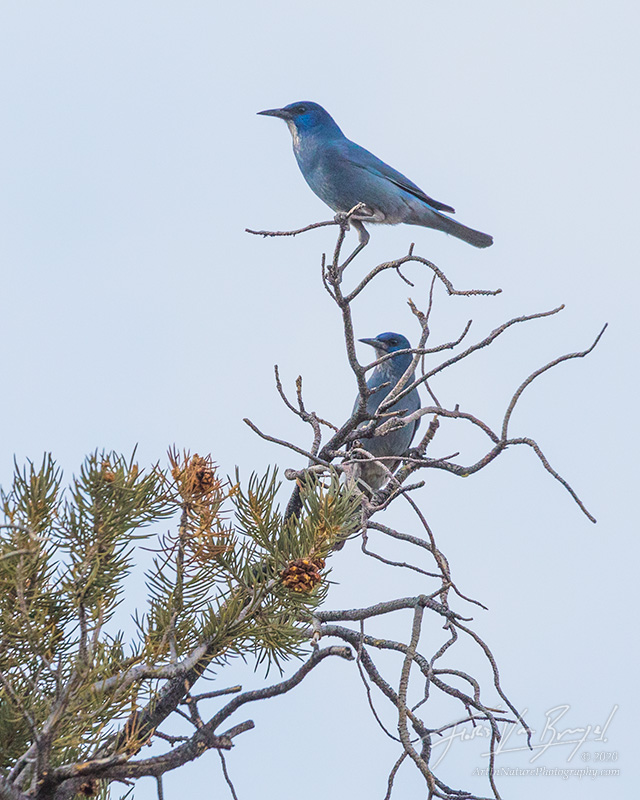
birds, nevada

Pinyon Jays perched atop a pinyon pine in Nevada’s Toiyabe National Forest.

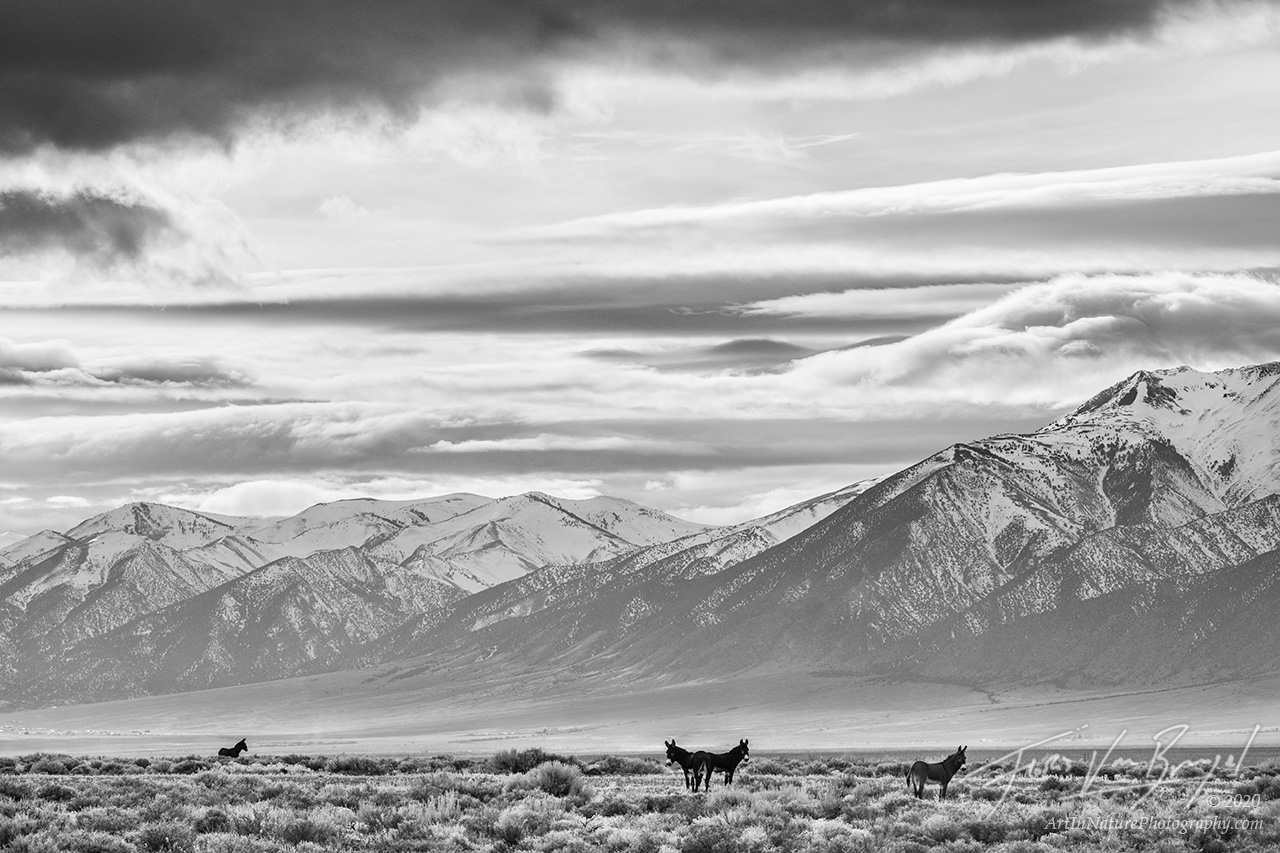
burrows, wildlife, nevada, desert, black and white

Wild Burrows pose in front of the eastern Toiyabe Range in Nevada.

Tags: nevada, toiyabe mountains, toiyabes

[ad_2]

Source link

Ocultación de Marte por la Luna: 8 de diciembre [ESPAÑA]

[ad_1]

El próximo 8 de diciembre, de madrugada, podremos observar desde España la ocultación de Marte por la Luna, un fenómeno poco habitual que coincide además con la oposición del planeta rojo, el momento en que se encuentra más próximo a La Tierra.

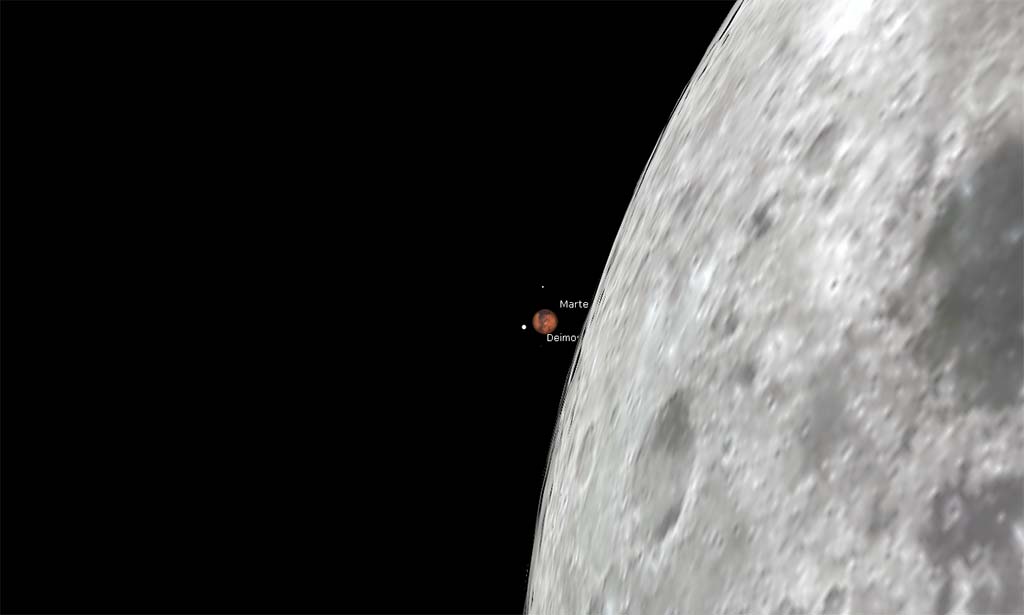
Podemos decir que se produce un «eclipse marciano» ya que nuestro satélite natural tapará durante unos minutos a Marte aunque lo interesante de la ocultación son los momentos inmediatamente anteriores y posteriores a ésta, cuando podemos ver el planeta junto a la Luna, ser testigos de sus movimientos orbitales y hacernos una idea de sus diferentes tamaños aparentes ya que la Luna es más pequeña que Marte, pero está mucho más cerca que éste.

Concretamente en el momento de la ocultación la Luna estará a 397.703 kms de nosotros mientras que Marte se encontrará a 82.207.000 de kms.

Marte junto a la Luna justo antes de ser ocultado

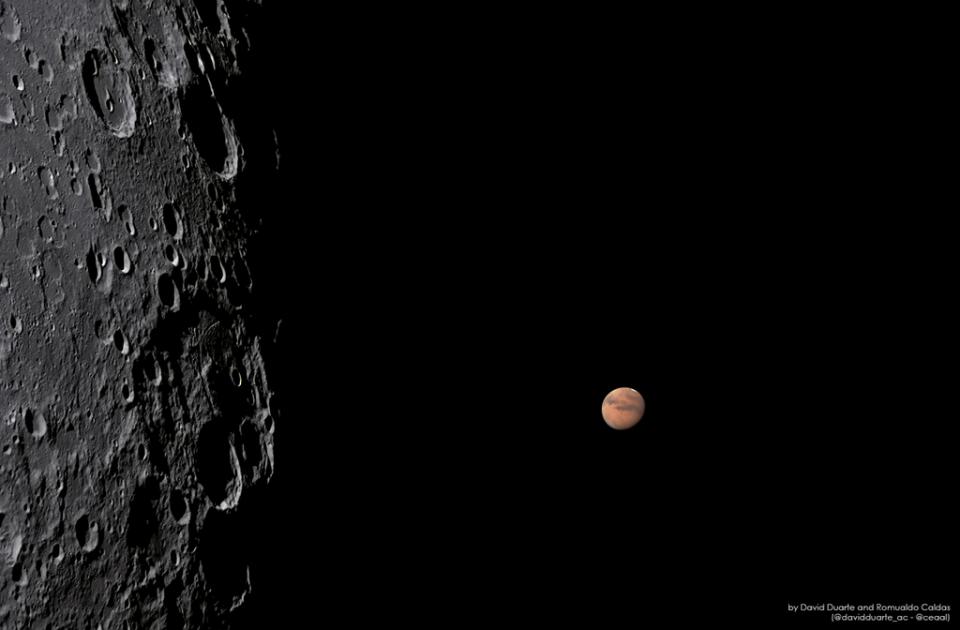
La última vez que pudimos ver este fenómeno desde España fue el 6 de septiembre de 2020 y algunos astrónomos amateurs consiguieron algunas imágenes espectaculares de aquella ocultación.

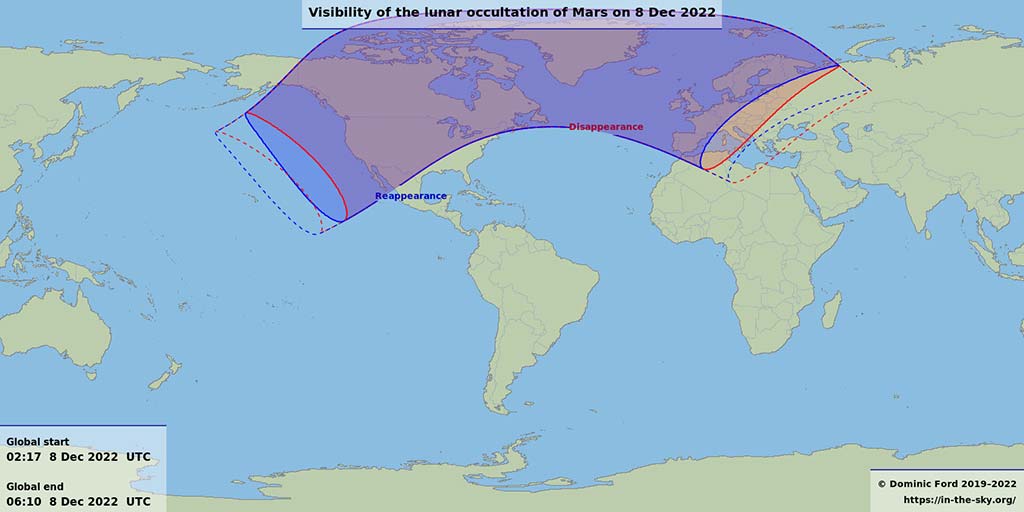
El fenómeno de ocultación será visible únicamente desde parte de América del Norte, Groenlandia, Islandia, parte de Europa y parte del norte de África pero la conjunción de ambos astros si será visible desde todo el mundo.

Mapa de visibilidad de la ocultación de Marte por la Luna el 8 de diciembre de 2022.
Mapa de visibilidad de la ocultación de Marte (c) Dominic Ford https://in-the-sky.org

Horario de la ocultación de Marte

El inicio de la ocultación varía dependiendo de la posición geográfica desde la que se observe el fenómeno. Te recomendamos que consultes algún programa como Stellarium para comprobar a qué hora se observará desde tu localidad.

En Madrid el fenómeno comenzará a las 06:20UT a una altitud de 24,1º y la reaparición será a las 07:05UT a una altitud de 15,4º por lo tanto tendremos que buscar un lugar con horizonte despejado para poder ver el fenómeno completamente. Recordad que es la madrugada del 7 al 8 de diciembre.

¿Cómo observar la ocultación?

Para observar esta ocultación es recomendable el uso de un telescopio de bastante focal ya que Marte es un planeta con un tamaño aparente bastante pequeño. Podemos utilizar también prismáticos pero éstos no nos darán los mismos aumentos y tan solo veremos Marte como puntito brillante.

astrofotocanadiense
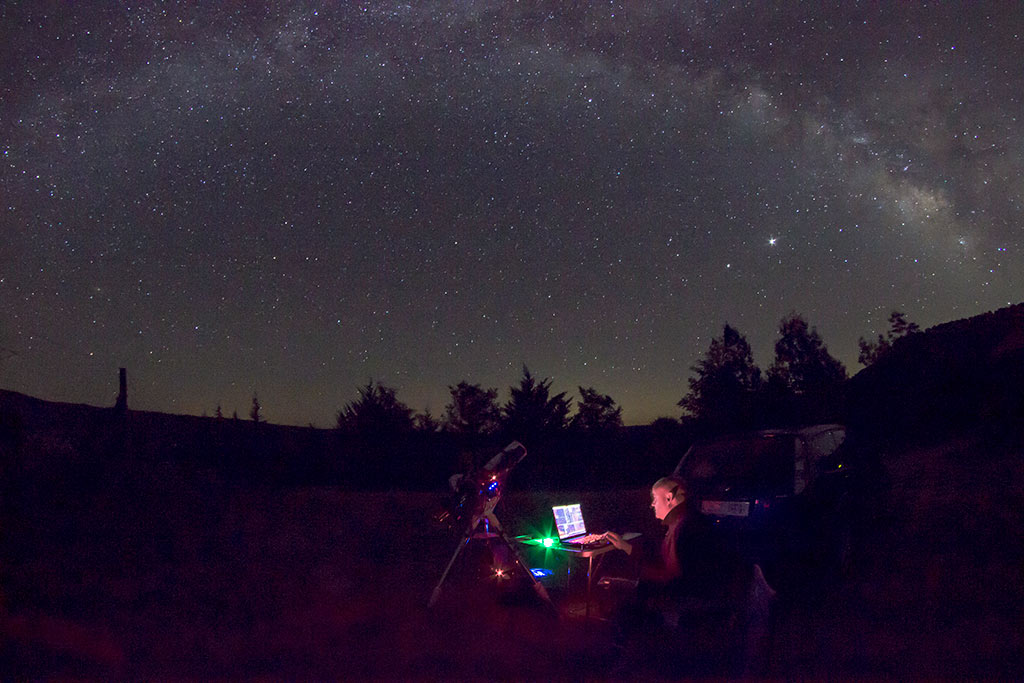
Una sesión de fotografía astronómica desde el campo.

Recomendamos que planifiquéis bien la observación y que madruguéis bastante. Se tarda un rato en montar el telescopio y aclimatarlo así que nos tocará levantarnos prontito y aguantar bajo temperaturas gélidas. Para evitar pasar frío os recomendamos que leáis este artículo que escribimos hace algún tiempo sobre ropa para observaciones astronómicas. También es recomendable que llevéis algo de comida y bebida caliente (un café, un caldo, etc…).

Buscad un lugar elevado con el horizonte despejado. El fenómeno se observará aquí en España con la Luna bastante baja en el horizonte, sobre todo al final. No hace falta que el sitio esté muy oscuro ya que no es un fenómeno astronómico al que le afecte demasiado la contaminación lumínica, se puede observar incluso desde la ciudad pero buscad un sitio donde los edificios no os tapen la Luna.

El fenómeno de ocultación y reaparición dura muy poco. Tanto Marte, como la Luna y La Tierra están en continuo movimiento así que estad muy atentos porque es todo un «visto y no visto». Si estáis atentos podréis llegar a ver a Marte desaparecer y aparecer entre las montañas y cráteres del relieve lunar.

Fotografiar la ocultación de Marte

Para fotografiar la ocultación también necesitaremos focales muy largas. Hay que tener en cuenta que la ocultación se produce en fase de Luna llena por lo que el brillo de la Luna saturará la imagen si queremos sacar a Marte bien expuesto. Necesitaremos una cámara con muy alto rango dinámico o bien hacer múltiples exposiciones para intentar hacer luego una composición HDR.

Además, en astrofotografía planetaria la mejor técnica es el «lucky imaging» que consiste en grabar vídeos, pero el diferente movimiento aparente de la Luna y el planeta nos obligará a hacer vídeos muy cortos para poder hacer posteriormente un apilado correcto.

En nuestro canal de Youtube tienes multitud de vídeos de procesado de imágenes planetarias que te pueden servir de ayuda.

¿Cuándo se producirán las próximas ocultaciones de Marte por la Luna?

Si no puedes ver esta ocultación podrás volver a intentarlo en cualquiera de las siguientes fechas.

04/1/2023 Sudáfrica y Madagascar
31/1/2023 México , Centroamérica, Colombia, Venezuela y Ecuador
28/2/2023 Noruega, Suecia, Finlandia y Rusia
17/09/2023 América del norte y central. Colombia, Venezuela y Brasil
16/10/2023 Antártida
05/5/2024 Tailandia, China y Japón
18/12/2024 España, Portugal, Francia, Alemania, Reino Unido, Noruega, Suecia e Islandia

Summary

Event

Ocultación de Marte por la Luna el 8 de diciembre

Location

España,

Starting on

08/12/2022

Ending on

08/12/2022

Description

La Luna ocultará el planeta Marte el próximo 8 de diciembre antes del amanecer. Esta ocultación será visible desde toda España.

[ad_2]

Source link

NJ Photography: A research chemist runs a successful photography business

[ad_1]

New Delhi [India], November 2 (ANI/SRV): Weddings are special in everyone’s life, and to make this day memorable, wedding shoots and pre-wedding shoots are in trend among young people nowadays.

The trend of a pre-wedding shoot is growing among young couples. When we talk about making memories, not just pre-wedding shoots, but wedding shoots, maternity shoots, and candid photos are in style.

A different custom rooted in youth is taking photos and videos of a wedding ceremony and displaying them in a nice collage or posting them on social media to tell everyone that they got married. As a result, there is a surge in hiring professional photographers as the photography industry grows and expands.

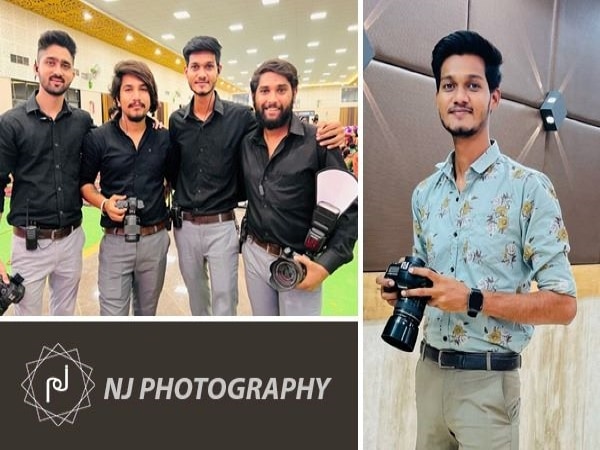
While talking about the photography business, we can take the example of NJ Photography, one of Kalyan West’s fastest-growing wedding photography businesses that provide pre-wedding, wedding, maternity, royal albums, drones, cinematic videos, and candid photo services. With a highly professional team, they have shot more than 350 weddings to date and have done more than 200 fashion shoots. NJ Photography has served a few renowned clients, including Namrata Anap (Bollywood fashion designer), Dr Neha Shelkar, Amruta Anap (TV9 Marathi anchor), Shraddha Pednekar (Fashion Influencer), etc.

In the year 2016, Nikhil Jadhao founded NJ Photography and formed a creative team with friends who shared a similar interest and passion for the arts. When he first started the business, orders for wedding and pre-wedding photography began to pour in just 7 months, and the company achieved its first goal of 20+ wedding shoots.

NJ Productions, a full-service film production firm, has become a destination to cater to the citizens’ photography needs in Mumbai. The founder of the company is well known for his candid photographic work and excellent video coverage. Within a short period, the company became successful by providing its services across the country.

Today, NJ Photography is one of Kalyan West’s fastest-growing wedding photography businesses. However, success is never handed to you; you have to work hard for it. Likewise, Nikhil also had to struggle, but never gave up. From his background as a research scientist at Aditya Birla Group, he has always been fascinated by the world of art.

His only area of interest was photography, and he persuaded his father that he should start his own photography business. Nikhil left his job and started his own photography business. While doing his business, he experienced loss but continued to make his own NJ photography without faltering.

(https://www.instagram.com/nikhil_jadhao) Nikhil Jadhao, a self-made entrepreneur with a mission to become the best wedding photographer in India, the best photography mentor, YouTuber, and the best Instagram influencer, has started an e-comm. a firm called ‘prophotographers.in’ which provides digital tools for photographers, and he serves as CEO of NJ Productions (Adv and Media Company). He aims to establish a full-service production studio in Mumbai.

This story has been provided by SRV. ANI will not be responsible in any way for the content in this article. (ANI/SRV)

DISCLAIMER

(This story has not been edited by Business Standard staff and is auto-generated from a syndicated feed.)


[ad_2]

Source link

How to photograph waterfalls – a complete guide

[ad_1]

August 15, 2022

If you’re looking to learn how to photograph waterfalls, then this is the how-to guide for you.

Waterfalls are simple, elegant features to shoot and you don’t need one the size of Niagara Falls to get good images. A waterfall of 4ft-5ft (1.2-1.5m) or even a few feet across can be just as photogenic –  sometimes more so than a great roaring giant that is producing so much spray you can’t get near it.


Welcome to the AP Improve Your Photography Series – in partnership with MPB – This series is designed to take you from the beginnings of photography, introduce different shooting skills and styles, and teach you how to grow as a photographer, so you can enjoy producing amazing photography (and video), to take you to the next level, whether that’s making money or simply mastering your art form.

Improve your photography from AP and MPB

Each week you’ll find a new article so make sure to come back to continue your journey, and have fun along the way, creating great images. If you’ve found these articles helpful, don’t forget to share them with people you know who may be interested in learning new photography skills. You’ll find a whole range of further articles in this series.


Waterfalls in the UK: We’re lucky to have a huge variety of waterfalls across the UK, especially in Wales, Scotland and the North of England. Southern England isn’t short on these cascades of water, either, with some excellent examples on Exmoor in Somerset. You’ll even find some waterfalls in local parks or nearby rivers.

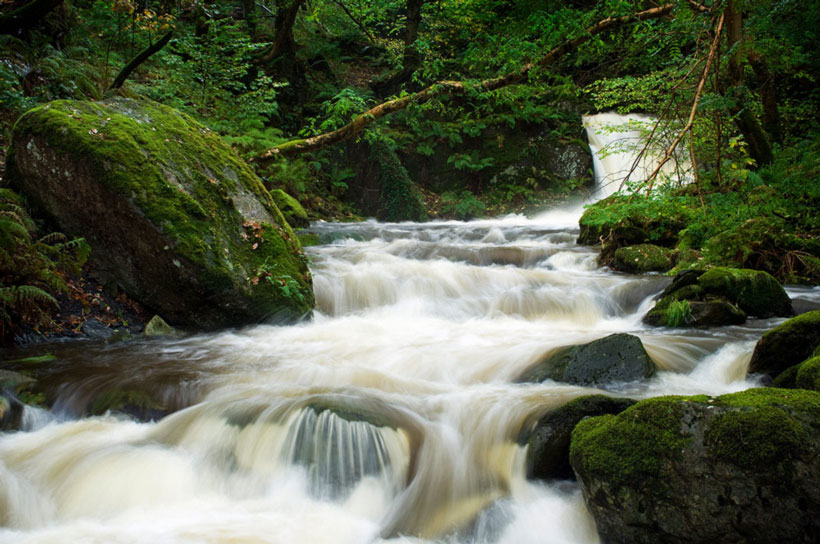
Lead image: River and waterfall in woodland, Brecon Beacons National Park, Wales. Photo: Jeremy Walker

How to photograph waterfalls

On first seeing a waterfall, look around your location and take time to study the flow of water. Waterfalls are living entities and they will pulse with the flow and volume of water. Don’t fall into the trap of trying to shoot the waterfall in its entirety, as you’ll find many excellent images by looking for sections, abstracts, details or close-ups. Try to identify individual rivulets within a fall, curtains of water, or rocks and boulders that will add shape, direction and flow to your shot.

Take time to study the flow of water. Sgwd Gwladus waterfall, Brecon Beacon National Park, Wales. United Kingdom. Photo: Jeremy Walker

Take time to study the flow of water. Sgwd Gwladus waterfall, Brecon Beacon National Park, Wales. United Kingdom. Photo: Jeremy Walker

Health and safety

Before you shoot your waterfall, be aware that you’ll probably be working in a wet environment, with spray from the falls making the surrounding area very slippery. Take care when climbing over rocks to get in position and carry your kit in a camera bag. Moving around a wet, slippery location with thousands of pounds’ worth of camera kit on a tripod is asking for trouble. If there’s spray coming from the waterfall you’ll need to protect the front of your lens with a lens hood. If moisture is falling on the camera, try using a chamois cloth to wrap around it and help protect it and the barrel of the lens.

Be careful when shooting as the slippery surfaces can be dangerous. Sgwd yr Eira waterfall, Brecon Beacons National Park, Wales. Autumn. Photo: Jeremy Walker

Be careful when shooting as the slippery surfaces can be dangerous. Sgwd yr Eira waterfall, Brecon Beacons National Park, Wales. Autumn. Photo: Jeremy Walker

There are probably two main approaches to shooting a waterfall: the big, wide view, perhaps showing the whole of the falls, going for the dramatic in its landscape setting; or the closer, more intimate portrait showing the finer detail that’s easily missed when struck by the grandeur of a big fall. Both approaches can work well, but look for a composition that helps to tell a story, such as fallen rocks at the base of a waterfall, a dead tree across the river or even plant life growing in the rock face.

The most simple tool for composition is, of course, the camera itself, and don’t be afraid to turn the camera through 90° to shoot upright. It sounds so simple, but when faced with a long, wide subject it’s tempting just to use the camera horizontally.

Look for details and shapes within the waterfall. Waterfall, blurred motion. Glen Etive, Scotland, winter. Photo: Jeremy Walker

Look for details and shapes within the waterfall. Waterfall, blurred motion. Glen Etive, Scotland, winter. Photo: Jeremy Walker

Best time to shoot

The light at the beginning and end of the day is usually regarded as best for shooting landscapes, and this can also work for waterfalls, but they do present a unique set of problems. Many waterfalls will be in V-shaped river-cut valleys, and early morning and late evening light won’t hit the falls unless the valley is facing roughly east or west. When the sun is high, direct light on the water can be too contrasty and the highlights will lose all detail. The water will also look mottled and messy.

Unusually for a landscape subject, soft light from a grey, overcast sky can be the ideal conditions for shooting waterfalls. Soft light lacking contrast will always illuminate the water evenly and make it look much smoother. Also, if the waterfall is surrounded by trees and heavy foliage, a soft light will prevent unsightly shadows forming across what is the most important part of the image.

Unusually for a landscape subject, soft light from a grey overcast day is often best. Photo: Jeremy Walker

Unusually for a landscape subject, soft light from a grey overcast day is often best. Photo: Jeremy Walker

One of the big problems when shooting waterfalls is being able to convey their size and scale. It may not be obvious from adjacent boulders, trees and other objects in the shot just how big or small a waterfall is. The best way to convey the message of scale is to include a human figure, as we can easily relate to the size of a person. If you really want the figure to stand out, get them to wear a brightly coloured jacket!

Exposure and camera settings

Waterful

Don’t be afraid to play with the white balance of the image to add a sense of mood. Photo: Jeremy Walker

There are two schools of thought when exposing for a waterfall, or any shot where flowing water is an issue. Do you shoot with the fastest shutter speed possible and ‘freeze’ the motion, perhaps capturing every droplet of water with a shutter speed of 1/2000sec or higher? Or do you go for an exposure of several seconds, perhaps even minutes, and capture a smooth flow and silkiness to the water? Both techniques have their merits and can to help convey a story or message.

How to freeze motion

If you choose the fast shutter speed approach, you may want to bump up the ISO, so you can have a high shutter speed and still shoot at a reasonable f-number for depth of field, such as around f/8 or f/11.

Using a flashgun will also ‘freeze’ the motion of water, but you’ll only be able to cover a relatively small area of the waterfall with this technique. You may also have unwanted and very false-looking highlights.

How do you shoot smooth waterfalls?

To prolong your exposure and create the silky-smooth-flow effect, you’ll need to increase the exposure by dropping the ISO down to as low as it will go (ISO100 – ISO200 depending on your camera), and then using an ND filter such as the Lee Filters Big Stopper (or similar 10 stop ND filter). This will increase the indicated exposure by 10 stops, with a 1sec exposure, for example, becoming 17mins.

However, you don’t actually need 17mins, as anything from a few seconds to a couple of minutes will start to look good, depending, of course, on how fast the water is moving, and an ND filter with less stops such as 3-6 stops will be easier to manage.

Remember to meter for a midtone grey, rather than the pure white of the waterfall for an accurate reading. If you meter for the white of the water, you’ll end up underexposing the shot.

Before and After

Compose and set up your shot as normal, metering for a midtone grey. Shoot with the indicated exposure, checking the histogram to ensure that the highlights and shadows aren’t clipping. Apply a Lee Big Stopper / ND filter and recalculate the exposure. In the case of a Big Stopper (and other 10 stop ND filters), it would be 10 stops, (for example, 1/30sec would become 32secs). Expose at the new recalculated exposure and the water should become blurred or smooth and silky, depending on how fast it is flowing.

Before and after, fast shutter speed vs slow shutter speed. Photos: Jeremy Walker

Before and after, fast shutter speed vs slow shutter speed. Photos: Jeremy Walker

Shooting waterfalls can be fun, and to a certain degree therapeutic and soothing, but a final word of warning: shoot from the bottom of the waterfall and look up.

Climbing to the top of a waterfall and looking down is rarely the best view and you risk standing on wet slippery rocks right next to a long drop. It’s not the fall that hurts you – it’s the landing!

One that didn’t work – or did it?

Simplicity is often the key to success. Every now and then we’ll see an image, shoot it, think we quite like it and then, a few minutes later, a nagging doubt sets in and we try to ‘improve’ the shot. I’m never averse to a little ‘gardening’ if it helps an image, such as removing a distracting twig, stone or leaf. However, if you have to start building the foreground there may be something wrong. Does the image need a pile of nicely shaped boulders? Should there be more stones in the pile or should I have just lived with the foreground as it was?

Waterfall photo with foreground detail. Photo: Jeremy Walker

Waterfall photo with foreground detail. Photo: Jeremy Walker

Jeremy’s Top Tips and ideas to photograph waterfalls

1. Sense of scale

Man in red jacket standing next to tall waterfall. Photo: Jeremy Walker

Man in red jacket standing next to tall waterfall. Photo: Jeremy Walker

It can be difficult to convey the size and power of a waterfall. Because we can relate to the size of a human, use a person, preferably brightly dressed in a red jacket (as seen above), and have them stand near the waterfall.

2. Enhance colour

Waterfall with double rainbow in winter. Skógafoss, Iceland. Photo: Jeremy Walker

Waterfall with double rainbow in winter. Skógafoss, Iceland. Photo: Jeremy Walker

If there’s enough spray, and you can get the right angle relative to the direction of sunlight, you’ll get a rainbow. Use a polariser to enhance the colours, but be aware that the polariser increases your exposure by up to 2 stops.

3. Close-ups

Close-up of water flowing over rocks. Photo: Jeremy Walker

Close-up of water flowing over rocks. Photo: Jeremy Walker

If you can’t take a ‘big view’, showing the waterfall in all its splendour, look for smaller ‘micro’ alternatives. Search for close-ups or abstracts and use long exposures to show the flow of water that the human eye can’t see.

4. Don’t give up

Ice climber on frozen waterfall. Photo: Jeremy Walker

Ice climber on frozen waterfall. Photo: Jeremy Walker

If you turn up to shoot a waterfall and things aren’t as you planned or hoped, don’t just walk away with nothing. Look for the offbeat or even bizarre. Think ‘outside the box’ and consider how you can use what is around you to your advantage.

5. Add mood

Fast flowing waterfall. Water, blurred motion. Photo: Jeremy Walker

Fast flowing waterfall. Water, blurred motion. Photo: Jeremy Walker

Use the camera’s white balance control to alter the mood, look and colour of an image. Blue will suggest cold and wintry conditions (3200K or lower), while a higher setting makes the image warmer. This technique works best when there’s no other colour in the image.

Top kit to photograph waterfalls

You don’t always need to buy new when getting kit to photograph waterfalls, with second-hand camera gear often being great value, and you may already have what you need to get started.

Once you’ve got your camera sorted, there are a few essential items that will make your waterfall photography even easier, and more enjoyable. Here are our suggestions on what makes for some essential kit.

Lens choice

A good range of focal-length lenses will be useful, depending on how close you can get to the waterfall. A 24-70mm and 70-200mm lens will cover most eventualities, but an extreme wideangle, such as a 14-24mm f/2.8 zoom (or equivalent), will work well for closer shots. If you’re looking for a great wide-angle lens, have a look at our guide to the best landscape lenses.

Tripod

Manfrotto Tripod

For long exposure photography, you’re going to need a tripod. This will allow you to extend your exposure time, whilst keeping the camera steady and stable while you shoot. Use of the self-timer, or a remote release can help here, and be sure you clean your tripod afterwards to keep it dry. Read our complete guide to tripods.

Filters

Filter

A circular polariser is useful for enhancing the colour of any rainbows, but also for taking the sheen and reflections off the surface of the water and increasing contrast. A 6-stop or 10-stop filter is also handy to increase the exposure length to create blur and motion. Have a look at the top 3 filters needed for landscape.

Chamois cloth

Chamois cloth

A chamois cloth of the type available at motoring accessory shops is useful for wrapping around your lens and camera to protect your kit from spray. It’s also useful for wiping moisture off your camera kit should it get wet. Make sure you keep your camera and lenses clean after shooting near water, have a look at our guide to cleaning your camera kit.

Wellies

Wellies

At some stage you’ll probably want to shoot from the wettest place possible, and you’ll end up in a puddle or a tributary of the river. If you need new wellies, choose the neoprene-lined thermal variety. Warm, dry feet are essential, and will extend your comfort, and ability to keep shooting. Wet feet don’t make for a happy photographer.


Jeremy Walker is an award-winning professional photographer with many years’ experience specialising in high quality landscape and location photography from around the world for use by advertising, design and corporate clients. His belief in ‘quality is everything’ serves his clients well. www.jeremywalker.co.uk


More reading:
20 top tips for photographing water
The best Landscape photographs


Tune in next week, for the next article in the series of the AP Improve Your Photography Series – in partnership with MPB.

Find the latest Improve Your Photography articles here.


Follow AP on Facebook, Twitter, Instagram, and YouTube.

SubscribeSubscribe


[ad_2]

Source link

NEQ6 Modification Kit – Astroniklas

[ad_1]


May 25

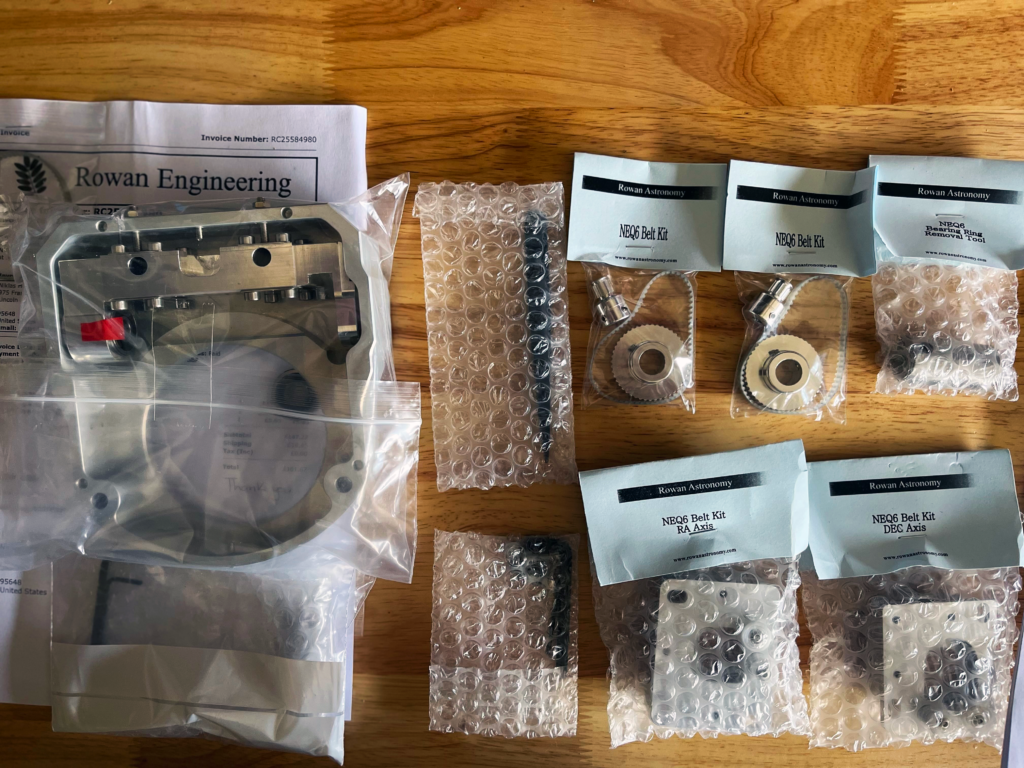
And finally it’s here! I just received the final few pieces for modifying the whole mount. The kit was purchased from Rowan Astronomy, and I truly can’t wait to begin the modernization in my mount’s tracking capabilities. The NEQ6 Pro mount has served me faithfully for over 10 years now and it’s time it gets some tuning and new gears to keep up the new gadgets that its going to carry around while tracking.

I’ll try and post the steps in a guide/tutorial over time with lots of photos and “lessons learned” from this journey


The fascination of star gazing had already started during the very first years of my childhood. I was looking up at the night sky with my grandfather every summer night, studying constellations, the phases of the moon cycle, counting satellite passages and by using his binoculars to discover globular clusters of stars. Equipped with star maps from his home-library I was gradually discovering more and more of this fascinating world we call universe.
Even though years went by, the interest and fascination of cosmos had never left me… I found myself occupied with many other things before astronomy finally became my main hobby in recent years.

I was born in Stockholm, Sweden 1979 and grew for the most part of my childhood years in Greece. Later I’ve studied physics at Lund’s university and was hoping to continue with astronomy. At my free time I was an active amateur astronomer in South Sweden, Lund. At some point I was also appointed as chief of observatory for the Tycho Brahe Astronomy Society in Lund.

Circumstances in life led me to move with my family to California. Today I’m working as a sofrware developer within the aviation industry and weather systems for airports. During my off-time, I spend most of my time with my wife Melissa and our daughters.

My main hobbies are astronomy, astrophotography, game development and I was also a member of several astronomy societies in south Sweden but time was never enough to continue being an active member.

This blog is dedicated to my family (Melissa, Vanita and Lena Grace), our friends and to all of you who share the same fascination towards the beauty of this science and all the mysteries yet to be revealed by our constant discoveries!


[ad_2]

Source link

This Xiaomi 12S Ultra Concept is a hope to take smartphone photography to the next level — lets you attach DSLR lenses to the phone

[ad_1]

  • Xiaomi has showcased a new concept device that allows you to attach a camera lens module.
  • The Chinese smartphone maker has partnered with German camera giant Leica for the Xiaomi 12S Ultra Concept.
  • The device will offer features such as focus peaking, zebra lines, histograms and more.

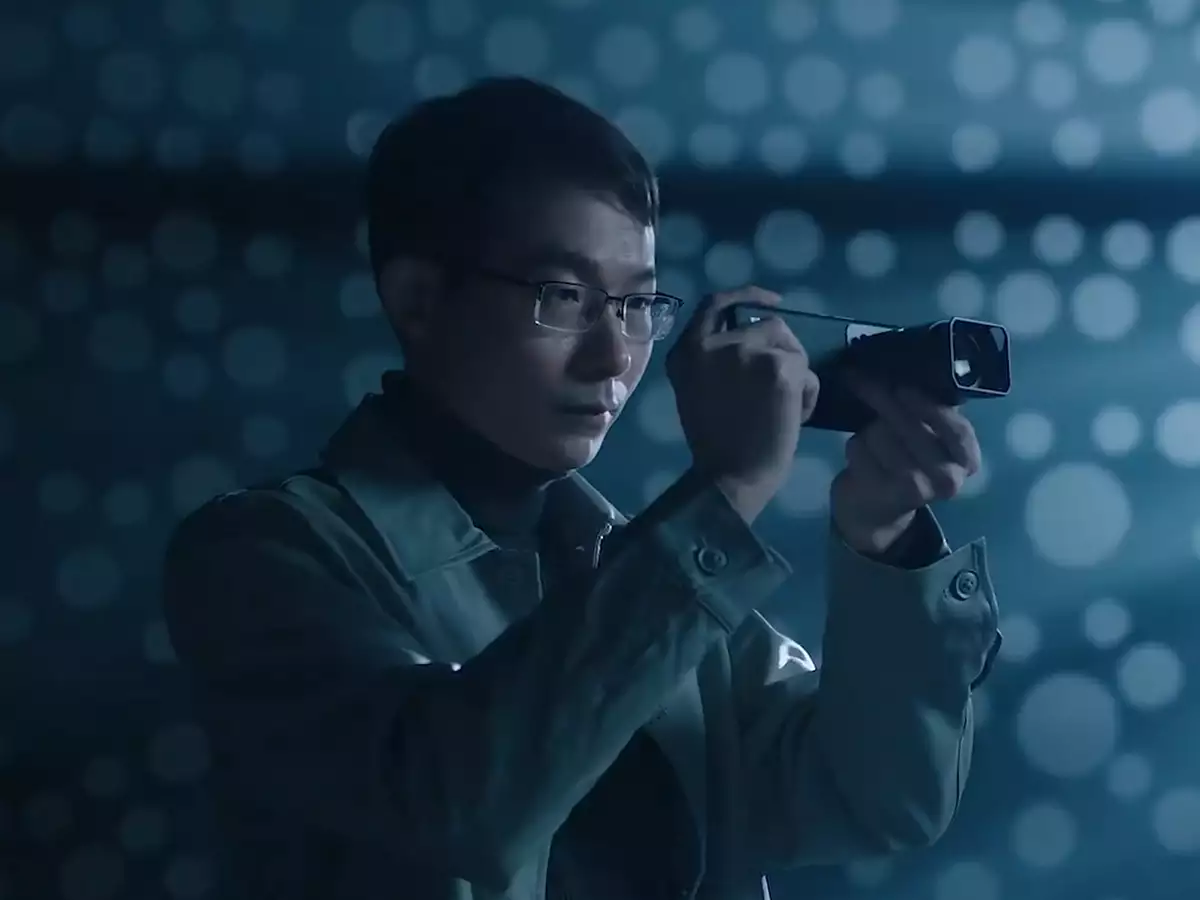
Xiaomi has revealed a new concept smartphone, dubbed the Xiaomi 12S Ultra Concept, which might make it one of the best smartphones for photography. The device has an excellent camera setup but does not stop there – the company has made it possible to attach a camera lens module at the back.

The Chinese tech giant has partnered with German camera giant Leica to enable you to attach a camera lens module to your smartphone, allowing you to capture professional photographs without having to splurge for a DSLR.

Add a lens to capture professional images

Discover the future of SaaS in India

The 6-part video series will capture the vision of Indian SaaS leaders and highlight the potential for the sector in the decades to come.10th Nov, 2022 Starts at 04:00 PM (30 mins)Register Now
Our Speakers

Jay Vijayan
Gary Szilagyi

This Xiaomi 12S Ultra Concept is a hope to take smartphone photography to the next level — lets you attach DSLR lenses to the phone
The Xiaomi 12S Ultra Concept phone allows you to attach a lens at the backXiaomi

The Xiaomi 12S Ultra Concept features a large circular camera module at the back, featuring a triple camera setup at the back. The module has been designed to mount a Leica M series lens at the back, allowing you to capture professional photos.

The device features two 1-inch sensors, one in the smartphone and one in the Leica lens. This allows you to suppress most of the noise while capturing images.

This Xiaomi 12S Ultra Concept is a hope to take smartphone photography to the next level — lets you attach DSLR lenses to the phone
The Leica lens used in the concept phone teaserXiaomi

The lens used by Xiaomi in the teaser is the Leica Summilux-M 35mm f/1.4 ASPH module; however, the phone supports all M-lenses from the company as it features an M-mount.

The teaser has revealed that once the lens is attached, the smartphone will offer features such as histograms, zebra lines, focus peaking, and 10-bit RAW shooting.

This Xiaomi 12S Ultra Concept is a hope to take smartphone photography to the next level — lets you attach DSLR lenses to the phone
Some of the features offered with the lens attached on the phoneXiaomi

It is to be noted that the device is only a concept at the moment, and the company has not revealed any information about a commercial launch. It may take some time before such a device can be launched for consumers.

SEE ALSO:

From longer tweets to proper verification of users, here are some of the Twitter features we want Elon Musk to introduce

India’s IT giants are worried about moonlighting employees sharing their corporate secrets

These are the 5G bands supported by Airtel and Jio – make sure your phone has them

[ad_2]

Source link

Mount Rainier Nature Photography For Sale

[ad_1]

Mt Rainier National Park

Mount Rainier National Park is an American national park located in southeast Pierce County and northeast Lewis County in Washington state. The park was established on March 2, 1899 as the fifth national park in the United States, preserving 236,381 acres (369.3 sq mi; 956.6 km2) including all of Mount Rainier, a 14,411-foot (4,392 m) stratovolcano.

The mountain rises abruptly from the surrounding land with elevations in the park ranging from 1,600 feet to over 14,000 feet (490–4,300 m). The highest point in the Cascade Range, Mount Rainier is surrounded by valleys, waterfalls, subalpine meadows, and 91,000 acres (142.2 sq mi; 368.3 km2) of old-growth forest. More than 25 glaciers descend the flanks of the volcano, which is often shrouded in clouds that dump enormous amounts of rain and snow.

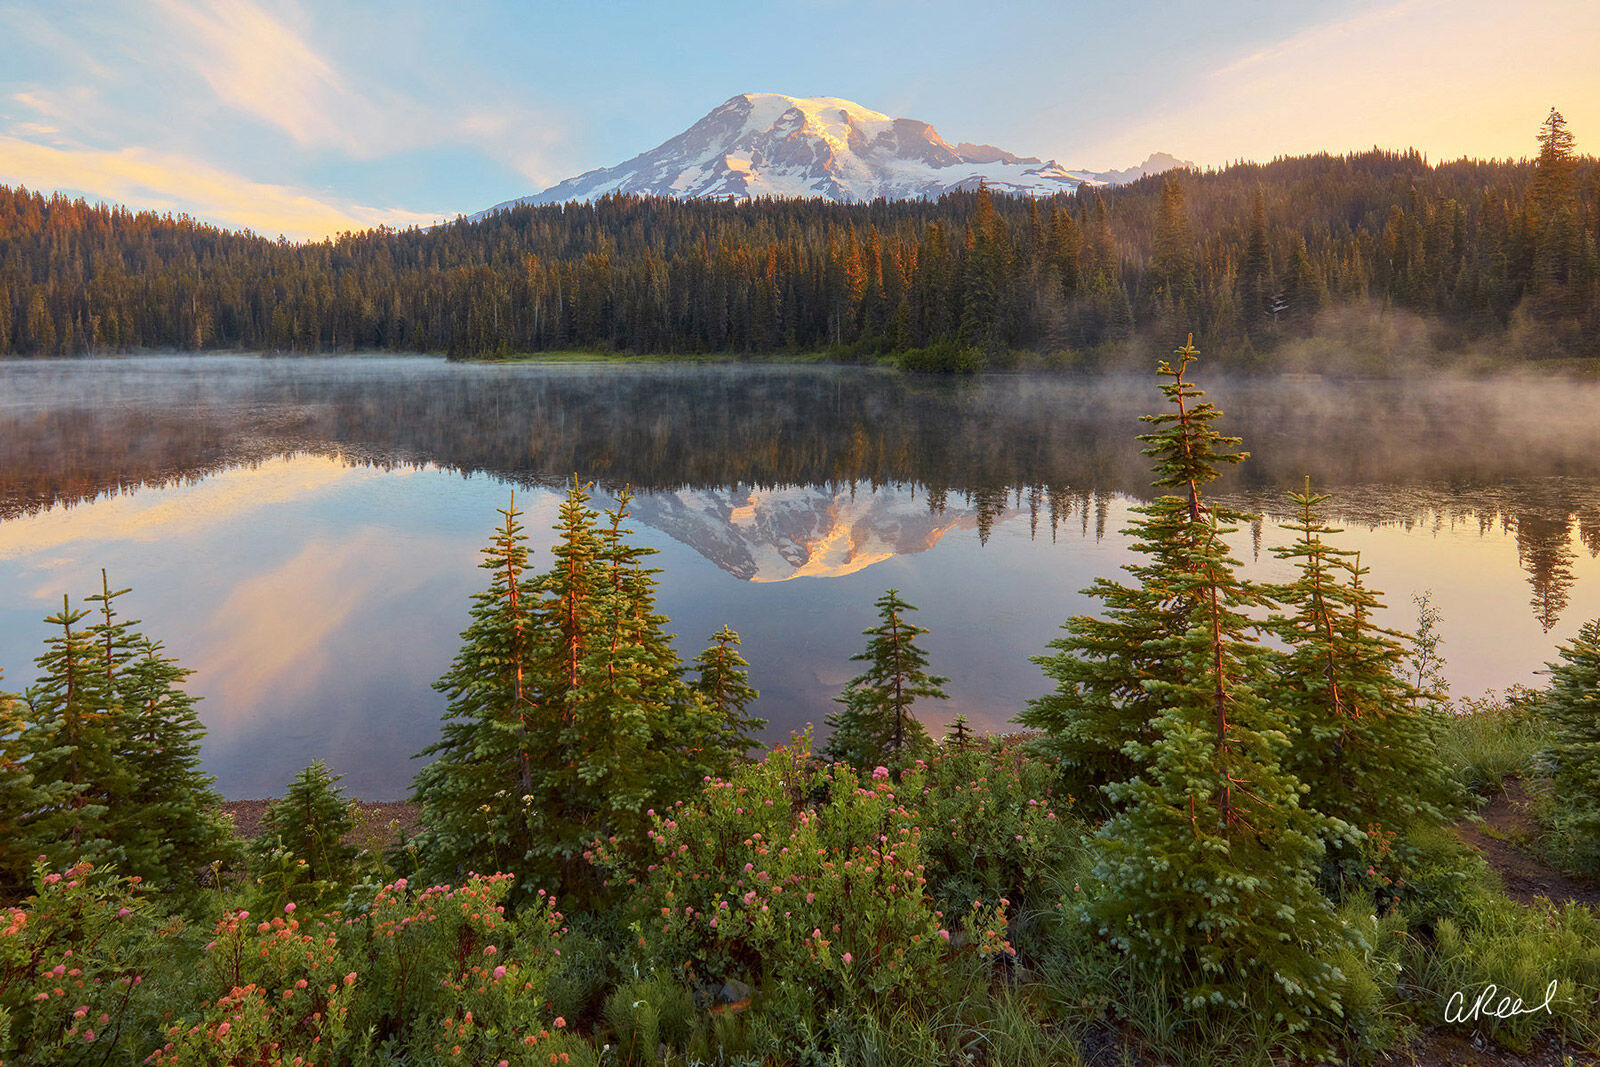
On Earth, As It Is In Heaven
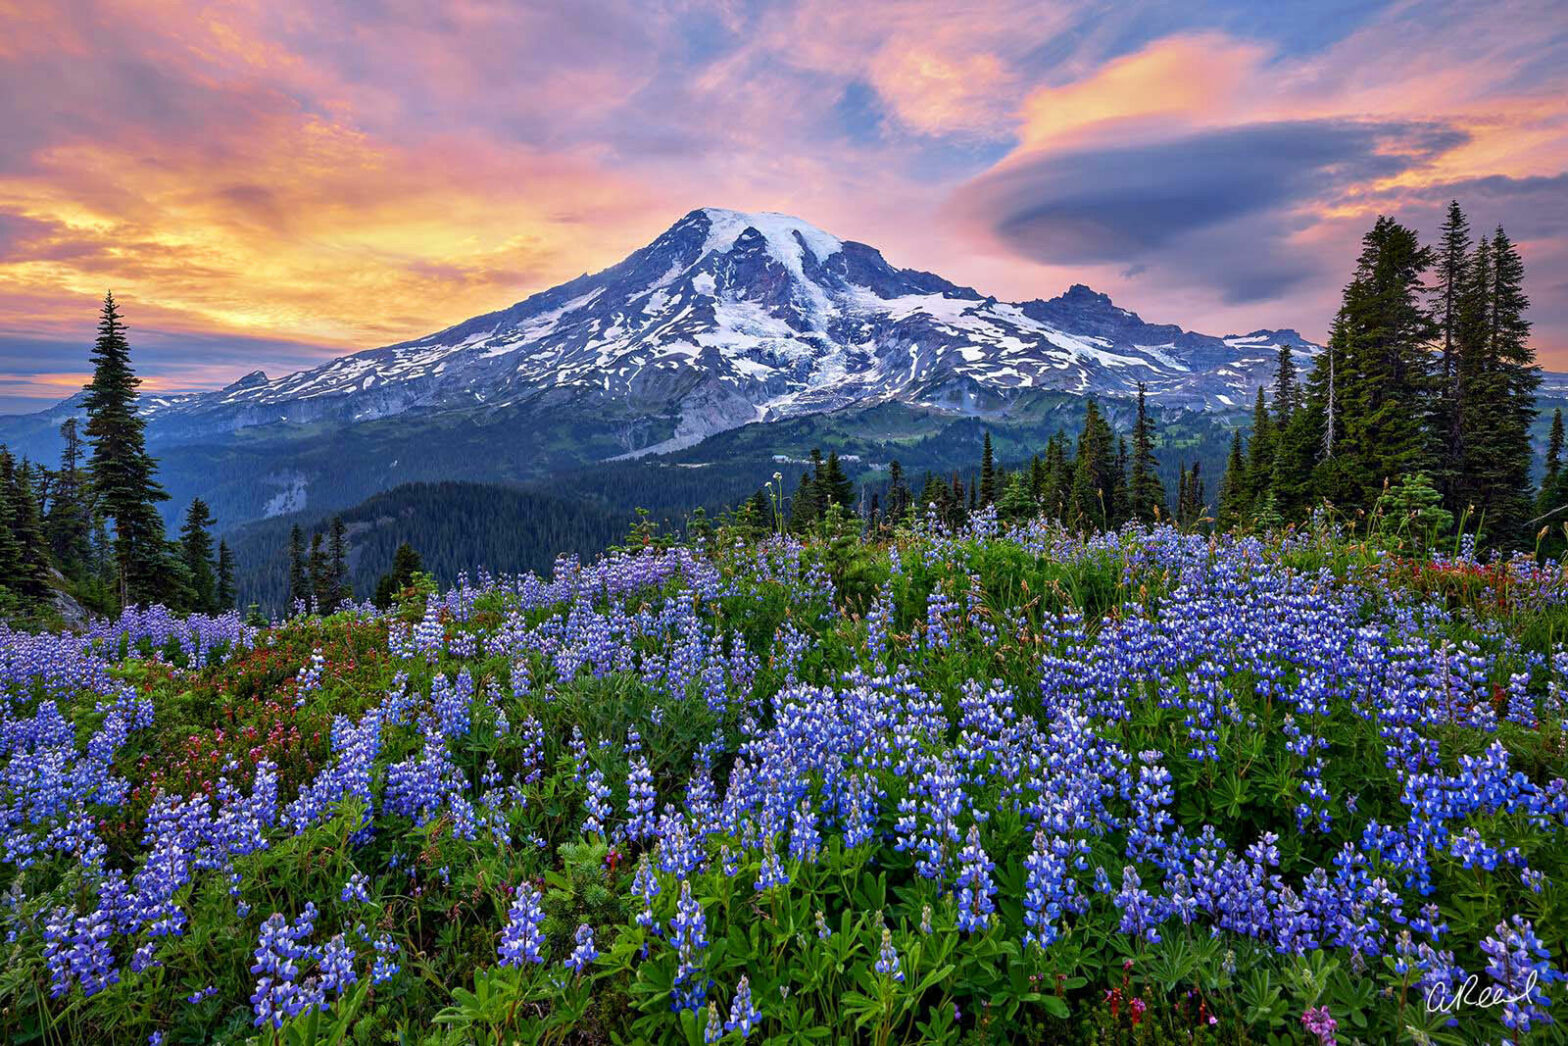
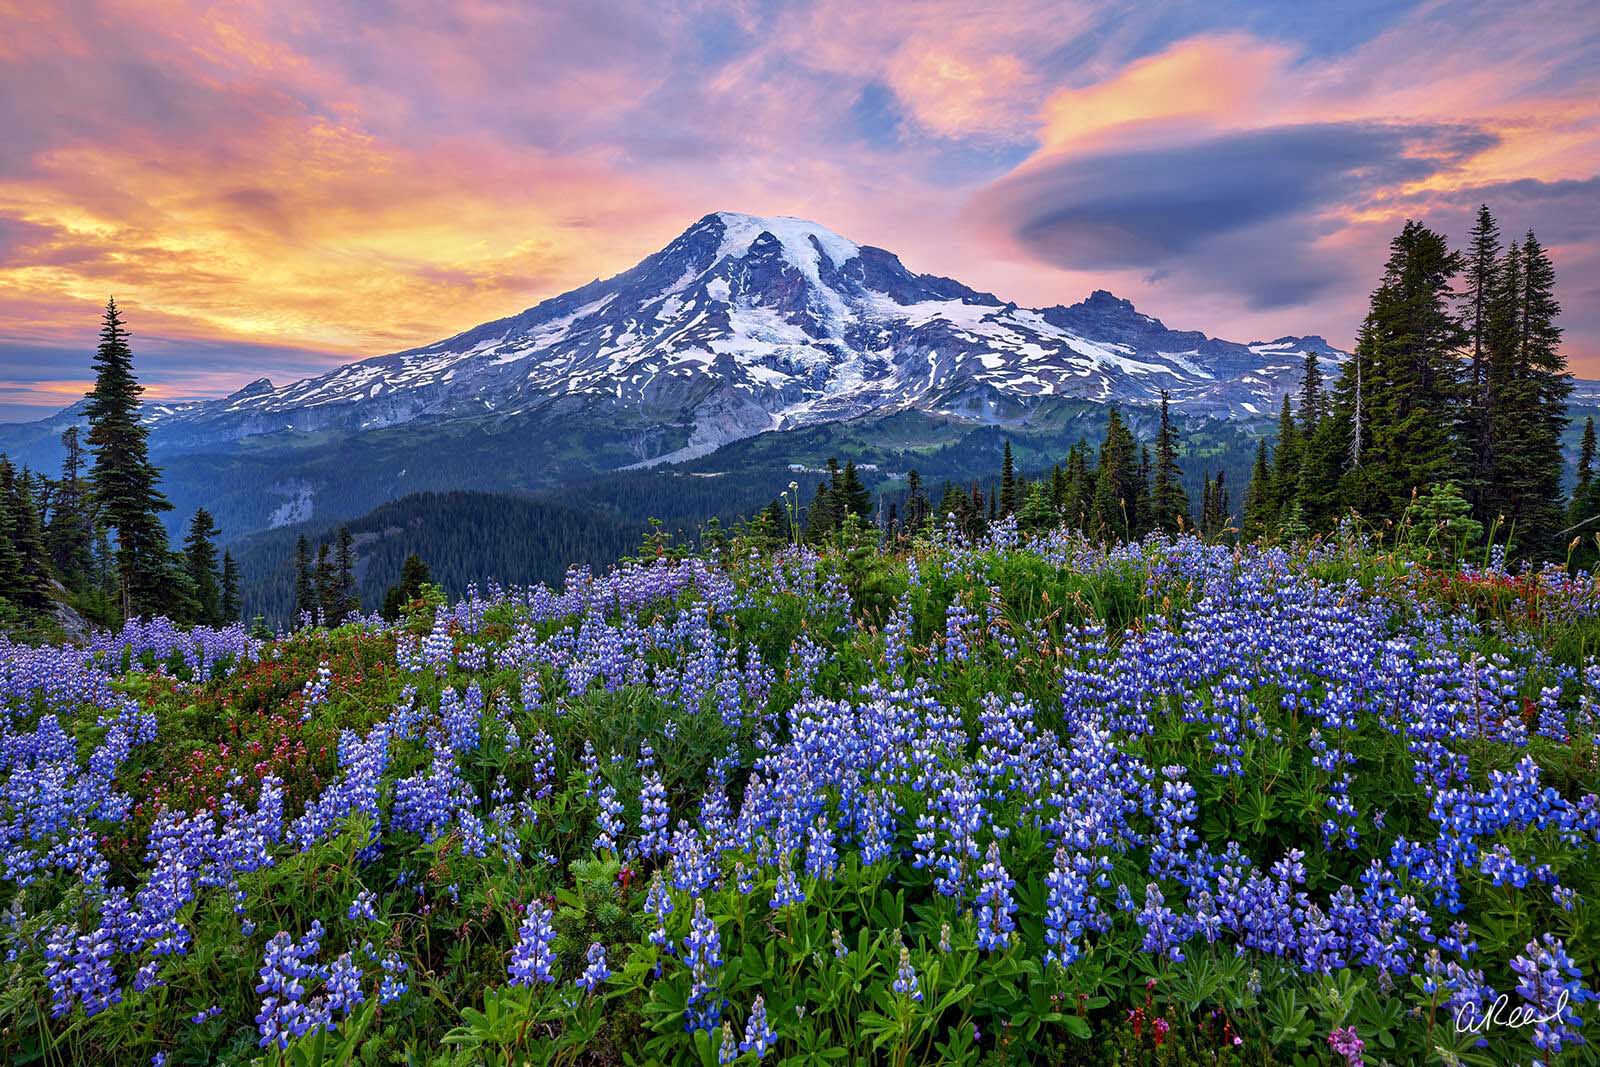
Elevate your home with Aaron Reed’s limited edition photography print, On Earth As It Is In Heaven, from his Newest Work Photography collection. Order yours today! Fine Art Limited Edition of 100.

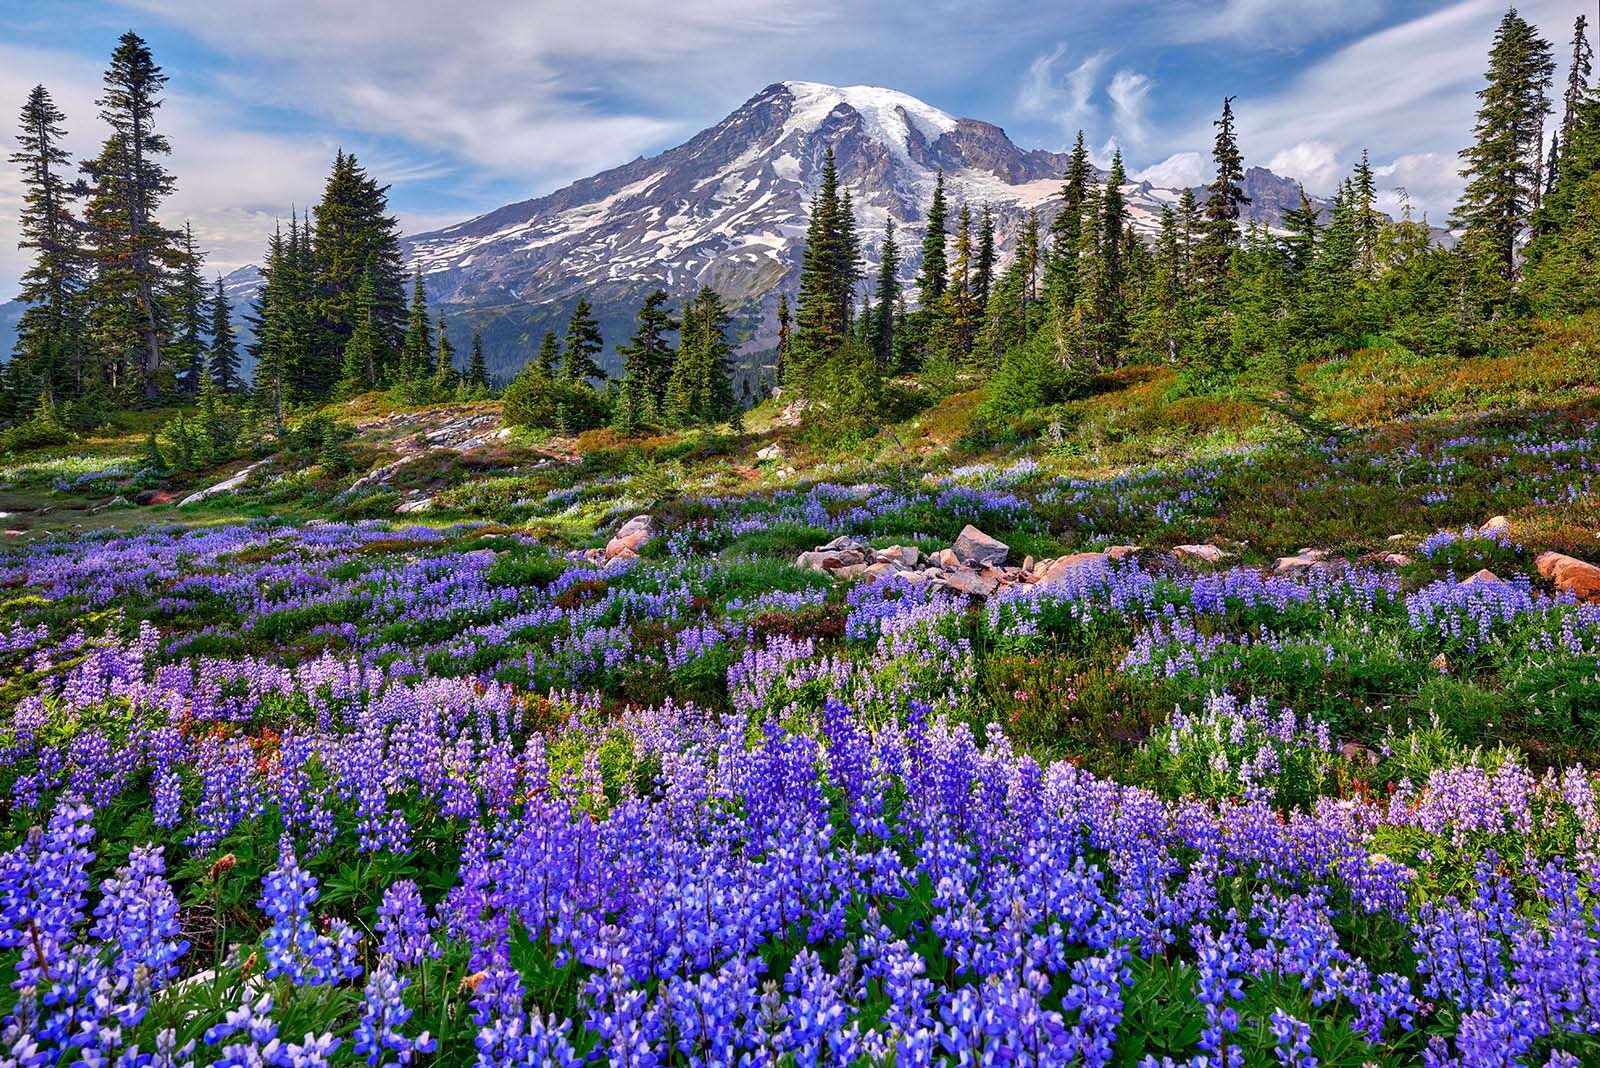
Glaciers, lava flows, wildflower meadows, giant stands of ancient trees. All these extraordinary sights can be found in Mt Rainier National Park, one of the nation’s oldest national parks found less than sixty miles from Seattle.

All year round, sightseers, hikers, and photographers flock to this iconic feature of the Washington landscape; not only to see an active volcano that towers more than 14,000 feet above sea level, but to explore the gorgeous surrounding scenery.

The national park is home to ancient forests, dense wildflower meadows, and abundant wildlife. Overall, Mt Rainier offers one of the best locations in the world to fully experience nature unlike anywhere else in the world.

Eternal Beauty
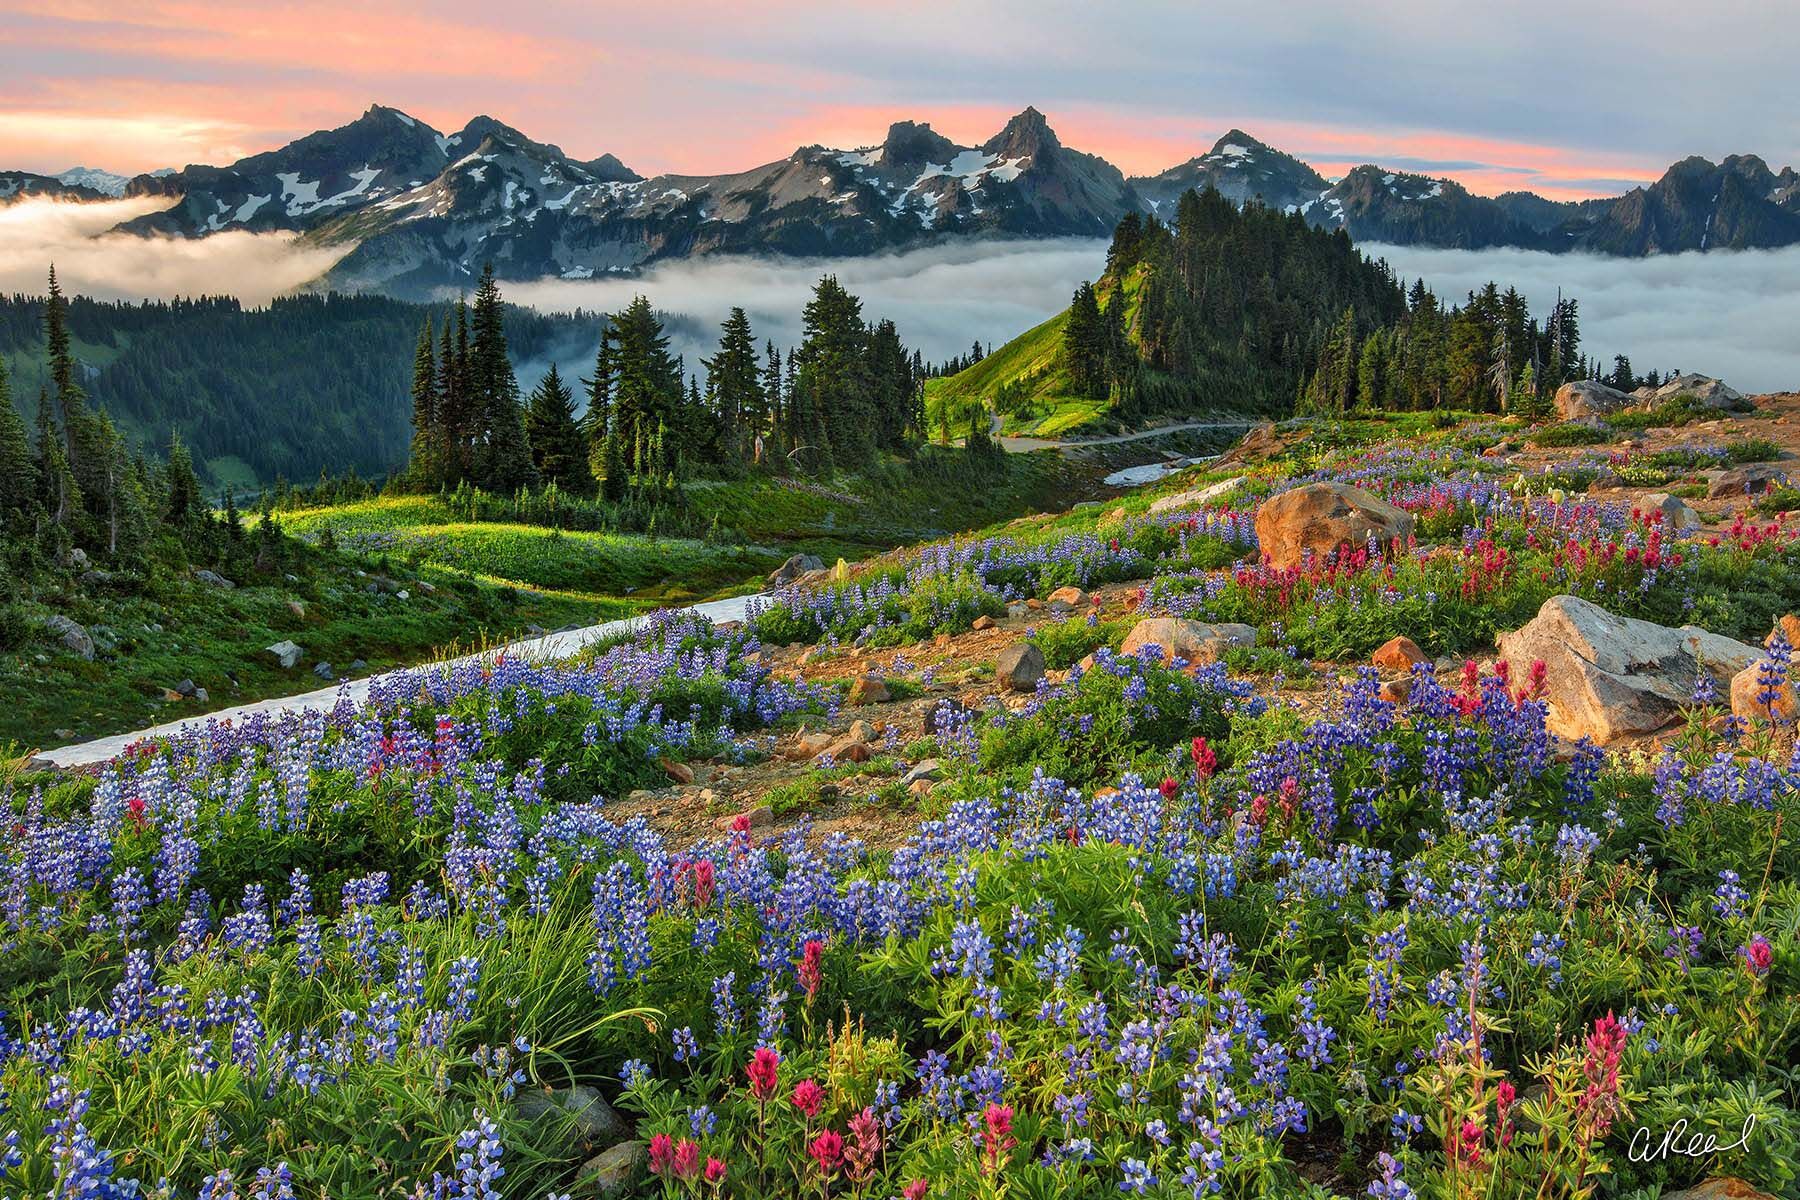
Create a window into nature with Aaron Reed’s limited edition photography print, Heaven, from his Mountains & Meadows Photography collection. Order yours today! Fine Art Limited Edition of 100. Photo © copyright by Aaron Reed . Photo © copyright by Aaron Reed.

A Quiet Danger

Due to its high probability of eruption in the near future, Mount Rainier is considered one of the most dangerous volcanoes in the world, and it is on the Decade Volcano list. The large amount of glacial ice means that Mount Rainier could produce massive lahars which could threaten the entire Puyallup River valley. According to the United States Geological Survey, “about 80,000 people and their homes are at risk in Mount Rainier’s lahar-hazard zones.

Shockwaves
Elevate your home with Aaron Reed’s limited edition photography print, Shockwaves, from his Newest Work Photography collection. Order yours today! Fine Art Limited Edition of 50.

Osceola Mudflow

The Osceola Mudflow of 5,600 years ago was Mount Rainier’s signature event during the Holocene. During a period of eruptions, avalanches caused 2 to 3 km3 (0.5 to 0.7 mi3) of mainly hydrothermally altered material from the volcano’s summit and northeast slope to slide away. This lahar swept down the west and main forks of the White River, passing the location of current day Enumclaw before reaching the Puget Sound near present-day Auburn.

The Osceola collapse left a 1.8 km-wide (1 mi-wide) horseshoe-shaped crater, open to the northeast, almost the same size as the crater produced by the 1980 eruption of Mount St. Helens. Most of the Osceola crater has been filled in by subsequent lava eruptions, most recently about 2,200 years ago.

The Revealing
Elevate your home with Aaron Reed’s limited edition photography print, The Revealing, from his Newest Work Photography collection. Order yours today! Fine Art Limited Edition of 50. Photo © copyright by Aaron Reed.

A Photographers Paradise

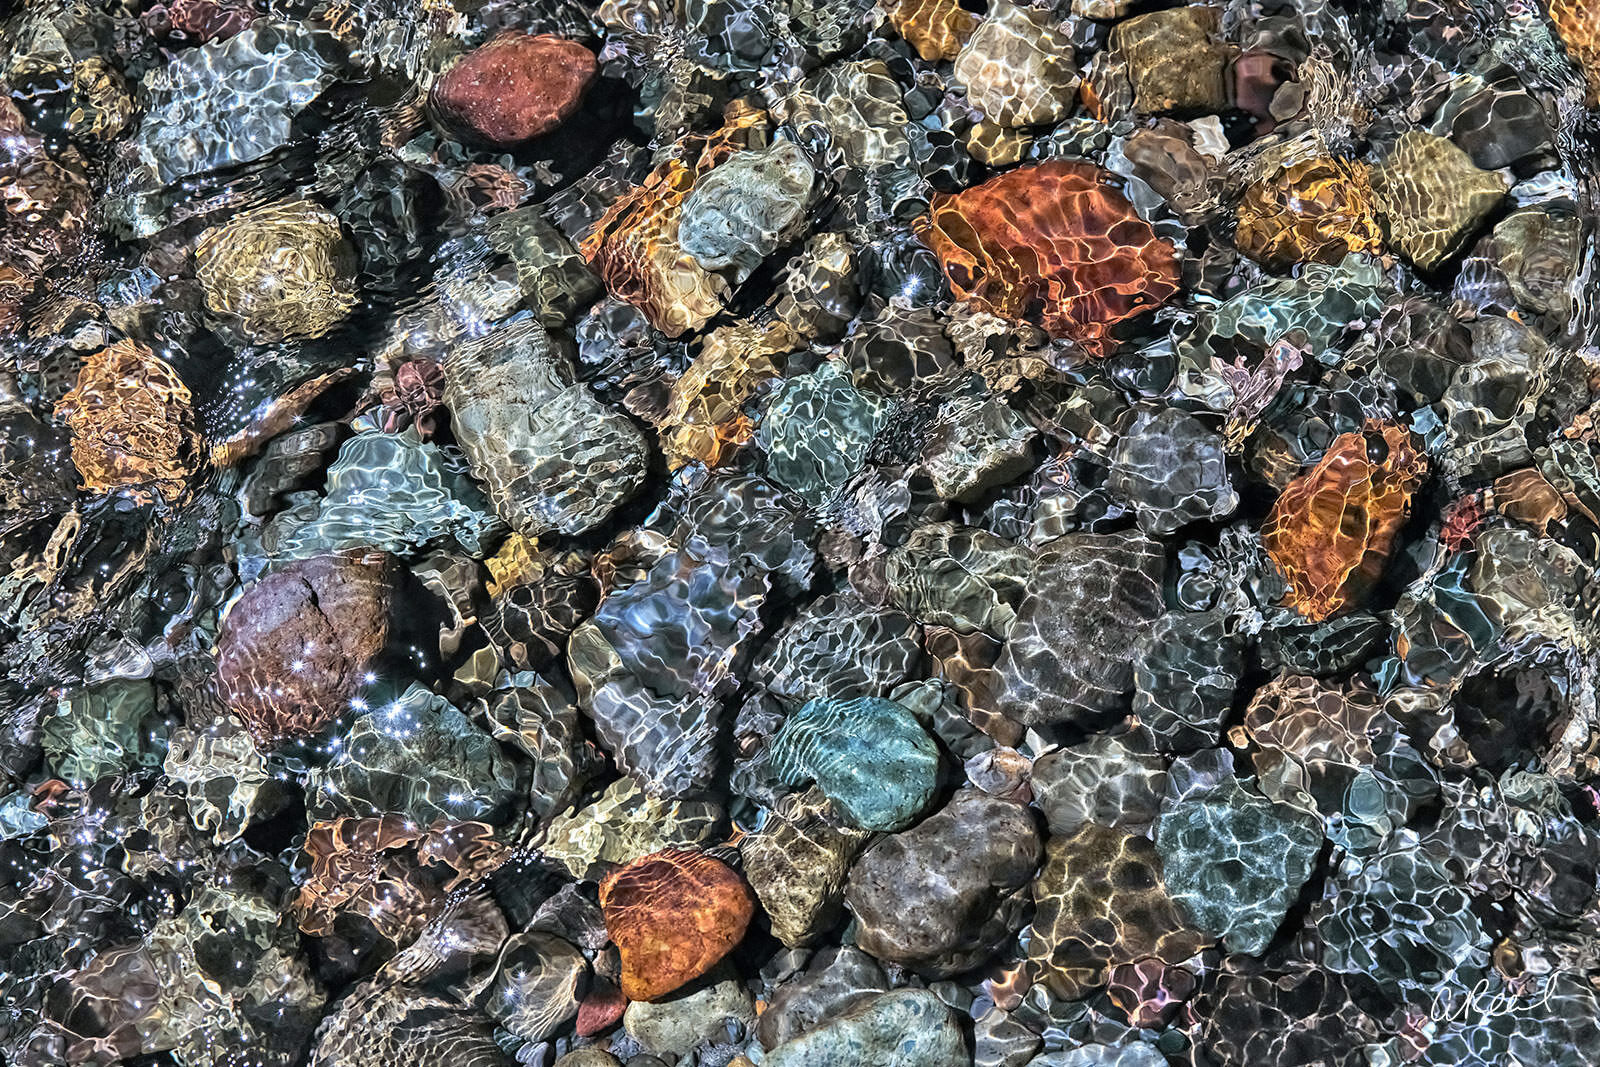
As a nature and landscape photographer, I truly believe that you can find beauty everywhere you look in the natural world, from the grandest vista to pebbles in a stream. That being said, there are some places that just ooze wonder and Mt Rainier National Park is at the top of this list. It truly is a photographers paradise. I am blessed that the park is just over two hours from my doorstep and while I have visited many times with my camera, the past year hunkered down in our homes has made me realize I haven’t visited nearly enough. This year, with hopes of life returning to some sort of normalcy, I hope to return to the slopes and alpine meadows of the park many times, with my family and with my camera. I took my daughter on her first long hike there when she was three and a half and now it’s her brothers turn. 🙂 I hope you find your way to the park one day to see it with your own eyes as well!

Walking In Wonderland
Elevate your home with Aaron Reed’s limited edition photography print, Wonderland, from his Newest Work Photography collection. Order yours today! Fine Art Limited Edition of 100.

The History of the Park

Mt Rainier’s unique glacial landscape generated interest in preservation as early as 1893. Due to the nature of the landscape, the land couldn’t be used for other purposes like agriculture or mining and there was a need for tourism near Seattle and Tacoma. People from a wide variety of backgrounds united over these issues and, ultimately, passed a bill to make Mt Rainier a national park in 1899. At that time, Mt Rainier became the nation’s fifth national park.

Since then, visitation has continued to steadily grow. It saw steep inclines over the course of its first few years. In 1906, roughly 2,000 visitors made their way to the park. Less than a decade later, that number would grow to nearly 35,000. Over the years, park administrators have had to constantly strive to keep up with demand for more roads, lodging, and other amenities. And, as you can imagine, the glacial landscape means it isn’t the easiest accomplishment in the world to just build more roads!

Shirley Temple
Elevate your home with Aaron Reed’s limited edition photography print, Shirley Temple, from his Newest Work Photography collection. Order yours today! Fine Art Limited Edition of 50.

Mt Rainier would eventually figure out its road troubles and become the first national park to allow cars! While this might not have been the best news for the environment, it was great news for those looking for an easier way to access and experience the park.

Whatever infrastructure was eventually put in place is working; from the early 1900s all the way to today, growth within the park has continued to blossom and visitor numbers climb each year. In 2016, over 1.8 million people visited the park.

Despite its challenges, nothing has ever stopped administrators or visitors alike from being truly passionate about Mt Rainier National Park.

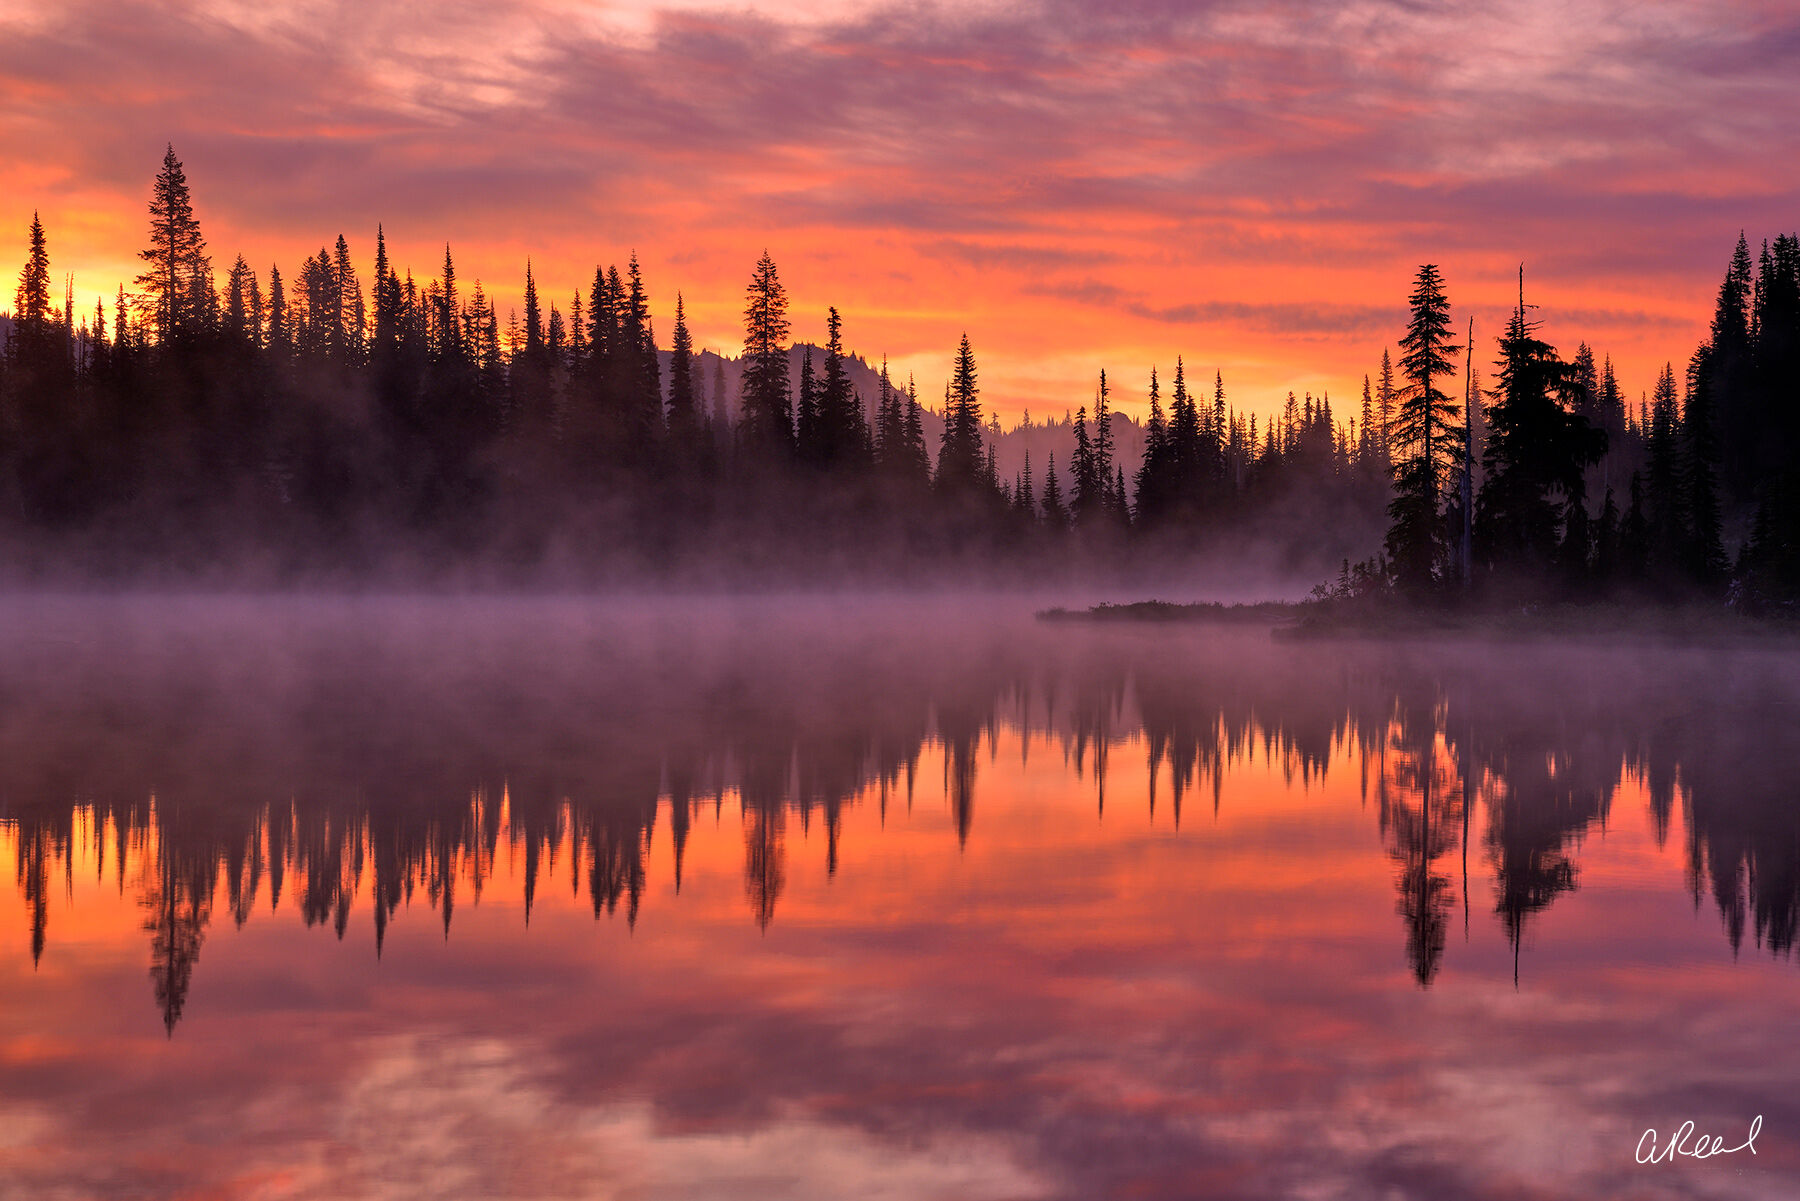
Morning Fire
Elevate your home with Aaron Reed’s limited edition photography print, Morning Fire, from his Newest Work Photography collection. Order yours today! Fine Art Limited Edition of 50.

The Priority of Preservation

In 1988, The Washington Wilderness Act of 1988 designated 98% of the park as wilderness. This not only gave the land greater protection against development, but shifted the focus of the park to emphasize and protect its most precious resource: nature.

Long ago, the park said goodbye to health spas and golf courses and instead ushered in an age of preservation and outdoor recreation.

The evolution of the park is part of what makes exploring it so magical. When you visit, you likely get on a plane or get in your car, take a shuttle from the airport, stay in a nice hotel, and enjoy any number of other modern conveniences all to experience the natural wonders of Washington’s Mt Rainier.

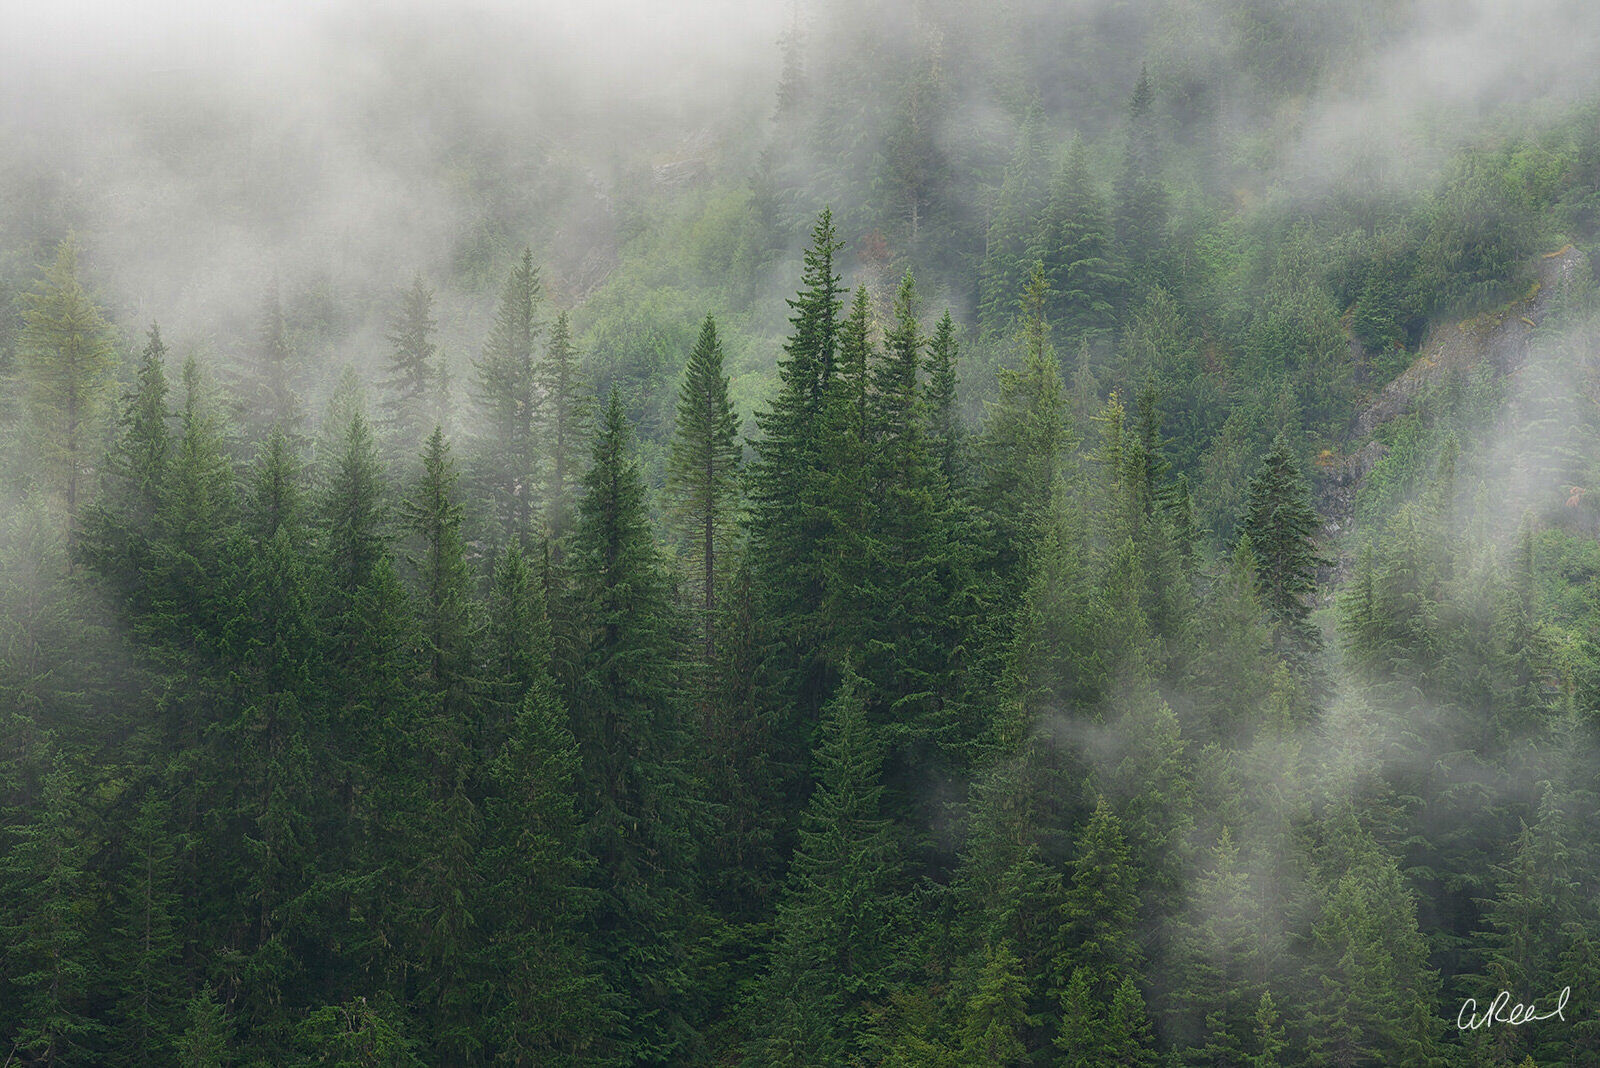
A fine art photograph of a forest of evergreen trees and whisps of fog.

Wispy receding fog dances among the evergreens inside Mt Rainier National Park in Washington. Fine Art Limited Edition of 50.

But, for hundreds of years, visitors of all kinds truly struggled to get there — either by horse or by foot — through the Washington wilderness to experience the overwhelming beauty of such an iconic location.

Walking among the same trees that those visitors walked among is truly something special. Forests alone are nearly 58% of the park landscape. Western hemlock, western red cedar, and Douglas-fir are just a few of the trees that tower around you. And, when you travel too high up the mountain, the forests open up to sweeping wildflower meadows. That means that no matter where you go, there’s always new wilderness and hidden treasures to discover.

What more could you want?

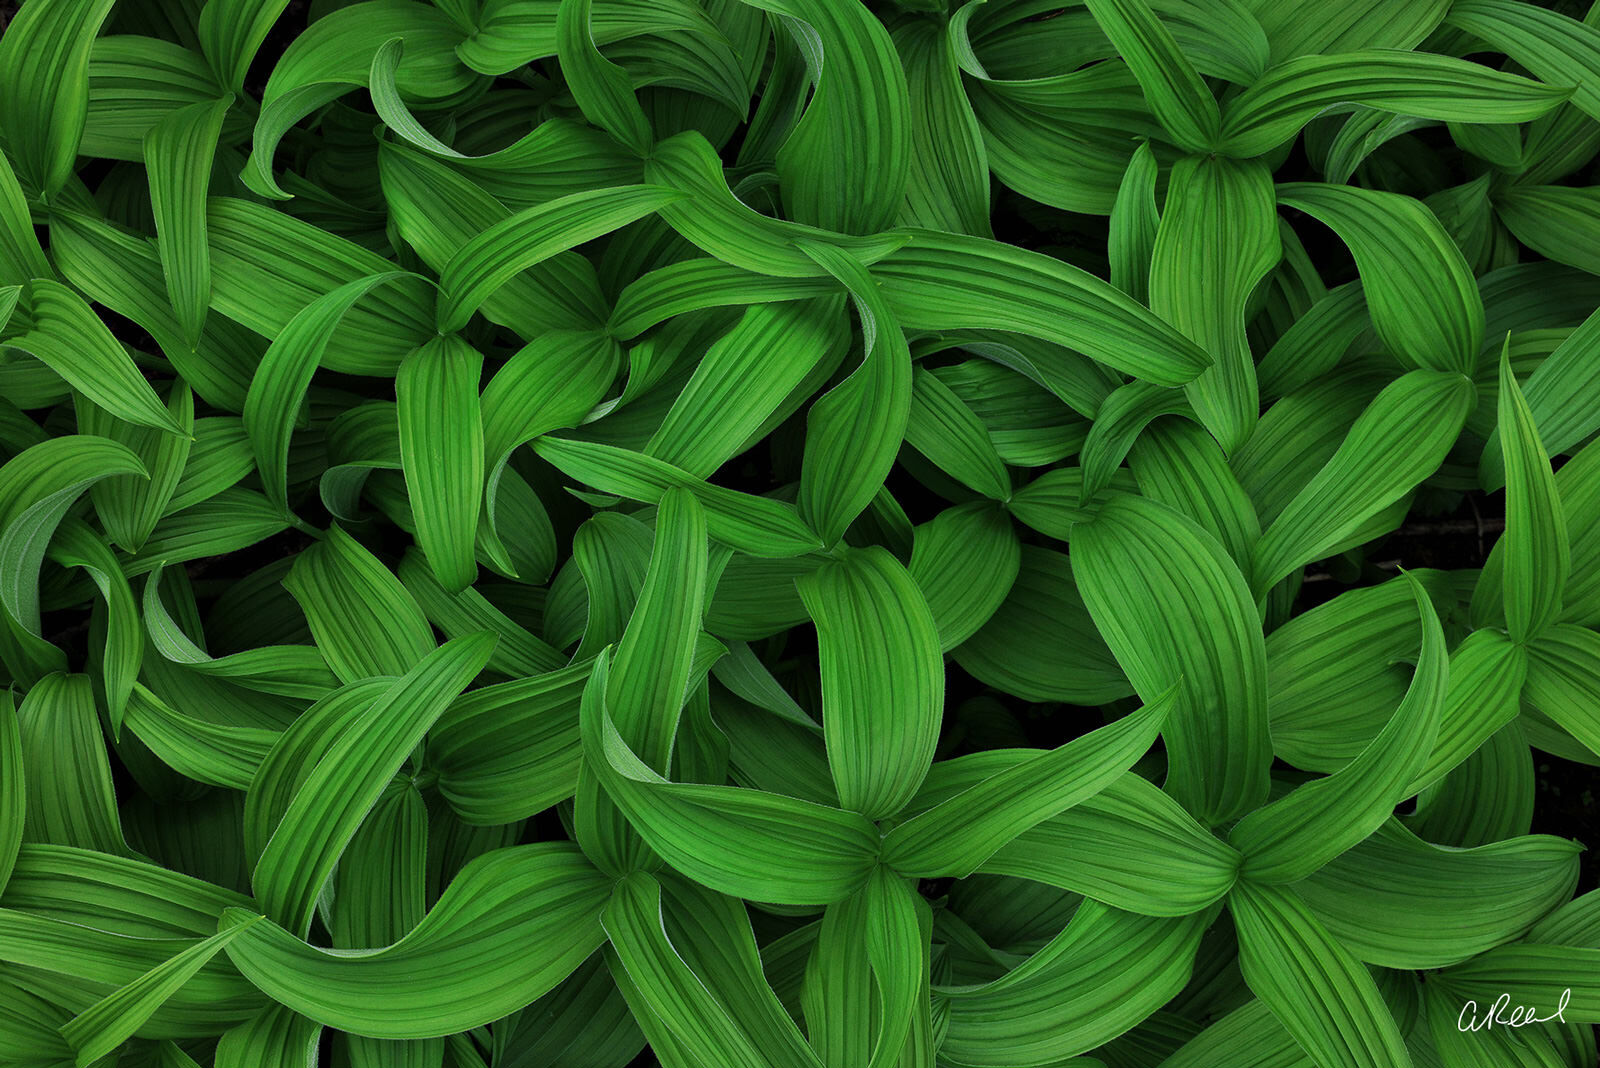
Emerald Whispers
Elevate your home with Aaron Reed’s limited edition photography print, Emerald Whispers, from his Newest Work Photography collection. Order yours today! Fine Art Limited Edition of 50. Photo © copyright by Aaron Reed.

More to Love

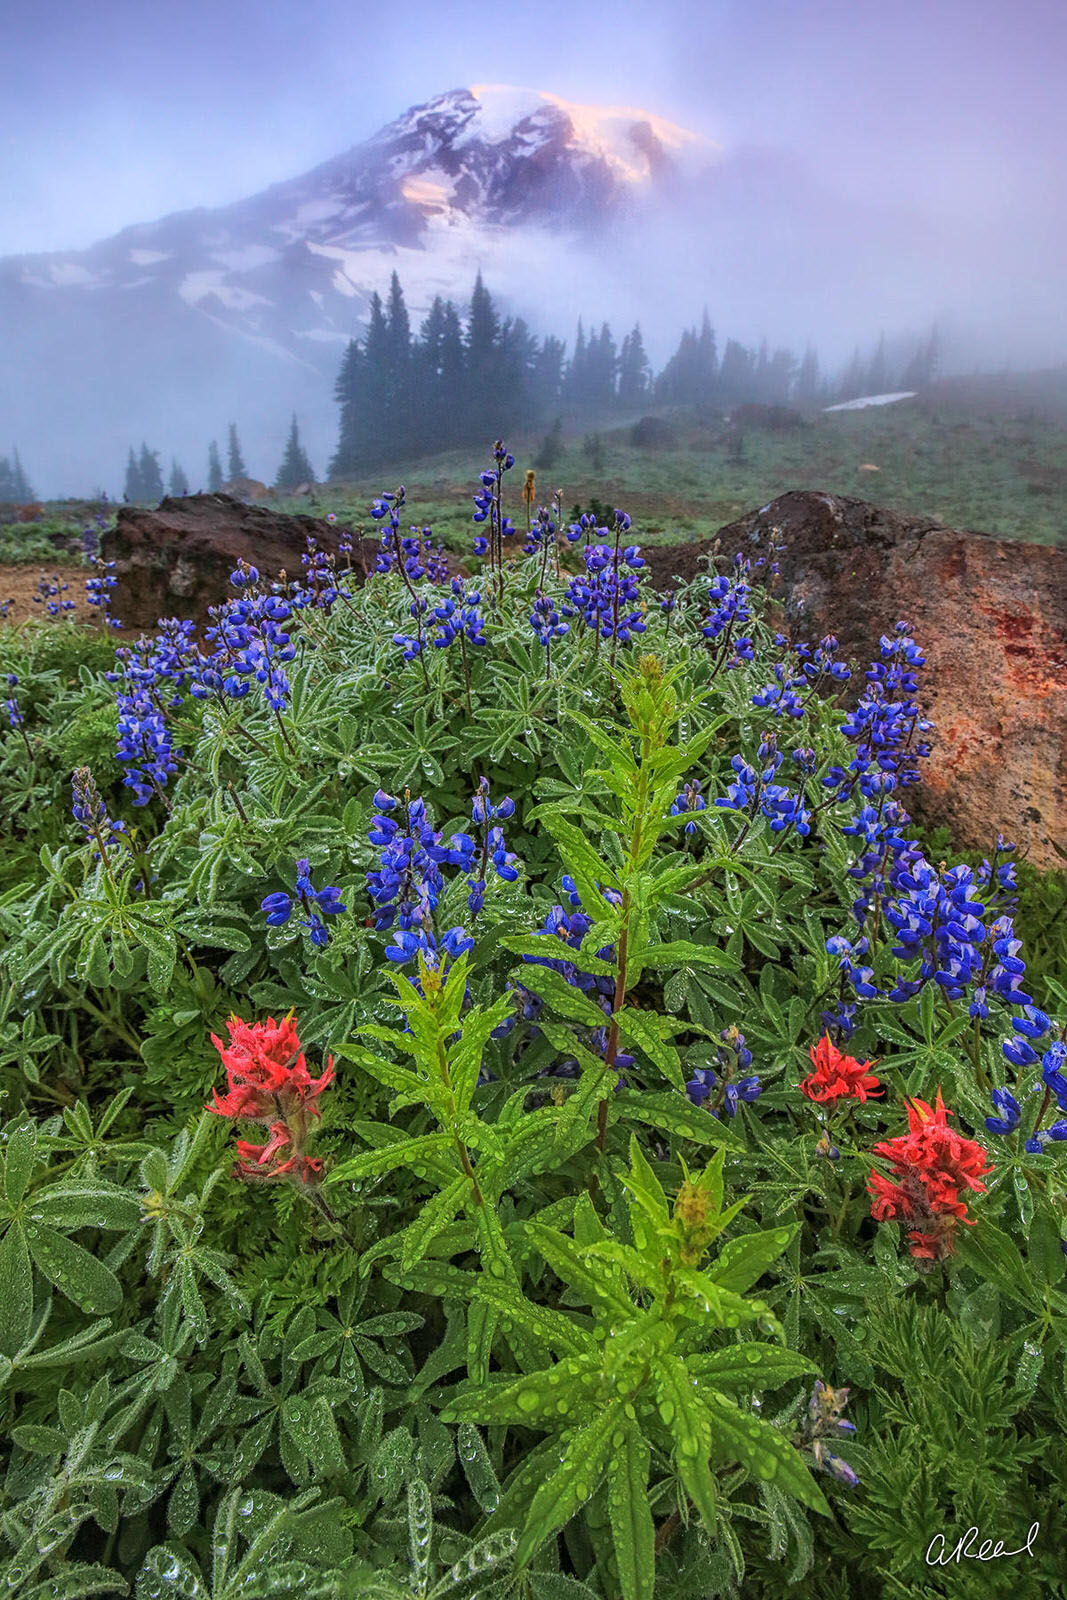
In addition to Mt Rainier’s ancient forests and wildflower meadows, Mt Rainier itself is an impressive sight. No matter the season, the volcano serves as an impressive and majestic backdrop for the rest of the landscape. No matter how enthralled you are by the forests and meadows, it’s hard to take your eyes off this impressive summit.

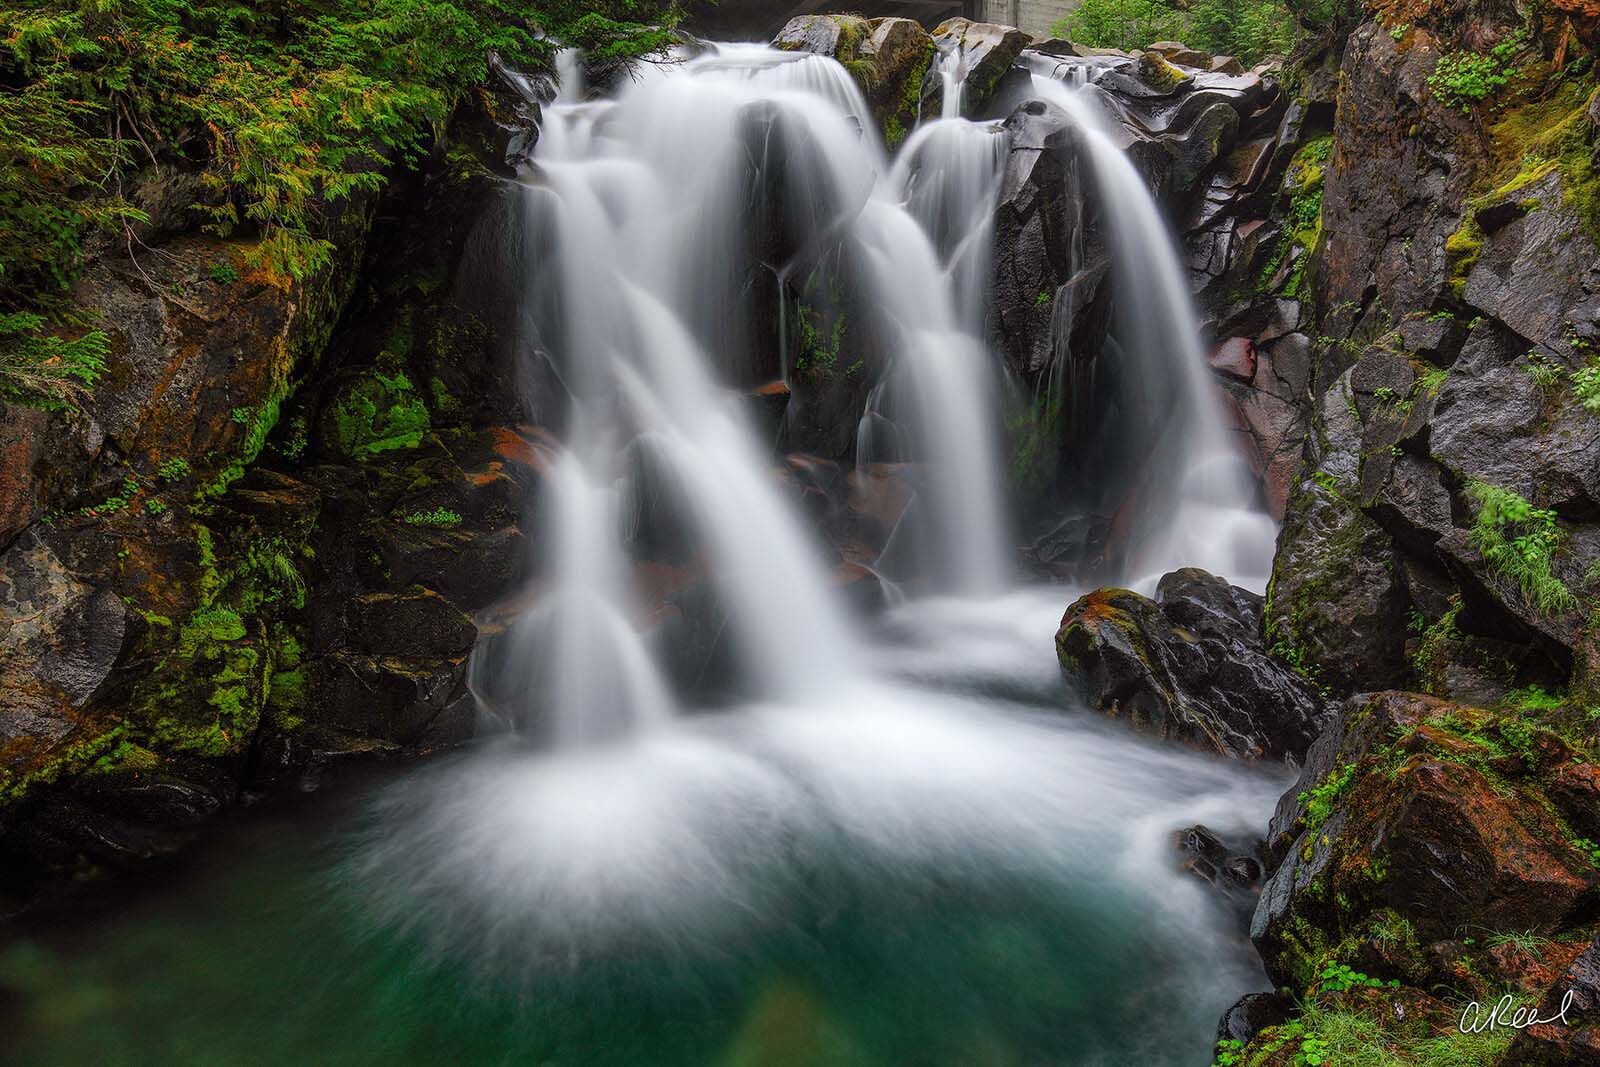
Additionally, Mt Rainier National Park is home to a variety of hidden waterfalls fed by snowmelt from the glaciers. Some waterfalls only appear during certain times of the year, while others are always present. Most of the waterfalls are best viewed in the early summer as snow truly begins to melt or in autumn during seasonal rains.

Whether you’re looking for scenic landscapes, extensive hiking, nature photography, or you simply want to find your own special spot in the park, Mt Rainier has a little bit of everything, making it one of the most unique destinations in the world.

The entire park is teeming with life, while also residing in the shadow of a looming volcano. The beauty and the contrast are what make Mt Rainier a magical destination.

Delicate Balance
Elevate your home with Aaron Reed’s limited edition photography print, Delicate Balance, from his Newest Work Photography collection. Order yours today! Fine Art Limited Edition of 50.
Beautiful Dreams
Transform your space with Aaron Reed’s limited edition photography print, Beautiful Dreams, from his Vertical Luxury Photography collection. Order yours today! Fine Art Limited Edition of 100. Photo © copyright by Aaron Reed . Photo © copyright by Aaron Reed.

[ad_2]

Source link